
ART
BEAUTÉ ET BIEN-ÊTRE
ARTISANAT
CULTURE ET HISTOIRE
DIVERTISSEMENT
ENVIRONNEMENT
NOURRITURE ET BOISSONS
INGÉNIERIE INVERSE
SCIENCES
SPORTS
TECHNOLOGIE
TECHNOLOGIE PORTABLE
Push Button: Normally Open Momentary Switch with a Cushioned Contact (De Reamer, GE 1939)
Ed

Créé par

Ed

28. octobre 2026FI
1
0
0
0
0

Push Button: Normally Open Momentary Switch with a Cushioned Contact (De Reamer, GE 1939)

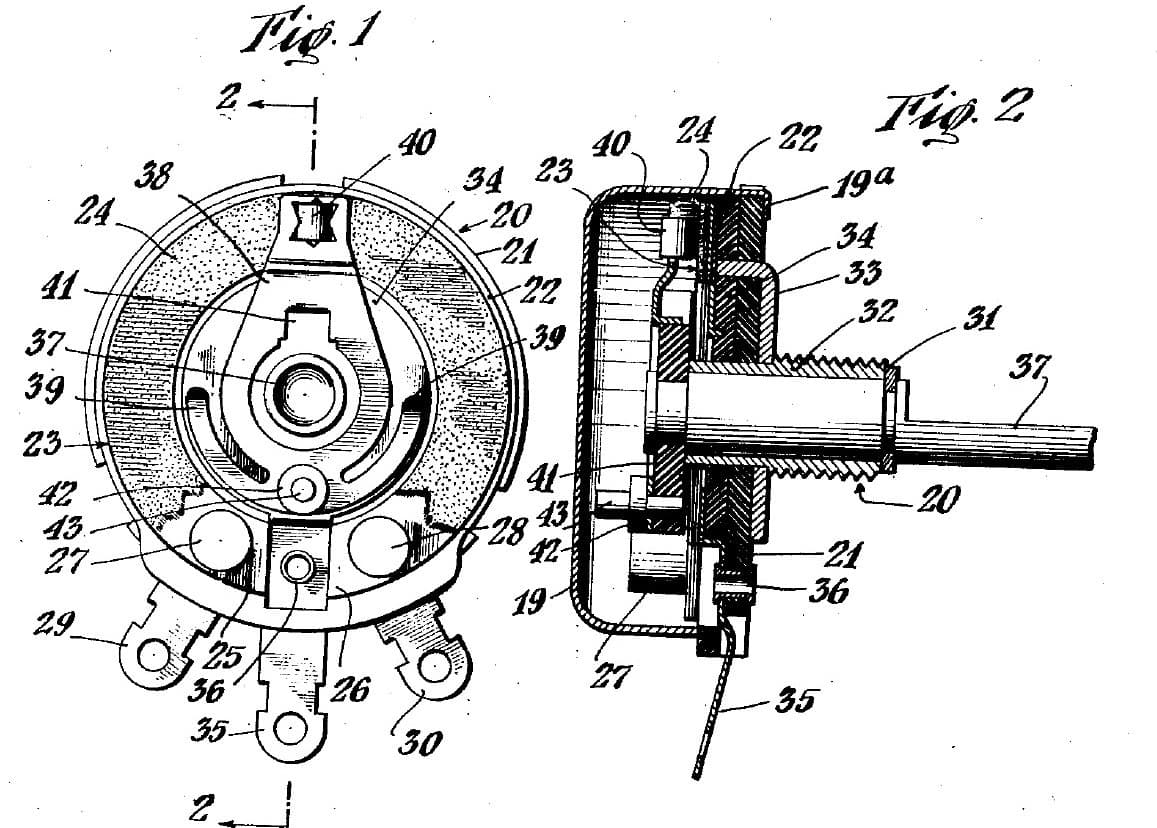
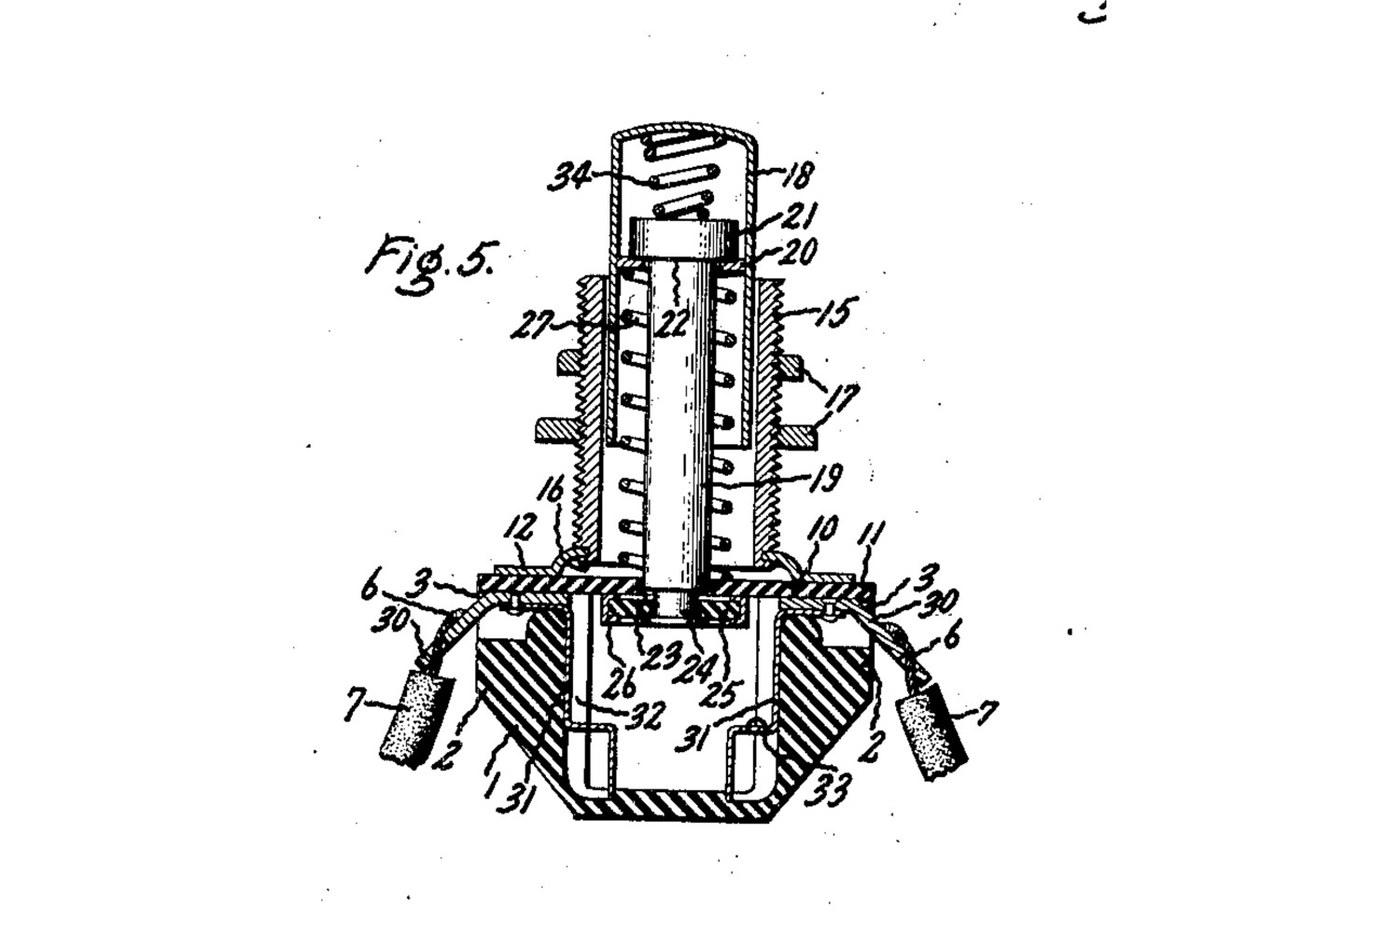
A panel push button that closes a circuit only while you press it. A spring holds the button out, and a metal rim on the end of its rod sits clear of two contacts. Press it and the rim bridges both contacts. A second spring inside the button lets the rod give, so the contacts never take more than that spring's force. Source: Frank C. De Reamer, US 2,166,803 (General Electric, 1939), Fig. 5. Unknown: the insulating material, the metals and every size. De Reamer gives none of them, so they are linked to unknown heads. The tools are ours. Picture: the patent's Fig. 5.
Avancé
2 days

Consignes

1

Mould the housing

Mould a cup-shaped housing of insulating material, with a boss on each of two opposite sides, a recess in the top of each boss, a groove inside below each boss, and a bead round the top. Unknown: the material, the sizes and the moulding.

Matériaux pour cette étape :

Isolant inconnuIsolant inconnu1 as required

Outils nécessaires :

Moule de compressionMoule de compression
Dimensions inconnuesDimensions inconnues
2

Make the terminals and contacts

Bend two angled metal strips. The upper end of each sits in a boss recess, and the lower end is a solder lug. Fix each upper end to a contact that fits the groove inside the housing, stepped at its bottom end. Unknown: the metal.

Matériaux pour cette étape :

Métal inconnuMétal inconnu1 as required

Outils nécessaires :

Cisaille à tôleCisaille à tôle
Pince platePince plate
Dimensions inconnuesDimensions inconnues
3

Make the sleeve, plate and cover

Turn a threaded sleeve and cut its thread. Spin its lower end over onto a metal plate with tangs. Cut a cover of insulating sheet with ears that reach over the bosses and a hole in the middle to guide the rod.

Matériaux pour cette étape :

Métal inconnuMétal inconnu1 as required
Isolant inconnuIsolant inconnu1 as required

Outils nécessaires :

Tour à métauxTour à métaux
Jeu d'outils de tournage (HSS)Jeu d'outils de tournage (HSS)
Porte-filièrePorte-filière
Cisaille à tôleCisaille à tôle
Pied à coulissePied à coulisse
Dimensions inconnuesDimensions inconnues
4

Make the push button

Make a drawn metal tube closed at the top, and a rod with a head. Put a small coil spring in the top of the tube, then the rod's head. Wedge a washer into the tube under the head. Leave clearance so the rod can swivel a little. Turn the rod's lower end down to a smaller diameter. Unknown: the metal.

Matériaux pour cette étape :

Métal inconnuMétal inconnu1 as required
Jeu de ressorts de compressionJeu de ressorts de compression1 spring

Outils nécessaires :

Tour à métauxTour à métaux
Jeu d'outils de tournage (HSS)Jeu d'outils de tournage (HSS)
Pied à coulissePied à coulisse
Dimensions inconnuesDimensions inconnues
5

Assemble

Set the terminals in their recesses and the contacts in their grooves. Slide the button into the sleeve, with a coil spring round the rod between the cover and the wedged washer. Pass the rod's end through the cover's hole. Put on it a loose insulating washer with a metal rim round its edge. Hammer the rod's end over into a flange. Lay the cover on the housing, so its ears clamp the terminals, and bend the plate's tangs over the bead.

Matériaux pour cette étape :

Isolant inconnuIsolant inconnu1 as required
Métal inconnuMétal inconnu1 as required
Jeu de ressorts de compressionJeu de ressorts de compression1 spring

Outils nécessaires :

Étau d'établiÉtau d'établi
Marteau à panne bombéeMarteau à panne bombée
Pince platePince plate
Lunettes de sécuritéLunettes de sécurité
6

Mount and wire it

Put the sleeve through a hole in the panel and clamp the panel between two nuts on the thread. Solder the bared wire ends to the two lugs.

Matériaux pour cette étape :

Écrou hexagonalÉcrou hexagonal2 pcs
Fil de soudureFil de soudure1 as required

Outils nécessaires :

Fer à souderFer à souder
Pince platePince plate
7

Check it

At rest, the rim sits against the underside of the cover and the circuit is open. Pressed, the rim meets the stepped ends of both contacts and closes it. The checking is ours: the meter reads open, then closed while pressed.

Outils nécessaires :

MultimètreMultimètre

Matériaux

5

Outils requis

13

CC0 Domaine public

Ce blueprint est publié sous CC0. Vous êtes libre de copier, modifier, distribuer et utiliser ce travail pour tout usage, sans demander la permission.

Soutenez le Maker en achetant des produits via son Blueprint où il perçoit une Commission Maker définie par les Vendeurs, ou créez une nouvelle itération de ce Blueprint et incluez-le comme connexion dans votre propre Blueprint pour partager les revenus.

Commentaires

(0)

Se connecter pour participer à la discussion

Chargement des commentaires...