ART
BEAUTÉ ET BIEN-ÊTRE
ARTISANAT
CULTURE ET HISTOIRE
DIVERTISSEMENT
ENVIRONNEMENT
NOURRITURE ET BOISSONS
INGÉNIERIE INVERSE
SCIENCES
SPORTS
TECHNOLOGIE
TECHNOLOGIE PORTABLE
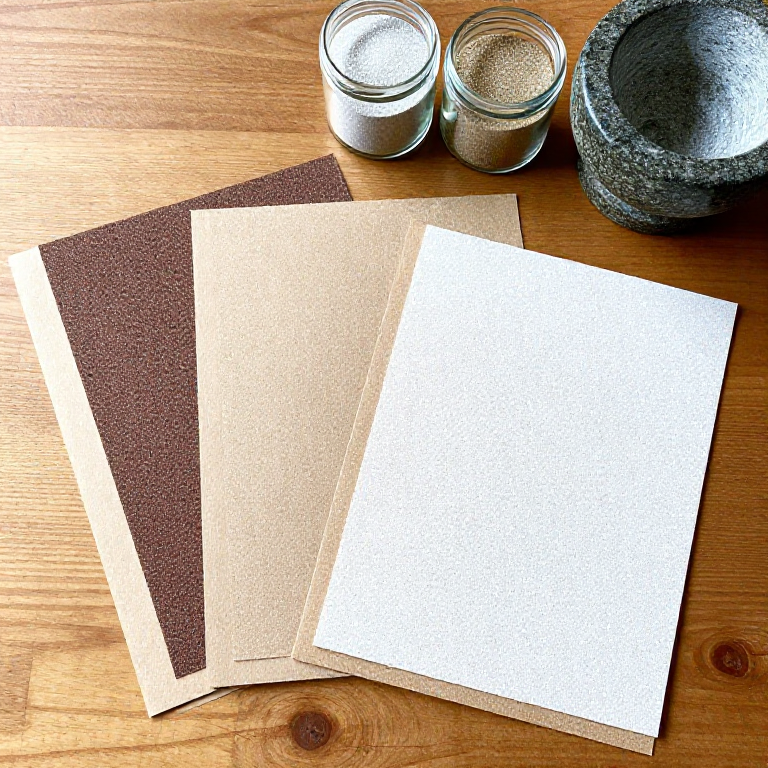


Sandpaper from Sand, Hide Glue and Paper
A coated abrasive is grit glued to a backing. The first recorded one, in 13th-century China, bonded crushed shells, seeds and sand to parchment with natural gum. Here clean quartz sand is crushed, sieved into grades and scattered on paper brushed with warm hide glue.
Sieve mesh only roughly matches a shop grit number: real P grades are set by ISO 6344. Quartz grit on hide glue wears faster than garnet or aluminium oxide paper, and water softens the glue, so use it dry.
Débutant
1 hour, plus a day drying
Consignes
1
1
Crush the sand
Crush the sand
With a dust mask on, crush clean quartz sand in the mortar, a few spoonfuls at a time.
Matériaux pour cette étape :
 Sable de quartz300 g
Outils nécessaires :
 Mortier et pilon
 Masque anti-poussière
2
2
Sieve into grades
Sieve into grades
Sieve through the 60, 80 and 120 mesh sieves stacked coarse on top. Keep what each sieve holds in its own labelled jar: coarse, medium and fine.
Outils nécessaires :
 Tamis 60 mesh
 Tamis à mailles 80
 Tamis 120 mailles
 Bocaux en verre avec couvercleMasque anti-poussière
3
3
Warm the glue
Warm the glue
Soak hide glue granules in water, then warm them in a double boiler to about 60 °C until runny. Do not let it boil.
Matériaux pour cette étape :
 Colle de peau50 g
 Eau0.1 litre
Outils nécessaires :
 Bain-marie
 Plaque chauffante
 Thermomètre à sonde à demeure
4
4
Glue the paper
Glue the paper
Brush a thin, even coat of glue over one face of a sheet of strong paper, edge to edge.
Matériaux pour cette étape :
 Papier3 feuilles
Outils nécessaires :
 Pinceau à colle
5
5
Scatter the grit
Scatter the grit
While the glue is wet, sprinkle one grade of grit thickly over it, press it in with a rolling pin over a clean sheet, and let it set for a minute.
Outils nécessaires :
 Rouleau à pâtisserie
6
6
Shake off and dry
Shake off and dry
Tip the sheet on edge and tap off the loose grit back into its jar. Dry it flat for a day, then label the back with its grade.
Outils nécessaires :
Bocaux en verre avec couvercle7
7
Test it
Test it
Sand a scrap of softwood ten strokes and look at the scratches. Cut sheets to size.
Outils nécessaires :
 Ciseaux
8
8
Troubleshooting
Troubleshooting
Home-made sandpaper troubleshooting.
Flow
Loading...
Matériaux
4- 300 gEspace réservé
- 50 gEspace réservé
- 0.1 litreEspace réservé
- 3 feuillesEspace réservé
Outils requis
12- Espace réservé
- Espace réservé
- Espace réservé
- Espace réservé
- Espace réservé
- Espace réservé
- Espace réservé
- Espace réservé
- Espace réservé
- Espace réservé
- Espace réservé
- Espace réservé
Ce plan fabrique


Blueprints liés
Ces blueprints partagent des connaissances — techniques, matériaux ou principes

CC0 Domaine public
Ce blueprint est publié sous CC0. Vous êtes libre de copier, modifier, distribuer et utiliser ce travail pour tout usage, sans demander la permission.
Soutenez le Maker en achetant des produits via son Blueprint où il perçoit une Commission Maker définie par les Vendeurs, ou créez une nouvelle itération de ce Blueprint et incluez-le comme connexion dans votre propre Blueprint pour partager les revenus.