ART
BEAUTÉ ET BIEN-ÊTRE
ARTISANAT
CULTURE ET HISTOIRE
DIVERTISSEMENT
ENVIRONNEMENT
NOURRITURE ET BOISSONS
INGÉNIERIE INVERSE
SCIENCES
SPORTS
TECHNOLOGIE
TECHNOLOGIE PORTABLE
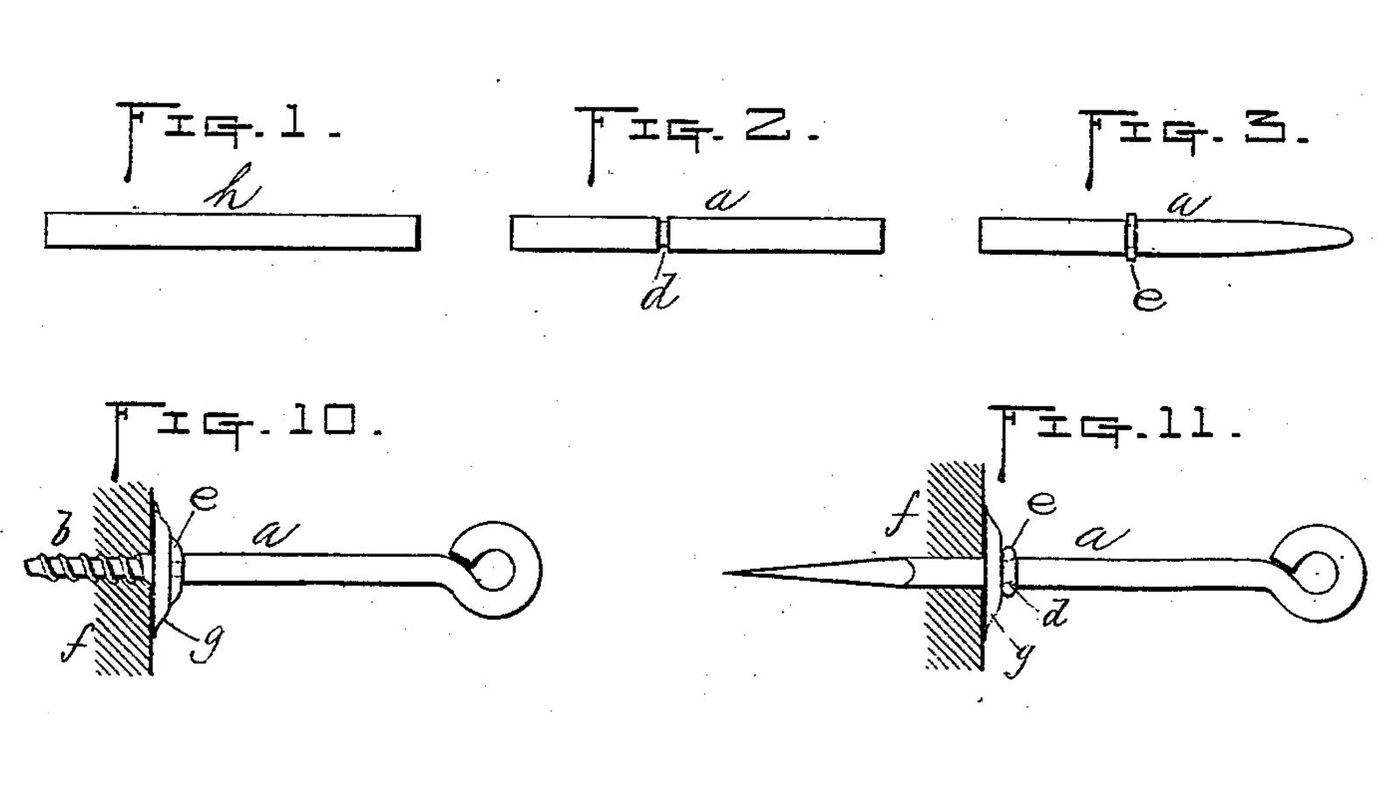


Screw Eye: Parmelee's One-Piece Wire Eye with a Stop-Ring
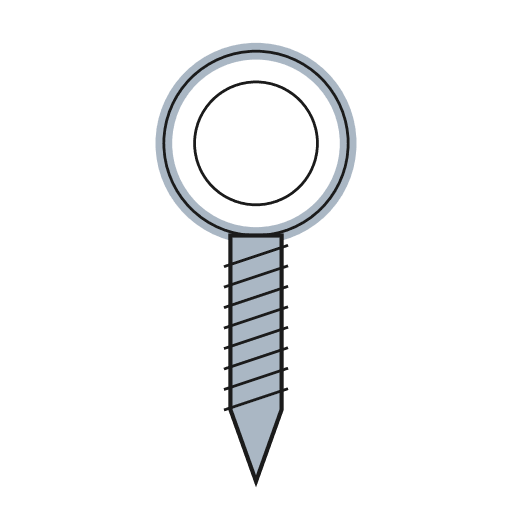
A screw eye bent from one piece of wire, by Arthur W. Parmelee of Worcester, Massachusetts (US 350,209, 1886). One end is threaded to turn into wood, the other bent into a closed eye. His addition is a ring closed into a groove around the shank: it stops the screw at the right depth, looks neat, and is left a little loose so the eye can turn without marking the wood under it.
The patent gives no metal or sizes. Iron wire, the 3 mm size, the pliers and the die are ours. The picture: Figs. 1-3 and 10-11 of the patent.
Débutant
30 minutes
Consignes
1
1
Cut a piece of wire
Cut a piece of wire
Cut a straight piece of iron wire about 3 mm thick (ours), long enough for the screw, the shank and the eye (Fig. 1).
Matériaux pour cette étape :
 Fil de fer1 pièce
Outils nécessaires :
 Règle
 Pince coupante
2
2
Cut the groove
Cut the groove
File a narrow groove right round the wire, a screw length from one end (Fig. 2). Parmelee cuts it or presses it in.
Outils nécessaires :
 Jeu de limes aiguilles
 Étau d'établi
3
3
Point the screw end
Point the screw end
File that end to a tapering point (Fig. 3).
Outils nécessaires :
 Lime à métauxÉtau d'établi
4
4
Thread the screw end
Thread the screw end
Cut a screw thread on the pointed end "in the usual way". Ours: a die in a die stock, run on as far as the point allows.
Outils nécessaires :
 Porte-filièreÉtau d'établi
5
5
Bend the eye
Bend the eye
Bend the other end into a closed round eye, the end turned in against the shank (Fig. 10).
Outils nécessaires :
 Pince à becs ronds
 Pince plate
6
6
Make the split ring
Make the split ring
Bend a short piece of the same wire round into an open ring that just slips over the shank (Figs. 9 and 11).
Matériaux pour cette étape :
Fil de fer1 pièceOutils nécessaires :
Pince coupantePince à becs ronds7
7
Close the ring into the groove
Close the ring into the groove
Slide the ring onto the groove and squeeze it until its two ends meet in a continuous band. Leave it a little loose, so the eye turns while the ring stays still against the wood.
Outils nécessaires :
Pince plate8
8
Turn it into the wood
Turn it into the wood
Turn the screw into the wood by the eye until the ring meets the surface: the ring is the depth stop. Parmelee also allows washers under the ring; we leave them out.
Matériaux
1- 2 piècesEspace réservé
Outils requis
8- Espace réservé
- Espace réservé
- Espace réservé
- Espace réservé
- Espace réservé
- Espace réservé
- Espace réservé
- Espace réservé
Ce plan fabrique
Blueprints liés
Ces blueprints partagent des connaissances — techniques, matériaux ou principes
CC0 Domaine public
Ce blueprint est publié sous CC0. Vous êtes libre de copier, modifier, distribuer et utiliser ce travail pour tout usage, sans demander la permission.
Soutenez le Maker en achetant des produits via son Blueprint où il perçoit une Commission Maker définie par les Vendeurs, ou créez une nouvelle itération de ce Blueprint et incluez-le comme connexion dans votre propre Blueprint pour partager les revenus.