ART
BEAUTÉ ET BIEN-ÊTRE
ARTISANAT
CULTURE ET HISTOIRE
DIVERTISSEMENT
ENVIRONNEMENT
NOURRITURE ET BOISSONS
INGÉNIERIE INVERSE
SCIENCES
SPORTS
TECHNOLOGIE
TECHNOLOGIE PORTABLE


The Finger-Valve Fountain Bath Brush: Press to Run, Let Go to Stop
A bath brush fed from a hose runs all the time, or needs a tap out of reach.
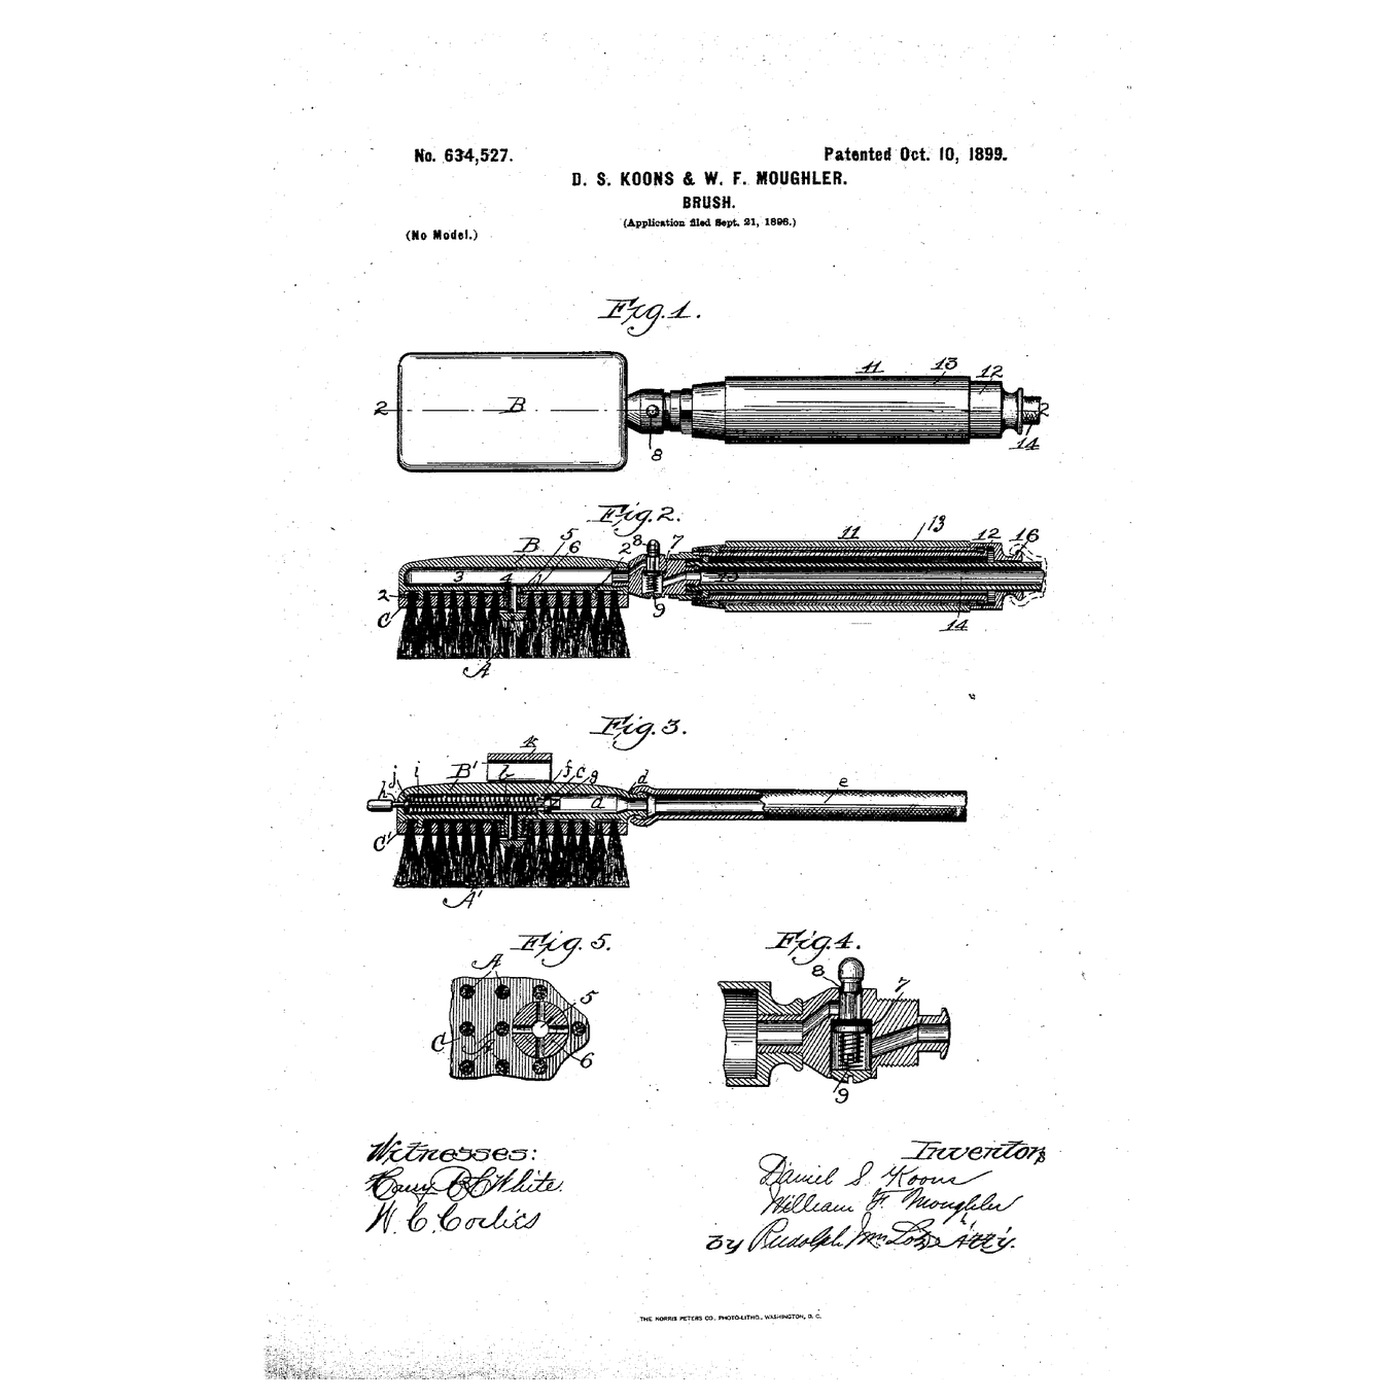
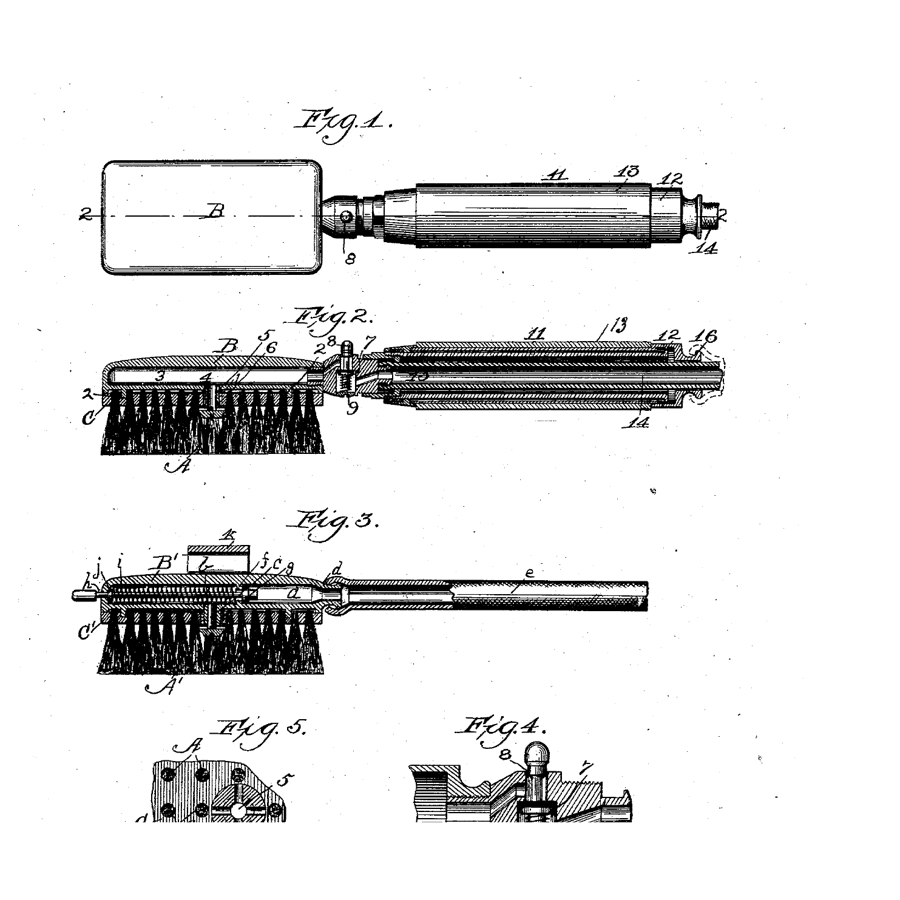
Daniel S. Koons and William F. Moughler of Chicago received US 634,527, dated 10 October 1899, for "a fountain bath-brush": a false back with a water passage, joined to the brush by a hollow screw whose perforated head lets the water out among the bristles, with a valve that a spring and the water pressure hold shut until a finger presses its stem, and a strap that holds the hand to the brush.
This rung works out the finger force, then builds the false back on a scrub brush with a tyre valve as the finger valve, and measures the force and the flow.
Intermédiaire
About 3 hours
Consignes
1
1
Force to open the valve
Force to open the valve
Chargement du notebook Jupyter…
2
2
A brush that feeds itself before it
A brush that feeds itself before it
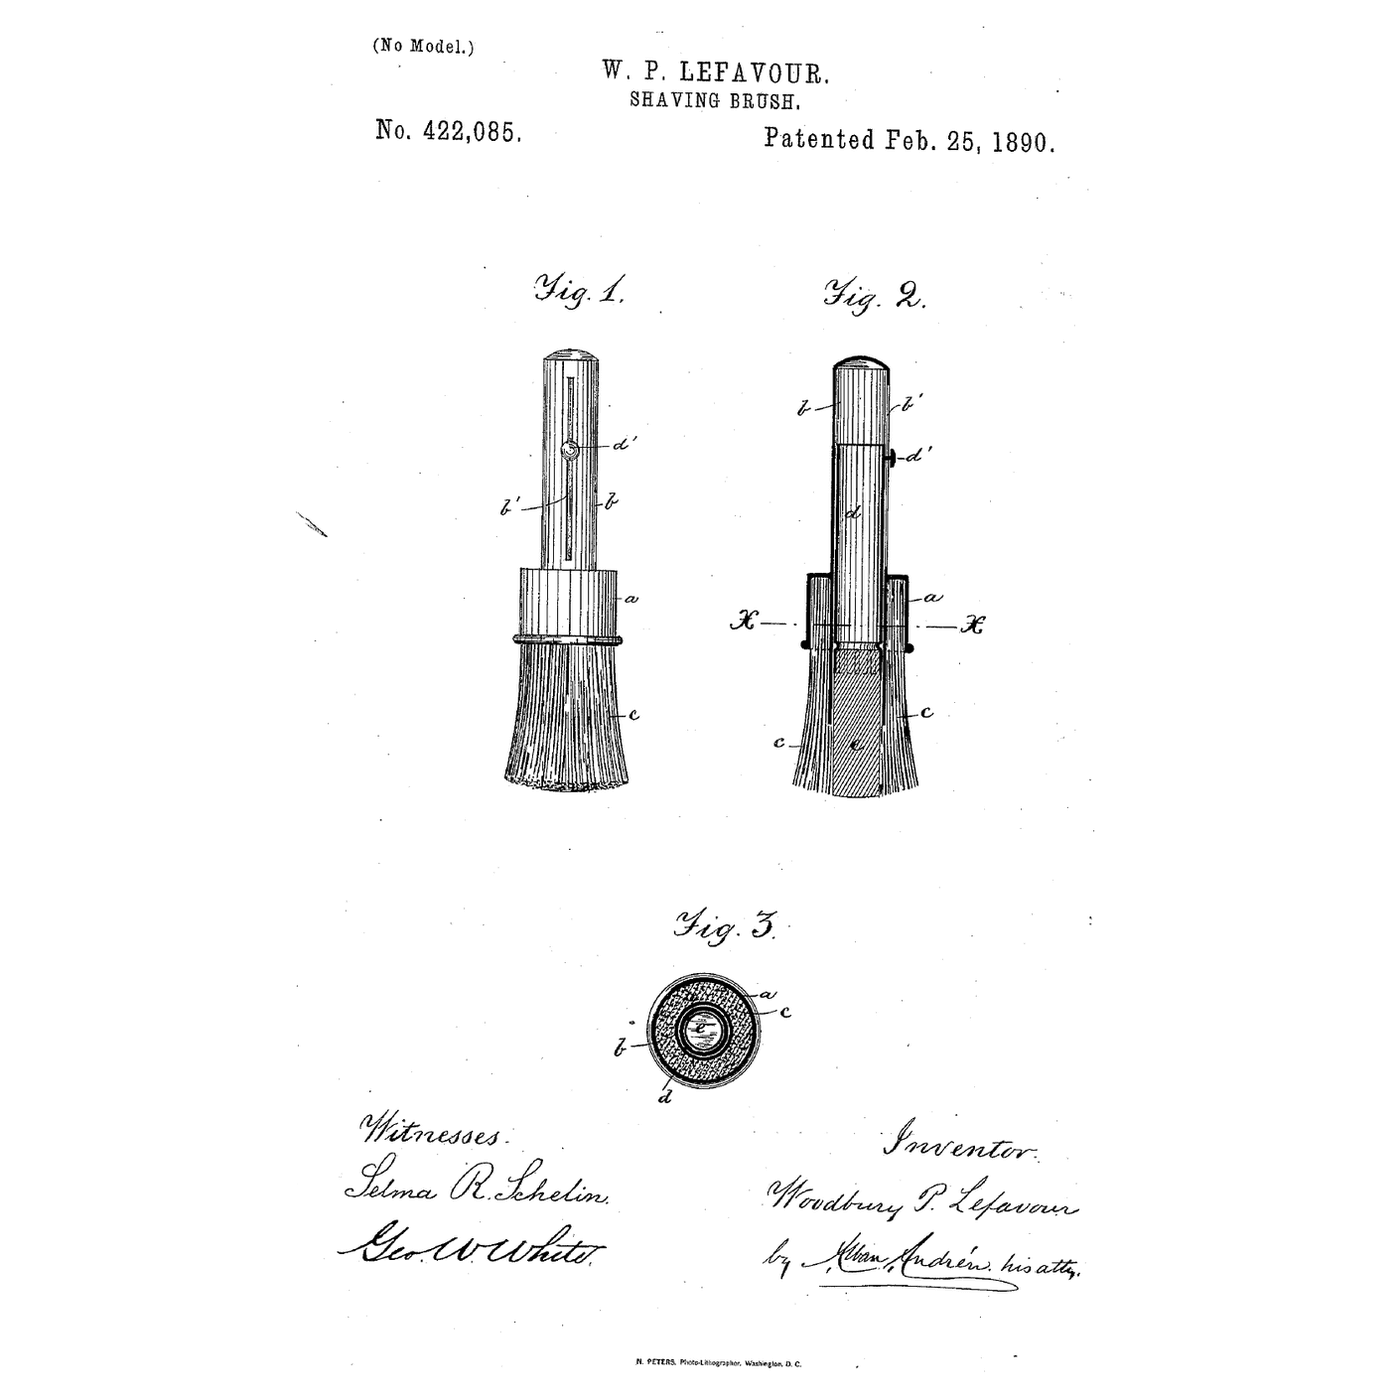
The embedded blueprint feeds soap from inside a shaving brush. Koons and Moughler feed water, and give the finger a valve to start and stop it.
3
3
Read US 634,527
Read US 634,527
"Said valve is held normally closed by means of a spring 9 and also by the water-pressure, as will be obvious."
"A strap k is secured at the sides of said back B' and passes over the latter, so that by inserting the hand between said back B' and said strap k the brush can be firmly held and the fingers at the same time kept in position to operate the valve."
4
4
Bore the false back
Bore the false back
Cut a hardwood block 120 × 50 × 22 mm. Drill a 6 mm passage 90 mm along its centre from one end, and a 6 mm hole down from the top to meet it 30 mm from the far end.
Matériaux pour cette étape :
 Bloc de bois dur1 pièce
Outils nécessaires :
 Étau d'établi
 Perceuse sans fil
 Jeu de mèches à bois à pointe de centrage
 Règle
Règle Lunettes de sécurité transparentes
5
5
Fit the finger valve
Fit the finger valve
Drill a hole across the passage 20 mm from the inlet to take a tyre valve, pin upward. Epoxy it in so the water must pass through it.
Matériaux pour cette étape :
 Valve de pneu1 pièce
 Époxy à deux composants1 pièce
Outils nécessaires :
Perceuse sans fil Jeu de forets
6
6
Join it to the brush
Join it to the brush
Drill a 6 mm hole through the scrub brush's back to line up with the outlet. Cut a rubber gasket, and screw the block on with four wood screws.
Matériaux pour cette étape :
 Brosse à récurer1 pièce
 Plaque de caoutchouc1 pièce
 Vis à bois #8 x 1"1 pièce
Outils nécessaires :
Perceuse sans filJeu de forets Cutter de précision
 Jeu de tournevis
7
7
Strap and hose
Strap and hose
Screw a strip of rubber sheet across the block as a hand strap, over the valve's side. Fit a hose connector to the inlet with brass fittings and PTFE tape.
Matériaux pour cette étape :
Plaque de caoutchouc1 pièceVis à bois #8 x 1"1 pièce Raccords en laiton1 pièce
 Ruban PTFE d'étanchéité pour filetage1 pièce
Outils nécessaires :
Jeu de tournevis Clé à molette
8
8
The patent drawing
The patent drawing
US 634,527 drawing sheet, public domain (expired patent).
9
9
Measure force and flow
Measure force and flow
Connect the garden hose and turn on the tap. Press the valve pin with the force meter's hook until water runs; note the force. Hold it open over the jug for 30 s and read the flow.
Matériaux pour cette étape :
 Tuyau d'arrosage1 pièce
 Eau1 pièce
Outils nécessaires :
 Dynamomètre (peson à ressort)
 Verre doseur
 Chronomètre
10
10
A valve that drips, sticks or barely flows
A valve that drips, sticks or barely flows
Finger-valve bath brush troubleshooting.
Flow
Loading...
11
11
History and honest limits
History and honest limits
**Daniel S. Koons** and **William F. Moughler** of Chicago filed US 634,527 on 21 September 1898; it is dated 10 October 1899. They called it a self-cleansing brush. Its handle is telescopic, with a stuffing-box between the two members, and the hose can be led through it to the brush; a second form uses a nozzle as the screw joining the backs. They did not limit it to the bath.
**Honest limits.** A tyre valve stands in for their seated valve and stem, and wood screws for their hollow screw. Your forces and flows are the result.
Matériaux
10- 1 pièceEspace réservé
- 1 pièceEspace réservé
- 1 pièceEspace réservé
- 1 pièceEspace réservé
- 1 pièceEspace réservé
- 2 piècesEspace réservé
- 1 pièceEspace réservé
- Espace réservé
- Tuyau d'arrosage10 % de commission1 pièceEspace réservé
- 1 pièceEspace réservé
Outils requis
12- Espace réservé
- 1 vendor sell this, none ship to you yetEspace réservé
- Espace réservé
- Espace réservé
- Espace réservé
- Espace réservé
- Espace réservé
- Espace réservé
- Espace réservé
- Espace réservé
- Espace réservé
- Espace réservé
Blueprints liés
Ces blueprints partagent des connaissances — techniques, matériaux ou principes


CC0 Domaine public
Ce blueprint est publié sous CC0. Vous êtes libre de copier, modifier, distribuer et utiliser ce travail pour tout usage, sans demander la permission.
Soutenez le Maker en achetant des produits via son Blueprint où il perçoit une Commission Maker définie par les Vendeurs, ou créez une nouvelle itération de ce Blueprint et incluez-le comme connexion dans votre propre Blueprint pour partager les revenus.