ART
BEAUTÉ ET BIEN-ÊTRE
ARTISANAT
CULTURE ET HISTOIRE
DIVERTISSEMENT
ENVIRONNEMENT
NOURRITURE ET BOISSONS
INGÉNIERIE INVERSE
SCIENCES
SPORTS
TECHNOLOGIE
TECHNOLOGIE PORTABLE


The Soap-Cup Shaving Mug: Water and Soap in One Vessel
Shaving with a brush needs hot water and soap within reach of each other, and the water cools while you lather.
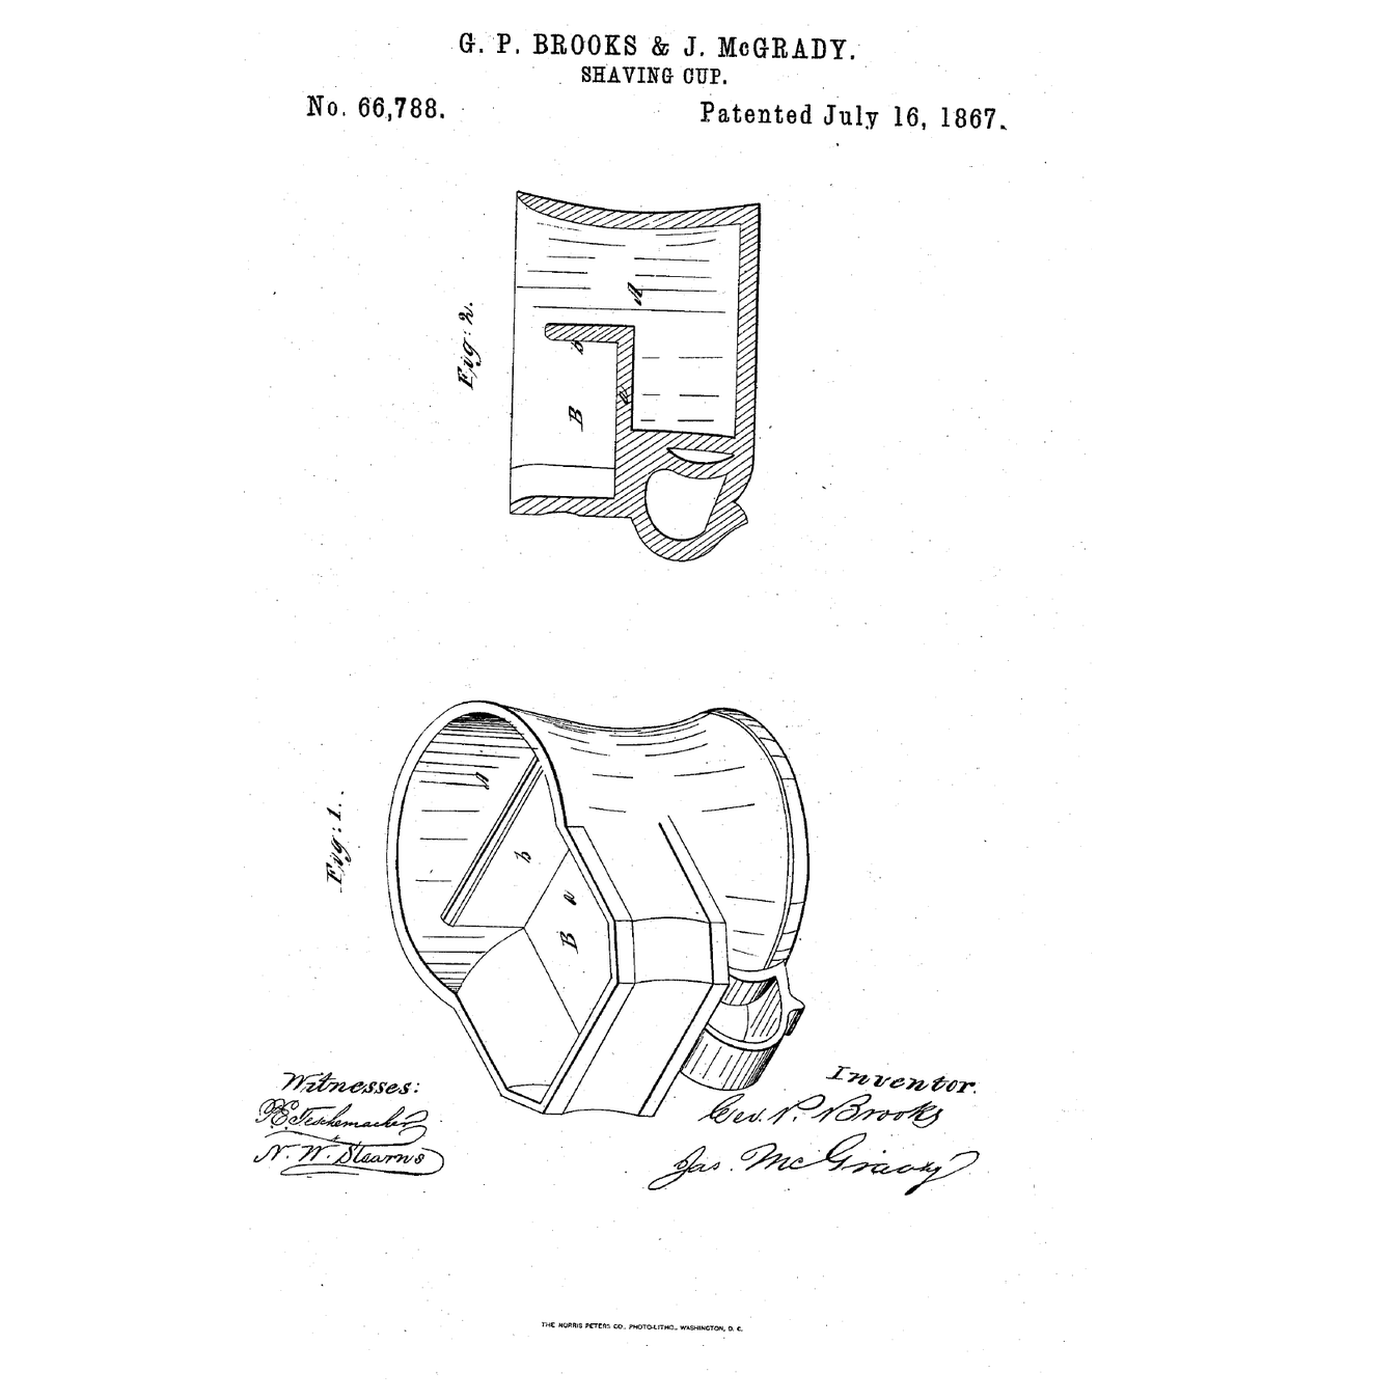
George P. Brooks and James McGrady of Boston received US 66,788, dated 16 July 1867, for a shaving-mug with a soap receptacle built into its rim, "so that the soap may always be in a convenient position ready for use during the operation of shaving". The receptacle's bottom partly covers the water.
This rung works out how covering part of the water slows its cooling, then fits a soap cup into a tin mug and times the water with and without it.
Débutant
About 2 hours
Consignes
1
1
Cooling with part of the top covered
Cooling with part of the top covered
Chargement du notebook Jupyter…
2
2
The soap in the cup
The soap in the cup
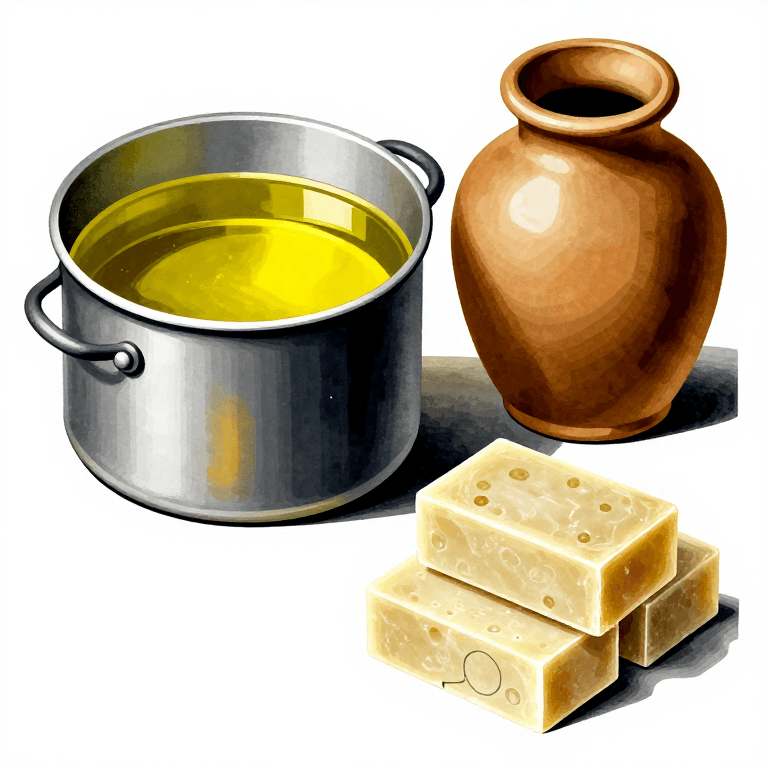
The embedded blueprint makes soap from olive oil and wood ash. Brooks and McGrady give that soap its own cup on the mug.
3
3
Read US 66,788
Read US 66,788
"Our invention consists in combining a soap-receptacle with a mug, so that the soap may always be in a convenient position ready for use during the operation of shaving."
"And it will be seen that hot water placed in the portion A of the mug, being partially covered over by the bottom of the receptacle B, will not become cooled so rapidly as would be the case if its entire surface were exposed to the air."
"A shaving-mug formed as above described need occupy no more space than an ordinary mug, while it possesses the advantage of two receptacles, for water and soap, combined in one, it being merely necessary to dip the brush from one to the other".
4
4
Fit a soap cup into a tin mug and time the water
Fit a soap cup into a tin mug and time the water
Take two tin cans, a tall one for the mug and a shorter one. Cut the short can down to 3 cm deep and cut it in half across its diameter, leaving three tabs 1 cm long on its curved edge. File every cut edge smooth.
Set the half-cup inside the rim of the tall can, curved side against the wall, so its bottom sits about 3 cm below the rim and covers part of the water surface. Bend the tabs out over the rim with the pliers to hold it. Put a piece of bar soap in the cup.
Fill the mug to just below the soap cup with water from the kettle. Read the temperature every 5 minutes for 15 minutes. Take the cup out, refill the mug with water at the same starting temperature, and read it again. Compare both runs with the notebook.
Matériaux pour cette étape :
 Boîte de conserve2 pièces
 Pain de savon1 pièce
 Eau400 ml
Outils nécessaires :
 Bol à raser
 Cisaille à tôle
 Pince à becs longs
 Lime à métaux
 Bouilloire électrique en verre
 Thermomètre
 Chronomètre
 Règle
Règle5
5
A mug that leaks soap into the water or cools as fast as before
A mug that leaks soap into the water or cools as fast as before
Shaving mug troubleshooting.
Flow
Loading...
6
6
History and honest limits
History and honest limits
**George P. Brooks and James McGrady** of Boston received US 66,788, dated 16 July 1867. They wrote that the mug "may be constructed of earthenware, metal, or other suitable material, and the water may be heated in it, instead of in a separate vessel, if desired".
**Honest limits.** The notebook splits heat loss into a top share and the rest, and treats the covered part as losing nothing. Real cups still pass some heat through their bottoms. The rates are examples. Your two runs of temperatures are the measurement.
Matériaux
3- 2 piècesEspace réservé
- 1 pièceEspace réservé
- 400 mlEspace réservé
Outils requis
8- Espace réservé
- Espace réservé
- Espace réservé
- Espace réservé
- Espace réservé
- Espace réservé
- Espace réservé
- Espace réservé
Blueprints liés
Ces blueprints partagent des connaissances — techniques, matériaux ou principes


CC0 Domaine public
Ce blueprint est publié sous CC0. Vous êtes libre de copier, modifier, distribuer et utiliser ce travail pour tout usage, sans demander la permission.
Soutenez le Maker en achetant des produits via son Blueprint où il perçoit une Commission Maker définie par les Vendeurs, ou créez une nouvelle itération de ce Blueprint et incluez-le comme connexion dans votre propre Blueprint pour partager les revenus.