

The Tube-in-the-Back Fountain Brush: Turn the Tube and the Jets Become a Soak
Consignes
Jet against soak
Jet against soak
A scrubbing brush improved before it
A scrubbing brush improved before it
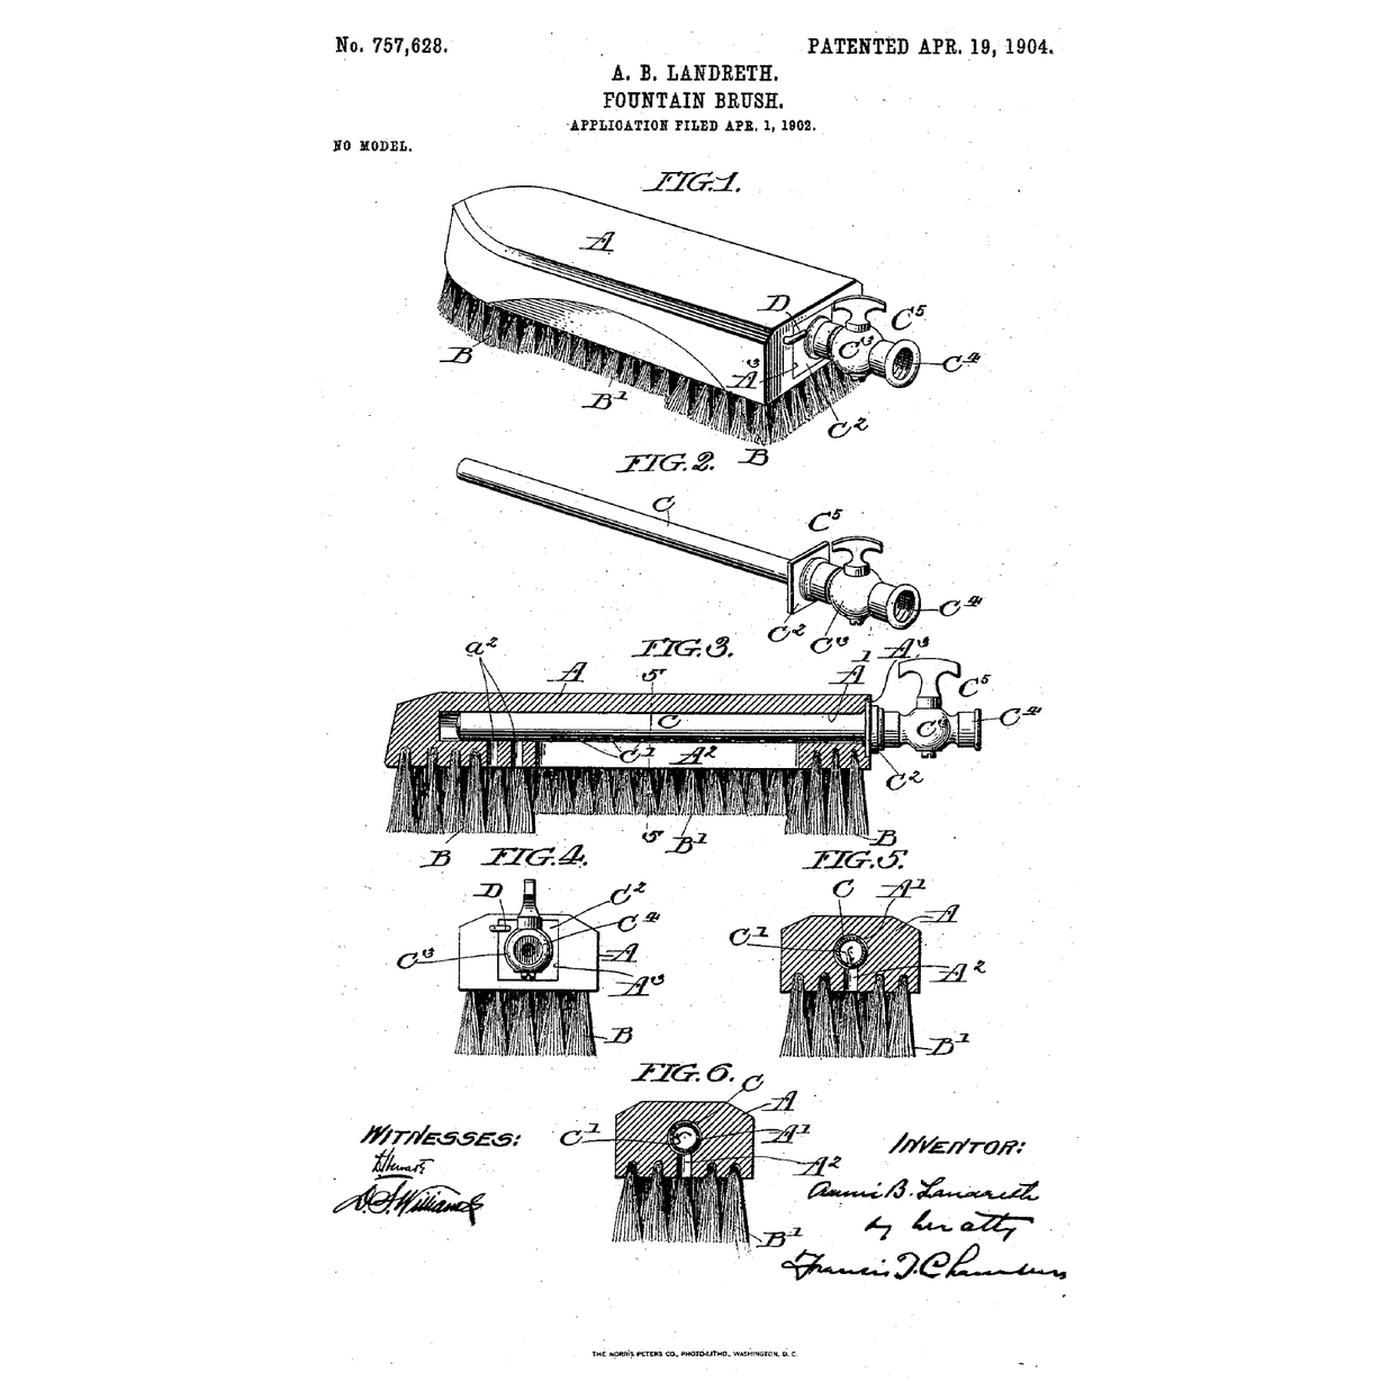
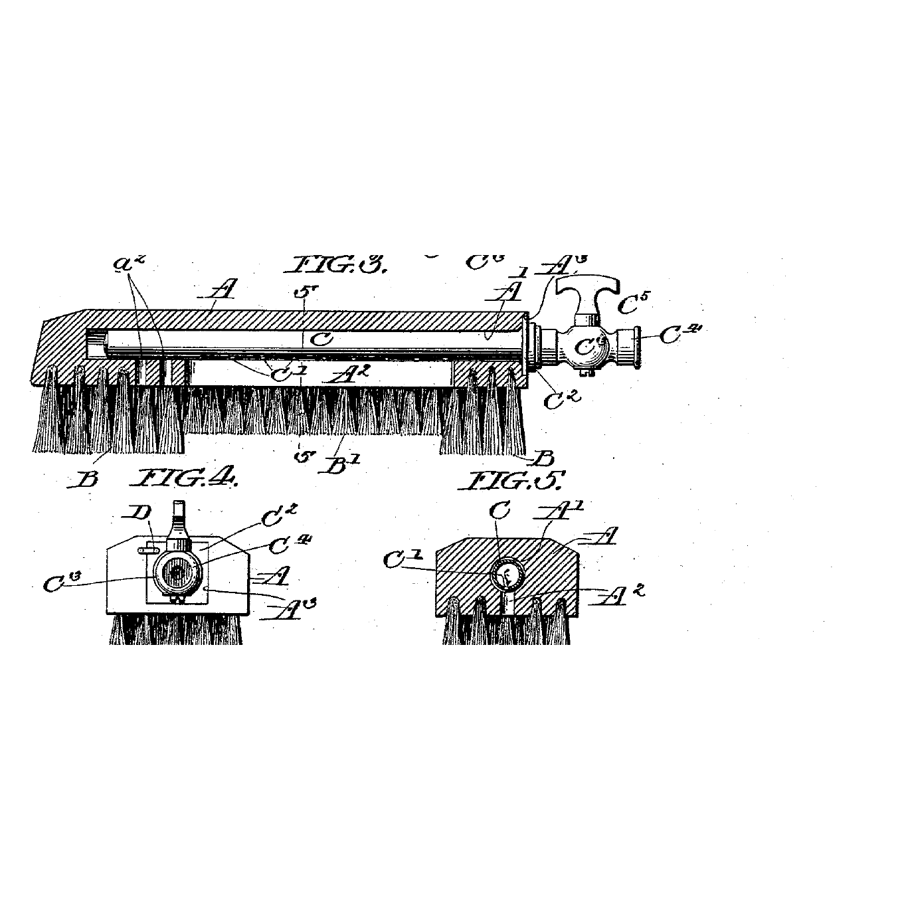
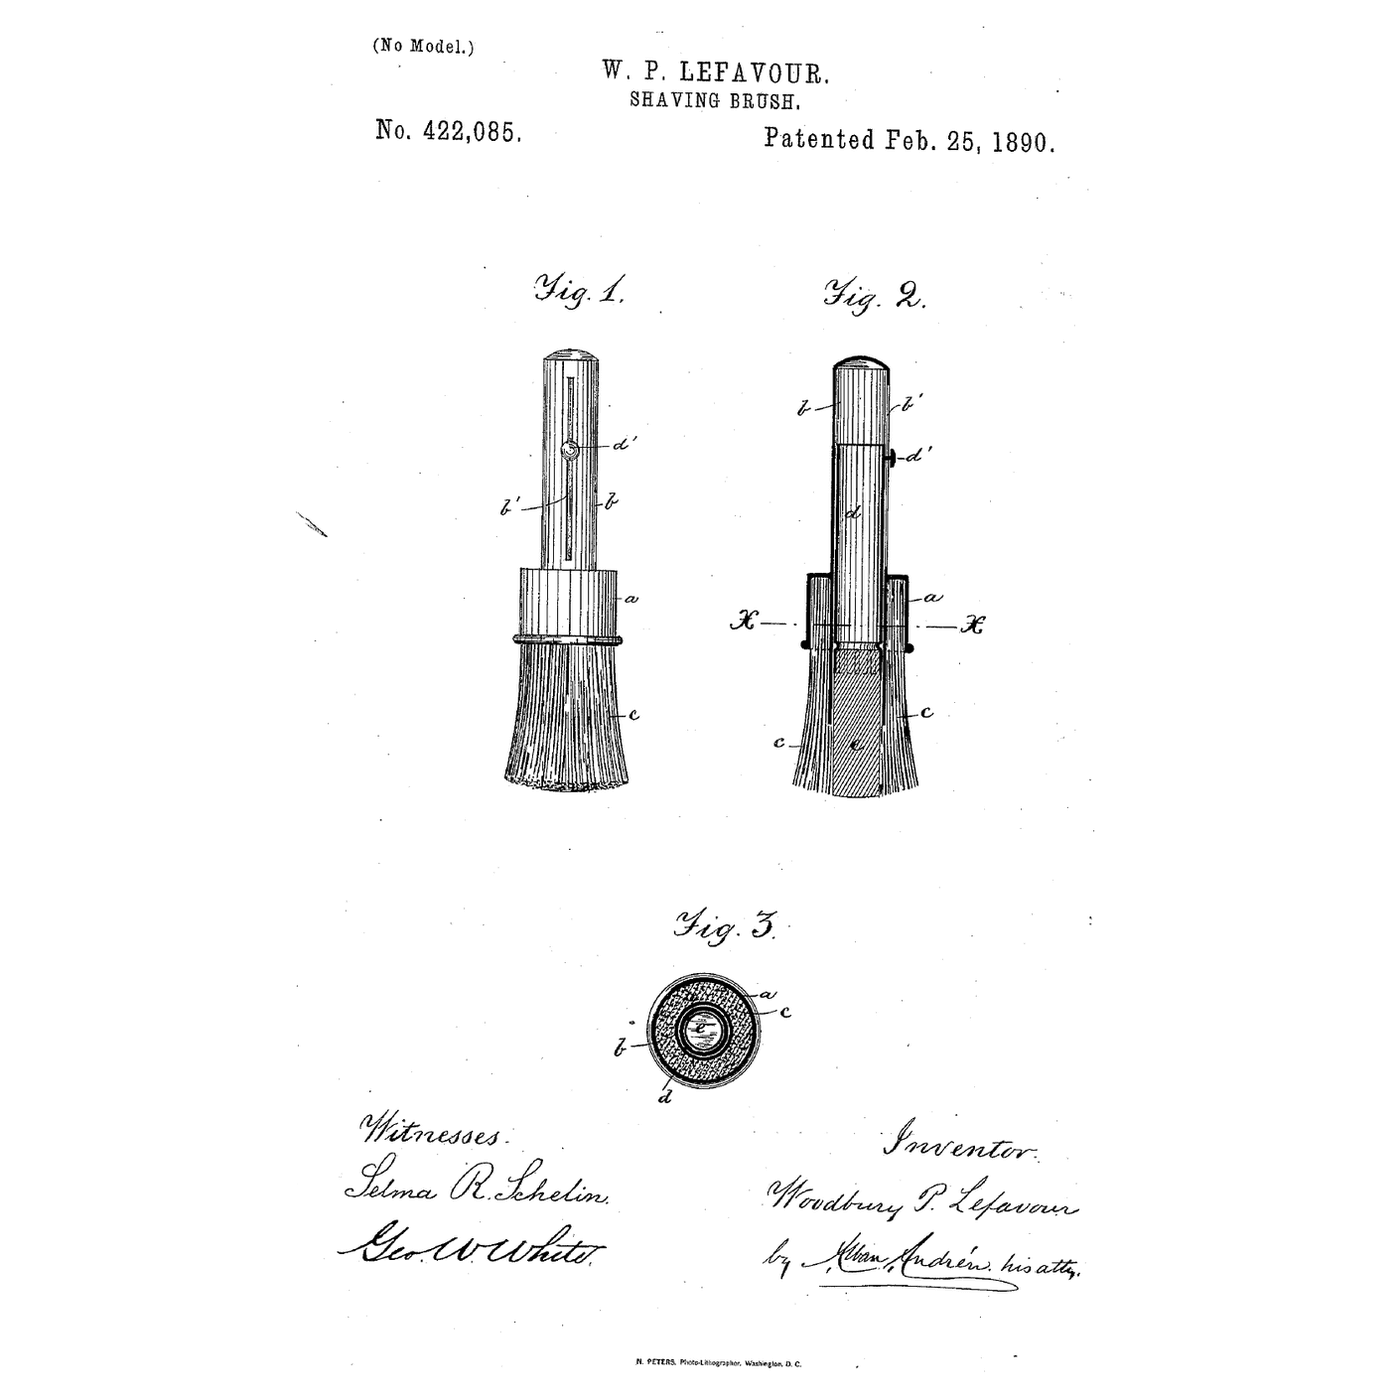
Read US 757,628
Read US 757,628
Bore the back
Bore the back
Matériaux pour cette étape :
 Brosse à récurer1 pièce
Outils nécessaires :
 Étau d'établi
 Perceuse sans fil
 Jeu de mèches à bois à pointe de centrage
 Règle
Règle Lunettes de sécurité transparentes
Drill the openings
Drill the openings
Outils nécessaires :
Perceuse sans fil Jeu de forets
 Marqueur permanent
Cut the square depression
Cut the square depression
Outils nécessaires :
 Jeu de ciseaux à bois
 MarteauRègle
Make the tube
Make the tube
Matériaux pour cette étape :
 Tube de cuivre 10 mm1 pièce
 Soudure de plomberie sans plomb1 pièce
 Flux de plomberie1 pièce
Outils nécessaires :
 Coupe-tubeÉtau d'établi
 Chalumeau à propanePerceuse sans filJeu de forets
 Gants résistants à la chaleur
Solder on the square plate
Solder on the square plate
Matériaux pour cette étape :
 Feuille de laiton1 pièceSoudure de plomberie sans plomb1 pièceFlux de plomberie1 pièce
Outils nécessaires :
 Cisaille à tôlePerceuse sans filJeu de foretsChalumeau à propaneGants résistants à la chaleur
Fit the tap and button
Fit the tap and button
Matériaux pour cette étape :
 Vanne à boisseau sphérique1 pièce
 Raccords en laiton1 pièce
 Ruban PTFE d'étanchéité pour filetage1 pièceFeuille de laiton1 pièce
 Vis à bois #8 x 1"1 pièce
Outils nécessaires :
 Clé à molette
 Jeu de tournevis
The build in 3D
The build in 3D
Compare the two settings
Compare the two settings
Matériaux pour cette étape :
 Tuyau d'arrosage1 pièce
 Eau1 pièce
Outils nécessaires :
Règle Verre doseur
 Chronomètre
A brush that sprays, leaks or will not lock
A brush that sprays, leaks or will not lock
Flow
History and honest limits
History and honest limits
Matériaux
11- 1 pièceEspace réservé
- 1 pièceEspace réservé
- 2 piècesEspace réservé
- 2 piècesEspace réservé
- 1 pièceEspace réservé
- 1 pièceEspace réservé
- 1 pièceEspace réservé
- Espace réservé
- 1 pièceEspace réservé
- Tuyau d'arrosage10 % de commission1 pièceEspace réservé
- 1 pièceEspace réservé
Outils requis
17- Espace réservé
- 1 vendor sell this, none ship to you yetEspace réservé
- Espace réservé
- Espace réservé
- Espace réservé
- Espace réservé
- Espace réservé
- Espace réservé
- Espace réservé
- Espace réservé
- Espace réservé
- Espace réservé
- Espace réservé
- Espace réservé
- Espace réservé
- Espace réservé
- Espace réservé
Fichiers de conception
1Blueprints liés
Ces blueprints partagent des connaissances — techniques, matériaux ou principes


CC0 Domaine public
Ce blueprint est publié sous CC0. Vous êtes libre de copier, modifier, distribuer et utiliser ce travail pour tout usage, sans demander la permission.
Soutenez le Maker en achetant des produits via son Blueprint où il perçoit une Commission Maker définie par les Vendeurs, ou créez une nouvelle itération de ce Blueprint et incluez-le comme connexion dans votre propre Blueprint pour partager les revenus.