Kolaborasi
SENI
KECANTIKAN & KESEHATAN
KERAJINAN
BUDAYA & SEJARAH
HIBURAN
LINGKUNGAN
MAKANAN & MINUMAN
REKAYASA BALIK
ILMU PENGETAHUAN
OLAHRAGA
TEKNOLOGI
PERANGKAT PAKAI
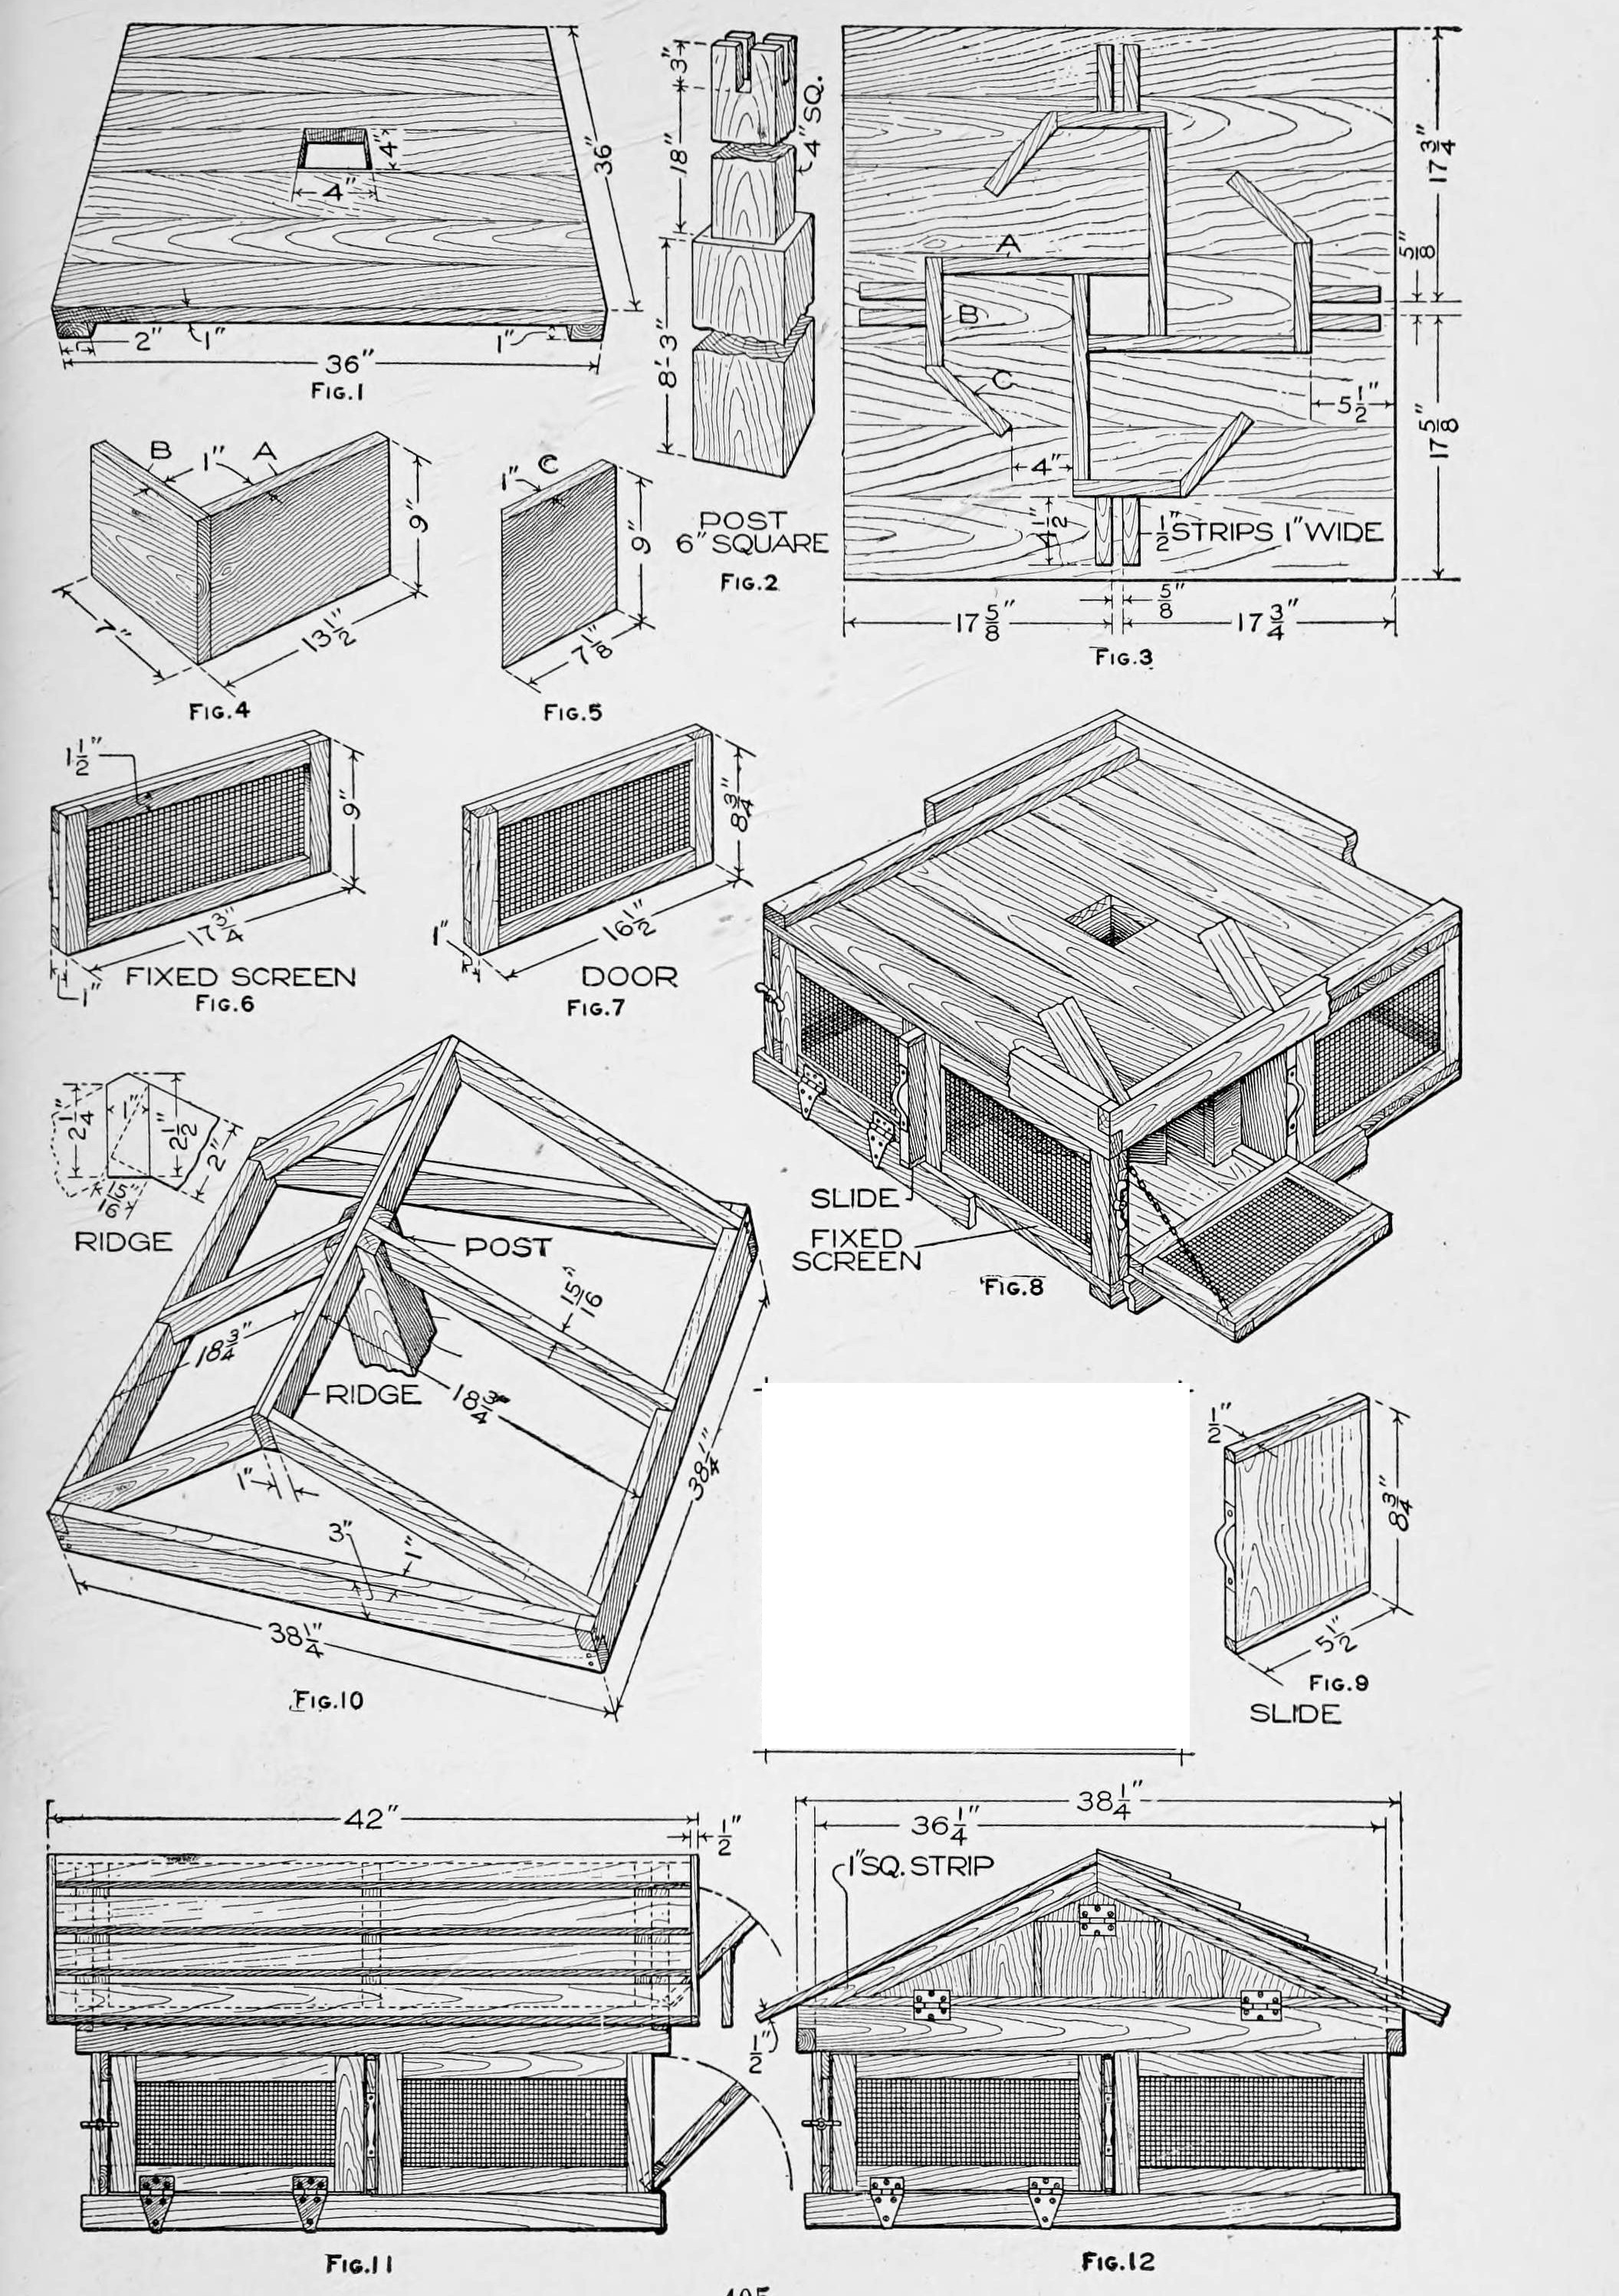


Pigeon House for 20 Birds: Swastika Compartments, Sliding Shutters and a Gable Roof on a Post (Boy Mechanic, 1919)
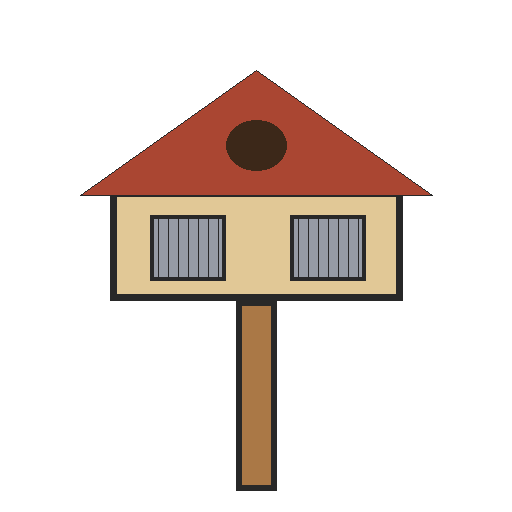
Robert Baker's pigeon house from The Boy Mechanic, Book 3 (1919), mostly from box wood: a 36 in square lower story on a 6 in post, divided into four compartments by pinwheel (swastika-pattern) partitions, with wire-mesh screens, hinged doors and sliding shutters, under a removable framed and shingled gable roof. It houses 20 pigeons.
Menengah
Several days
Instruksi
1
1
Parts in centimetres
Parts in centimetres
Memuat notebook Jupyter…
2
2
Read The Boy Mechanic, Book 3
Read The Boy Mechanic, Book 3
"The house described will accommodate 20 pigeons, and additional stories of the same type may be added to provide for more."
3
3
Make the floor, ceiling and post
Make the floor, ceiling and post
Make floor and ceiling alike, 36 in square of boards on cleats screwed on (or nails clinched), each with an accurate 4 in square centre hole (Fig. 1). Cut the post 6 in square, about 9 ft long, with a 4 in square shoulder at the top to fit the holes (Fig. 2); cut the notches for the ridge and centre rafters only when the roof boards are ready.
Material untuk langkah ini:
 Papan pinus6 buah
 Kayu pinus1 buah
 Sekrup kayu1 buah
Alat yang dibutuhkan:
 Gergaji Tangan
 Pahat kayu
 Bor engkol dan mata bor
 Gergaji Coping
 Siku-siku tetap
 Meteran Gulung
4
4
Build the compartments
Build the compartments
Make four each of the pieces A, B and C, 9 in high of 1 in stuff, exactly to Figs. 4 and 5 (A/B legs 13-1/2 and 7 in, C 7-1/8 in). Mark 4 in from one end of each A, pair the pieces with the line even with the end of the other and nail, then fit the pairs into a 4 in square at the centre. Fit each C to a B at an angle, trim the corners, nail, and nail B-C to the ends of A to complete the pattern (Fig. 3). Fix it over the floor hole with nails or screws through the floor, and nail two strips exactly 4-1/2 in long beside each opening to guide the slides. Fix the ceiling on top, cleats up, with its strips the same way.
Material untuk langkah ini:
Papan pinus3 buah Paku1 buah
Alat yang dibutuhkan:
Gergaji Tangan PaluSiku-siku tetap
 Pensil
5
5
Make screens, doors and slides
Make screens, doors and slides
Build fixed screens (17-3/4 by 9 in) and doors (16-1/2 by 8-3/4 in) of 1/2 in wood with 1/2 in square-mesh wire grating fixed between the pieces; screens stand 1/4 in higher than the doors and are fastened between ceiling and floor as braces. Hang the doors on combination strap hinges bent over the baseboard (or butts covered by it) with catches and chains; nail on 2-1/2 in baseboards. Make each slide of three pieces so it will not warp: a 7-3/4 in main piece with 1/2 in square strips on the ends (8-3/4 by 5-1/2 in), with a band-iron handle drilled for screws.
Material untuk langkah ini:
Papan pinus2 buah Jaring kawat galvanis1 buah
 Engsel tali besi4 buah
 Kancing kait4 buah
 Rantai halus1 buah
 Besi Strip Baja Lunak1 buahPaku1 buahSekrup kayu1 buah
Alat yang dibutuhkan:
Gergaji TanganPalu Gunting
 Bor tangan
 Ragum Meja
 Obeng pipih
6
6
Frame and cover the roof
Frame and cover the roof
Build the plate of pieces 3 in wide, 1/4 in larger inside than the ceiling so it fits snugly over it, with halved corners nailed both ways (Fig. 10). Lay out the end rafters full size on paper or a board, fit them first, then the others and the ridge. Nail rough boards 1/2 in apart, projecting 2 in past the plate ends, with a 1/2 in strip over their ends, and shingle or cover with tar paper. Nail a 1 in strip under each roof end and fit the gables, one with a door, the other with a screened opening the same size.
Material untuk langkah ini:
Papan pinus4 buah Sirap kayu1 buahPaku1 buahJaring kawat galvanis1 buahEngsel tali besi2 buah
Alat yang dibutuhkan:
Gergaji TanganPaluSiku-siku tetapPensil7
7
Set it up
Set it up
Set the post, put the lower story over its shoulder, cut the post-top notches to the ridge and centre rafters and seat the roof story on the lower one. The roof story lifts off for cleaning; for added stories put a post at each corner.
Alat yang dibutuhkan:
 SekopGergaji TanganPahat kayu
8
8
Troubleshooting
Troubleshooting
Pigeon house troubleshooting.
Flow
Loading...
9
9
History and honest limits
History and honest limits
From "A Pigeon House" by Robert Baker, in **The Boy Mechanic, Book 3**, Popular Mechanics, 1919 (Project Gutenberg 71856; checked on the archive.org scan boymechanic0003unse, pp. 403-405). The text calls the post about 9 ft; Fig. 2 marks 8 ft 3 in, 18 in and 3 in. The tools and metric figures are ours.
Bahan
10- 6 buahPlaceholder
- 1 buahPlaceholder
- 2 buahPlaceholder
- 3 buahPlaceholder
- 2 buahPlaceholder
- 4 buahPlaceholder
- 4 buahPlaceholder
- 1 buahPlaceholder
- 1 buahPlaceholder
- 1 buahPlaceholder
Alat yang Diperlukan
13- Placeholder
- Placeholder
- Placeholder
- Placeholder
- Placeholder
- 1 vendor sell this, none ship to you yetPlaceholder
- Placeholder
- 1 vendor sell this, none ship to you yetPlaceholder
- Placeholder
- Placeholder
- Placeholder
- Placeholder
- Placeholder
Cetak biru ini membuat
Blueprint terkait
Blueprint ini berbagi pengetahuan — teknik, bahan, atau prinsip
CC0 Domain Publik
Cetak biru ini dirilis di bawah CC0. Anda bebas untuk menyalin, memodifikasi, mendistribusikan, dan menggunakan karya ini untuk tujuan apa pun, termasuk komersial, tanpa meminta izin.
Dukung Maker dengan membeli produk melalui Cetak Biru mereka di mana mereka mendapatkan Komisi Pembuat yang ditetapkan oleh Penjual, atau buat iterasi baru dari Cetak Biru ini dan masukkan sebagai koneksi di milik Anda sendiri.