SENI
KECANTIKAN & KESEHATAN
KERAJINAN
BUDAYA & SEJARAH
HIBURAN
LINGKUNGAN
MAKANAN & MINUMAN
REKAYASA BALIK
ILMU PENGETAHUAN
OLAHRAGA
TEKNOLOGI
PERANGKAT PAKAI
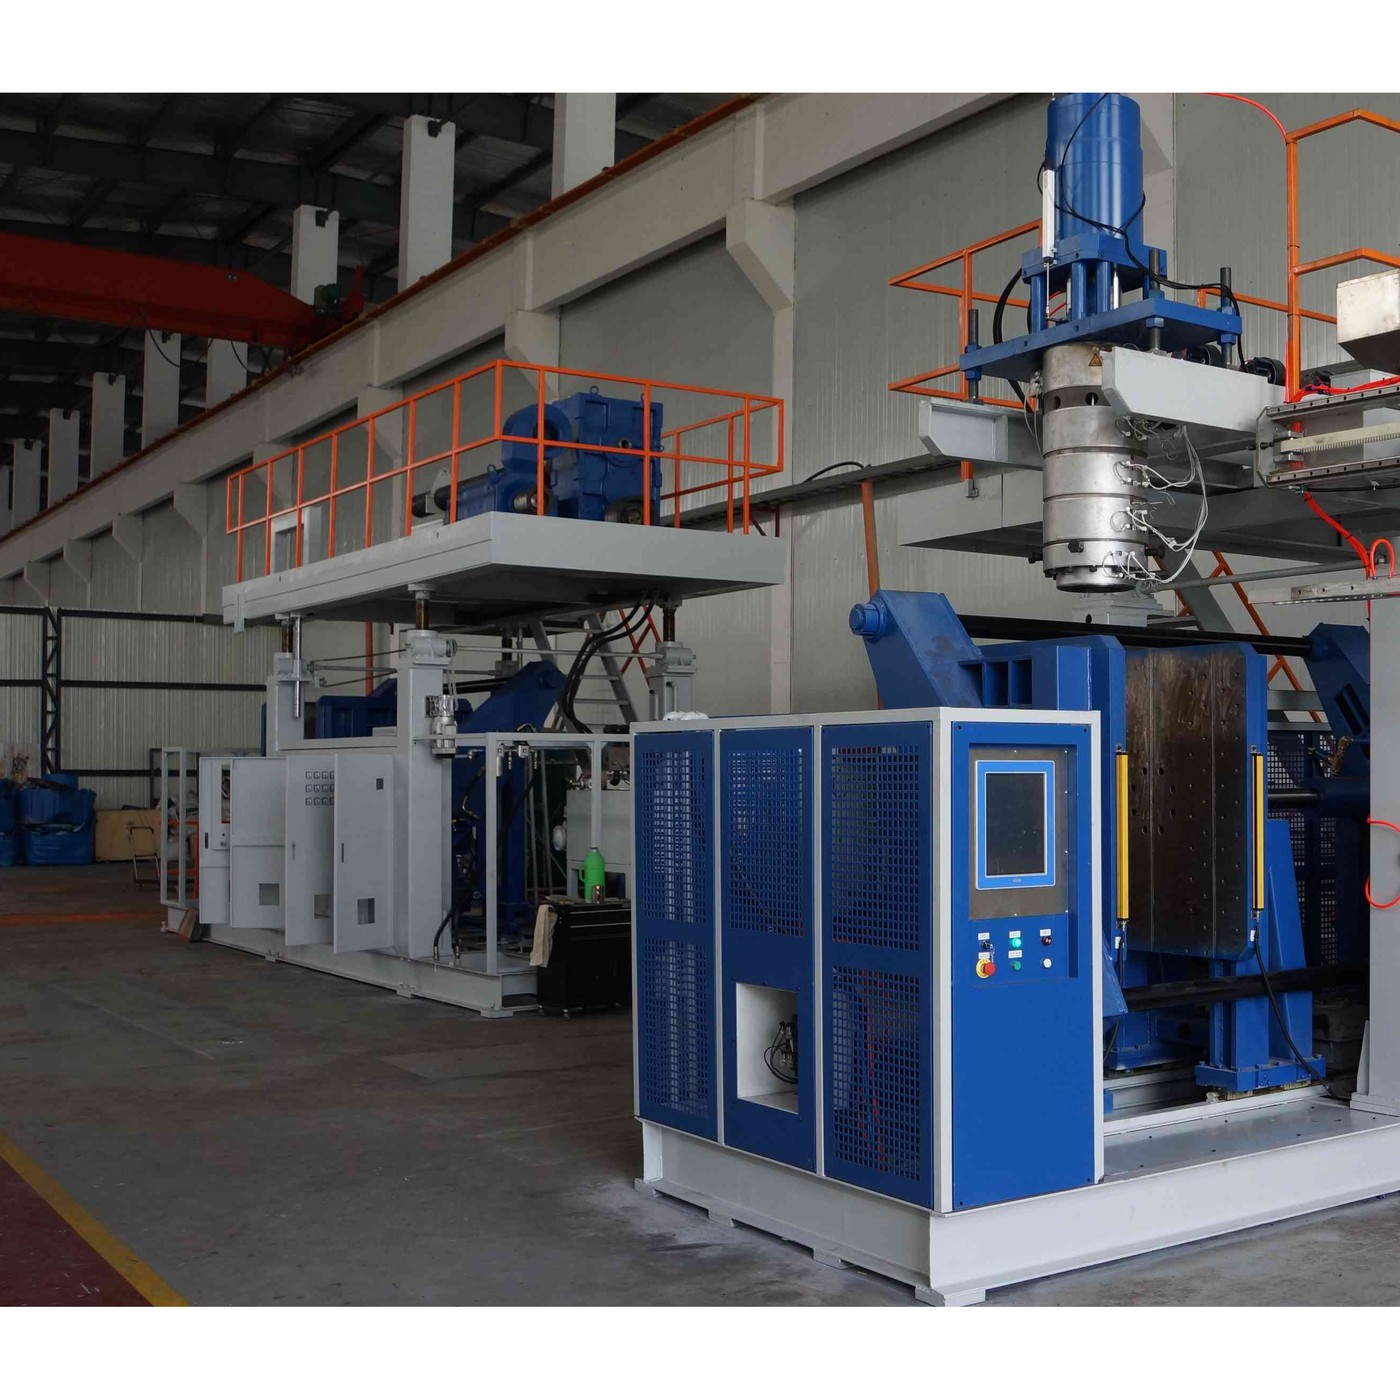


Blowing a Hollow Part: When There Is No Core
Injection moulding cannot make a bottle. To form the inside of a closed hollow you need a core, and to get the core out again you need an opening as big as the core — at which point it is not a bottle any more.
Blow moulding solves it by using **air as the core**. A hot tube of polymer, the parison, is extruded downward; a two-part mould closes round it and pinches the bottom shut; air inflates it against the cavity. The inside was never touched by tooling, so the opening can be any size you like.
The price is that you no longer control the wall. It is whatever the parison had, divided by how far the part stretched — which is why the corners of every blow-moulded container are the thinnest part of it, and why this rung ends up being about arithmetic.
Menengah
About 3 hours
Instruksi
1
1
Take three containers apart with your eyes
Take three containers apart with your eyes
Collect a blow-moulded bottle (milk, detergent), a blow-moulded jerrycan or toolbox if you have one, and an injection-moulded tub with a separate lid. Put them side by side.
On the blow-moulded ones, find:
- **The pinch-off seam** along the bottom — a raised or recessed line where the two mould halves closed on the parison and welded it shut. Squeeze it. This is the part's weakest feature and it is at the end most likely to be dropped.
- **The parting line** running up both sides and over the top.
- **The neck finish.** The threads are crisp and dimensionally good, because the neck is the one part formed against tooling on both faces.
- **Wall variation.** Hold the bottle up to a light and turn it slowly. The corners and the shoulder are translucent; the flats are not. That is step 5's arithmetic made visible.
Now cut one up. Section a clean, washed bottle with a craft knife — down one side, across the base — and measure the wall with the micrometer at eight places: neck, shoulder, mid-flat, corner, base centre, base corner, and either side of the pinch-off.
Write the eight numbers down. The ratio between the thickest and the thinnest is usually three or four to one, and it is not a defect: it is the process.
Material untuk langkah ini:
 Botol minuman poliester2 buah
Alat yang dibutuhkan:
 Pisau Kerajinan
 Mikrometer
 Jangka Sorong Digital 6 Inci
 Mikroskop Digital
 Kacamata Pengaman Bening
 Sarung Tangan Nitril
 Buku catatan laboratorium (dengan salinan)
2
2
Blow one by hand
Blow one by hand
You can do the whole process at bench scale with a length of plastic pipe, a heat gun and lung pressure. It is crude and it works.
**Make the mould.** Two blocks of MDF or aluminium with a cavity cut in the mating faces — a simple rounded bottle shape 60 mm across is plenty. Put a small vent hole at the far end of the cavity; air has to leave or the parison cannot reach the wall. Clamp them in the vise so they close square.
**Make the parison.** A 150 mm length of polypropylene or HDPE pipe, about 25–30 mm across. Push a short tube or a blowgun nozzle into one end and seal round it with tape — that is your blow pin.
**Heat it.** Work the heat gun evenly round and along the pipe until it is floppy and glossy, turning it constantly. This is the step that takes practice: too cold and it will not blow, too hot and it sags off the pin before you can close the mould. Watch the surface gloss rather than the clock.
**Close and blow.** Drop the hot parison between the mould halves, close them fast, and blow — gently and steadily. Low pressure is right; you are not inflating a balloon, you are pressing a soft tube outward until it touches cold steel and freezes.
Open the mould, cut the flash off, and section it. Measure the wall at the same eight kinds of place as step 1 and compare the pattern.
A heat gun runs at 400–600 °C and softened polymer sticks to skin and keeps burning. Gloves, glasses, a clear bench, nothing flammable, and never point the gun at anything you are holding in bare fingers. Ventilate: polyolefins give off irritating fumes when overheated, and PVC pipe gives off hydrogen chloride — **never heat PVC for this**.
Material untuk langkah ini:
 Lembaran polipropilena1 buah
 Papan MDF1 buah
 Pipa polietilena kepadatan tinggi1 buah
Alat yang dibutuhkan:
 Pistol udara panas
 Ragum Meja
 Mesin Bor Duduk
 Kikir (Kikir Tangan)Pisau KerajinanJangka Sorong Digital 6 InciMikrometer
 Termometer Inframerah
 Sarung Tangan Kerja KulitKacamata Pengaman Bening
 Pelindung Wajah
 Lemari asam (bersaluran buang)
 Alat pemadam apiBuku catatan laboratorium (dengan salinan)
3
3
Make the pinch-off fail
Make the pinch-off fail
The pinch-off is where two faces of molten polymer are pressed together by the closing mould and asked to become one. It is a **weld made by the tool**, and it is the feature that decides whether a container survives being dropped full.
Blow three more parts and deliberately change one thing on each:
1. **Too cold.** Close the mould on a parison that has cooled slightly. The pinch will look closed and will part under a thumbnail: the two faces touched but never mixed.
2. **Too fast.** Slam the mould shut. The pinch traps a thin fin of cooled skin between the faces, which is a crack with a shape.
3. **Right.** Hot, closed briskly but not violently, held closed while it cools.
Test all three the way the container will be tested: fill with water, cap, and drop from waist height onto a hard floor, base first. Do it outdoors or over a drain.
Then section each pinch and look at it under the microscope. A good weld shows the two flows merged with the line barely traceable; a cold one shows a sharp dark line straight through. This is the same distinction the sheet metal batch drew between a joint that fails and a joint that is no longer the weakest part.
The general rule worth carrying: **a weld between two melt fronts is only as good as how hot and how mobile they were when they met.** That is also exactly what a weld line is in an injection moulding, and why gate position matters so much there.
Material untuk langkah ini:
Pipa polietilena kepadatan tinggi3 buahAlat yang dibutuhkan:
Pistol udara panasRagum MejaMikroskop DigitalPisau KerajinanTermometer InframerahSarung Tangan Kerja KulitKacamata Pengaman BeningPelindung WajahLemari asam (bersaluran buang)Buku catatan laboratorium (dengan salinan)4
4
Blow ratio, and why the corner is thinnest
Blow ratio, and why the corner is thinnest
Memuat notebook Jupyter…
Alat yang dibutuhkan:
 Kertas Milimeter
5
5
History and context
History and context
**Attribution, stated honestly — and a number that did not survive checking.** Commercial blow moulding of plastics is credited to **Enoch Ferngren and William Kopitke**, who built a machine and sold it to the Hartford Empire Company in **1938**; the Plax Corporation carried the work forward. A widely repeated secondary source gives their patent as **US 2,175,154** — and that patent, read from the original, is about **digesters and blowoff elbows**, filed 26 June 1935 and granted 3 October 1939, with no Ferngren, no Kopitke and no Plax anywhere in it. **No number is asserted here.** The mechanism is not in doubt and the mechanism is what this rung teaches.
The idea itself is much older than plastics: **glass** has been blown into moulds for two thousand years, and the catalogue's glass rungs are the direct ancestor. What the 1930s added was a thermoplastic that could be extruded as a continuous tube — which needed the screw extruder — and a polymer tough enough to be worth the trouble, which arrived with polyethylene.
**Why it took over.** A blow-moulded container costs a fraction of an injection-moulded one of the same size, because the tool has no core, needs no ejection system and sees far lower pressure — tens of bar against hundreds. Every milk bottle, detergent pack, fuel can and car air duct is this process.
**Honest limits.** You cannot control wall thickness directly, only bias it by programming the parison; tolerances on anything but the neck are poor; and the bottom seam is a permanent weak point. The process also wants a polymer with high **melt strength** — one whose parison will hang without drawing itself thin under its own weight — which is why blow moulding grades are a separate thing to buy, and why the bench version in step 2 is so fiddly with ordinary pipe.
Bahan
4- 2 buahPlaceholder
- 1 buahPlaceholder
- 1 buahPlaceholder
- Placeholder
Alat yang Diperlukan
17- Placeholder
- Placeholder
- Placeholder
- Placeholder
- Placeholder
- Placeholder
- Placeholder
- 1 vendor sell this, none ship to you yetPlaceholder
- Placeholder
- Placeholder
- Placeholder
- Placeholder
- Placeholder
- Placeholder
- Placeholder
- Alat pemadam apikomisi 10%Placeholder
- Placeholder
Blueprint terkait
Blueprint ini berbagi pengetahuan — teknik, bahan, atau prinsip


CC0 Domain Publik
Cetak biru ini dirilis di bawah CC0. Anda bebas untuk menyalin, memodifikasi, mendistribusikan, dan menggunakan karya ini untuk tujuan apa pun, termasuk komersial, tanpa meminta izin.
Dukung Maker dengan membeli produk melalui Cetak Biru mereka di mana mereka mendapatkan Komisi Pembuat yang ditetapkan oleh Penjual, atau buat iterasi baru dari Cetak Biru ini dan masukkan sebagai koneksi di milik Anda sendiri.