Kolaborasi
SENI
KECANTIKAN & KESEHATAN
KERAJINAN
BUDAYA & SEJARAH
HIBURAN
LINGKUNGAN
MAKANAN & MINUMAN
REKAYASA BALIK
ILMU PENGETAHUAN
OLAHRAGA
TEKNOLOGI
PERANGKAT PAKAI
English


Electric Soldering Iron: Miner, 1890
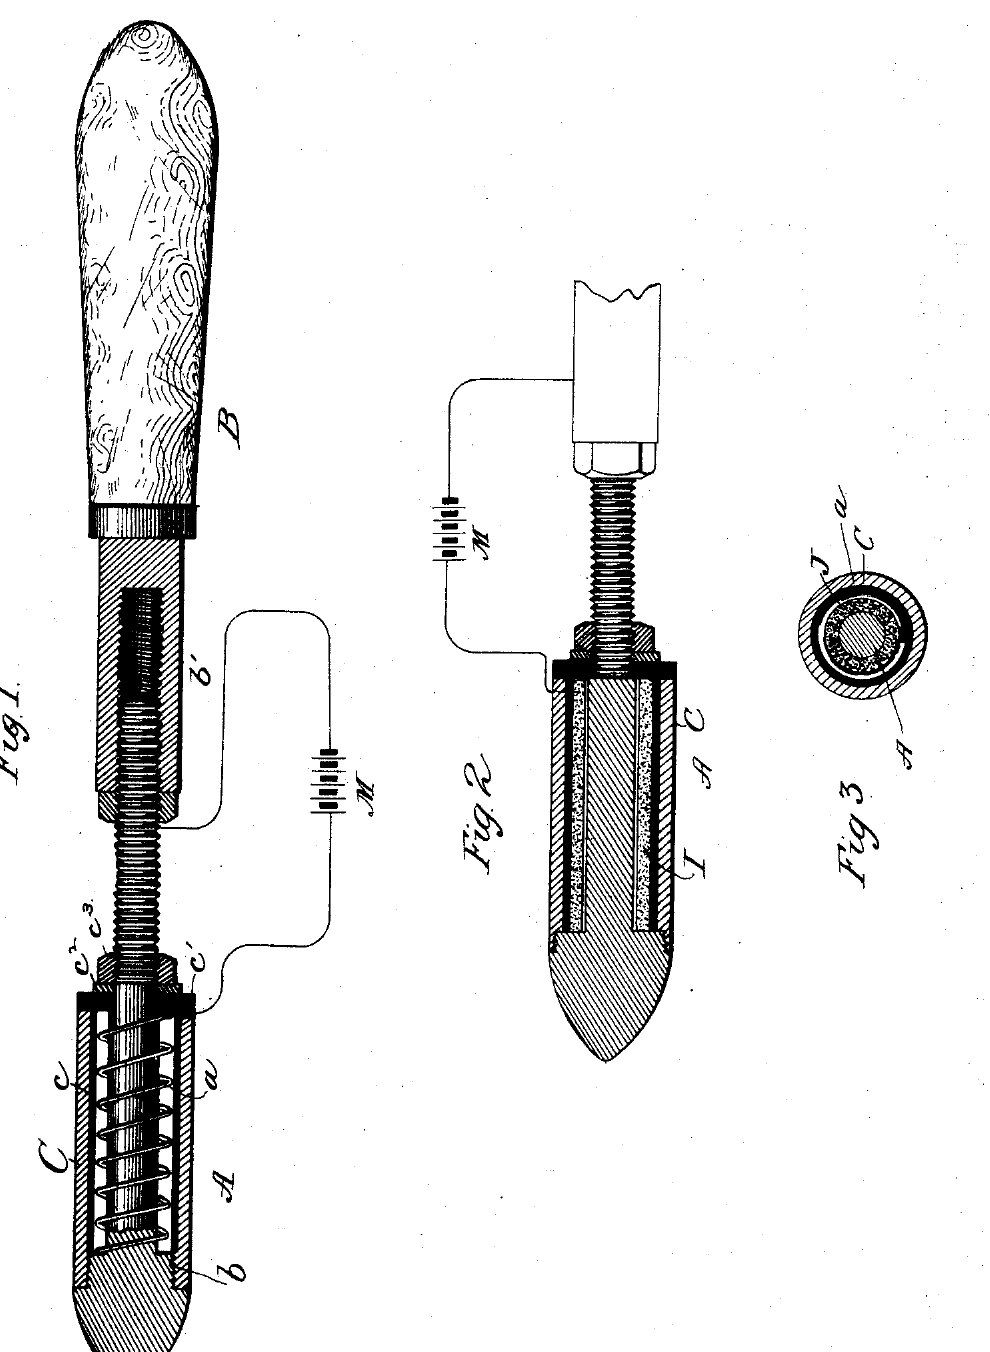
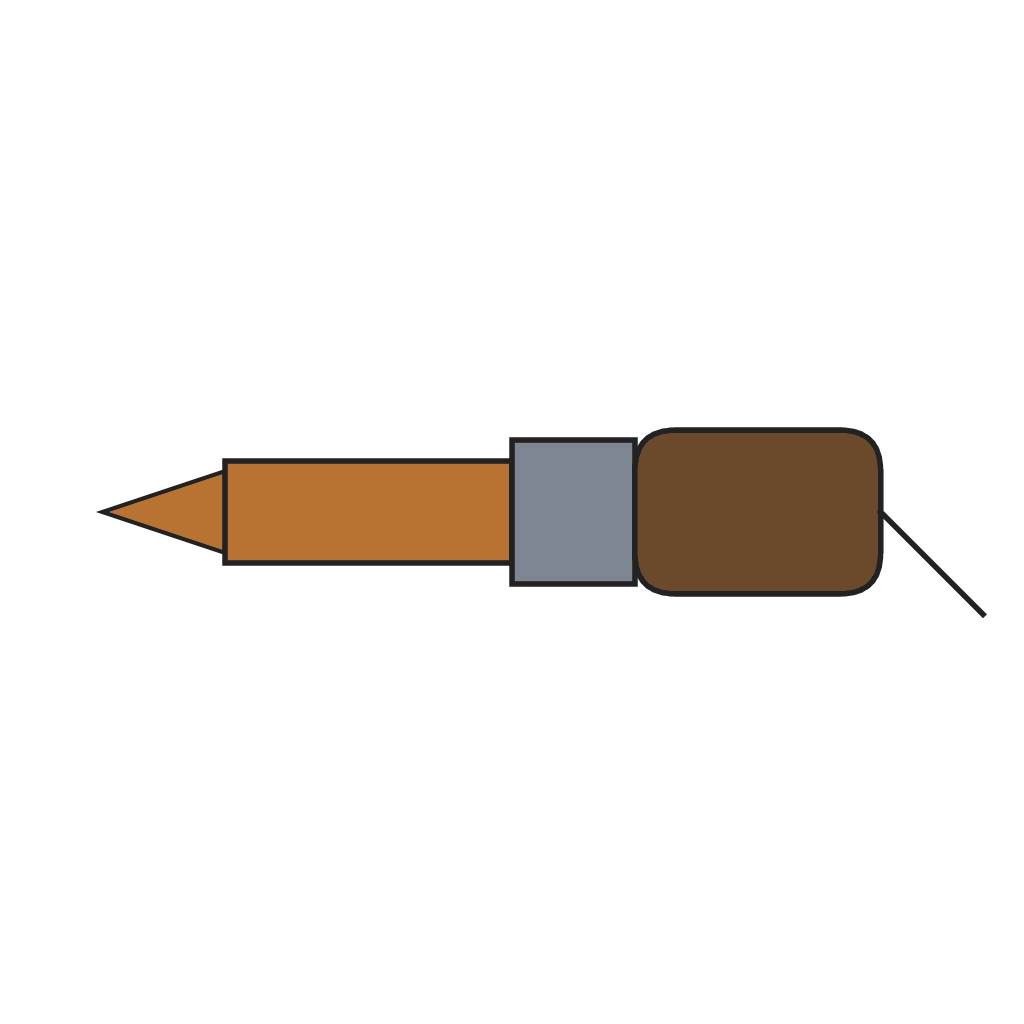
Earlier electric soldering irons heated a hollow copper head from inside, through finely divided carbon pressed against the tip, so the whole outside of the head lost heat to the air. Willard M. Miner of Plainfield, New Jersey, patented the alternative in 1890, US 421,185: keep the copper head solid, which holds its heat longer, and wind the heating resistance round the outside of it, under a shell that concentrates the heat on the copper and stops it escaping. The coil is German silver wire, wound round a reduced part of the head without touching it, with one end connected to the head and the other to the supply.
Menengah
Workshop process
Instruksi
1
1
Turn the head
Turn the head
Turn a solid copper head with its point. A little back from the point, cut the head down to a smaller diameter for some distance, leaving a shoulder, and thread a shank at its rear end.
Material untuk langkah ini:
 Batang tembaga bulat1 buah
Alat yang dibutuhkan:
 Mesin Bubut Logam
2
2
Wind the coil
Wind the coil
Coil German silver wire round the reduced part of the head, the coil slightly larger than the head so the two do not touch. Connect one end of the coil to the head at the shoulder; the other end goes to the supply.
Material untuk langkah ini:
 Kawat resistansi perak Jerman1 as required
Alat yang dibutuhkan:
 Tang Kombinasi
3
3
Shell
Shell
Slip on the shell, of brass lined with non-conducting material. Close its inner end with an insulating disc held by a washer and nut on the threaded shank.
Material untuk langkah ini:
 Selongsong kuningan berlapis1 buah
 Cakram ujung isolasi1 buah
Alat yang dibutuhkan:
 Kunci Inggris
4
4
Handle
Handle
Screw the shank into the metal socket in the handle, which takes the second connection.
Material untuk langkah ini:
 Kayu Keras Bahan Gagang1 buah
Bahan
5- 1 buahPlaceholder
- 1 as requiredPlaceholder
- Placeholder
- 1 buahPlaceholder
- 1 buahPlaceholder
Alat yang Diperlukan
3- Placeholder
- Placeholder
- Placeholder
Cetak biru ini membuat
Blueprint terkait
Blueprint ini berbagi pengetahuan — teknik, bahan, atau prinsip

CC0 Domain Publik
Cetak biru ini dirilis di bawah CC0. Anda bebas untuk menyalin, memodifikasi, mendistribusikan, dan menggunakan karya ini untuk tujuan apa pun, termasuk komersial, tanpa meminta izin.
Dukung Maker dengan membeli produk melalui Cetak Biru mereka di mana mereka mendapatkan Komisi Pembuat yang ditetapkan oleh Penjual, atau buat iterasi baru dari Cetak Biru ini dan masukkan sebagai koneksi di milik Anda sendiri.