Kolaborasi
SENI
KECANTIKAN & KESEHATAN
KERAJINAN
BUDAYA & SEJARAH
HIBURAN
LINGKUNGAN
MAKANAN & MINUMAN
REKAYASA BALIK
ILMU PENGETAHUAN
OLAHRAGA
TEKNOLOGI
PERANGKAT PAKAI
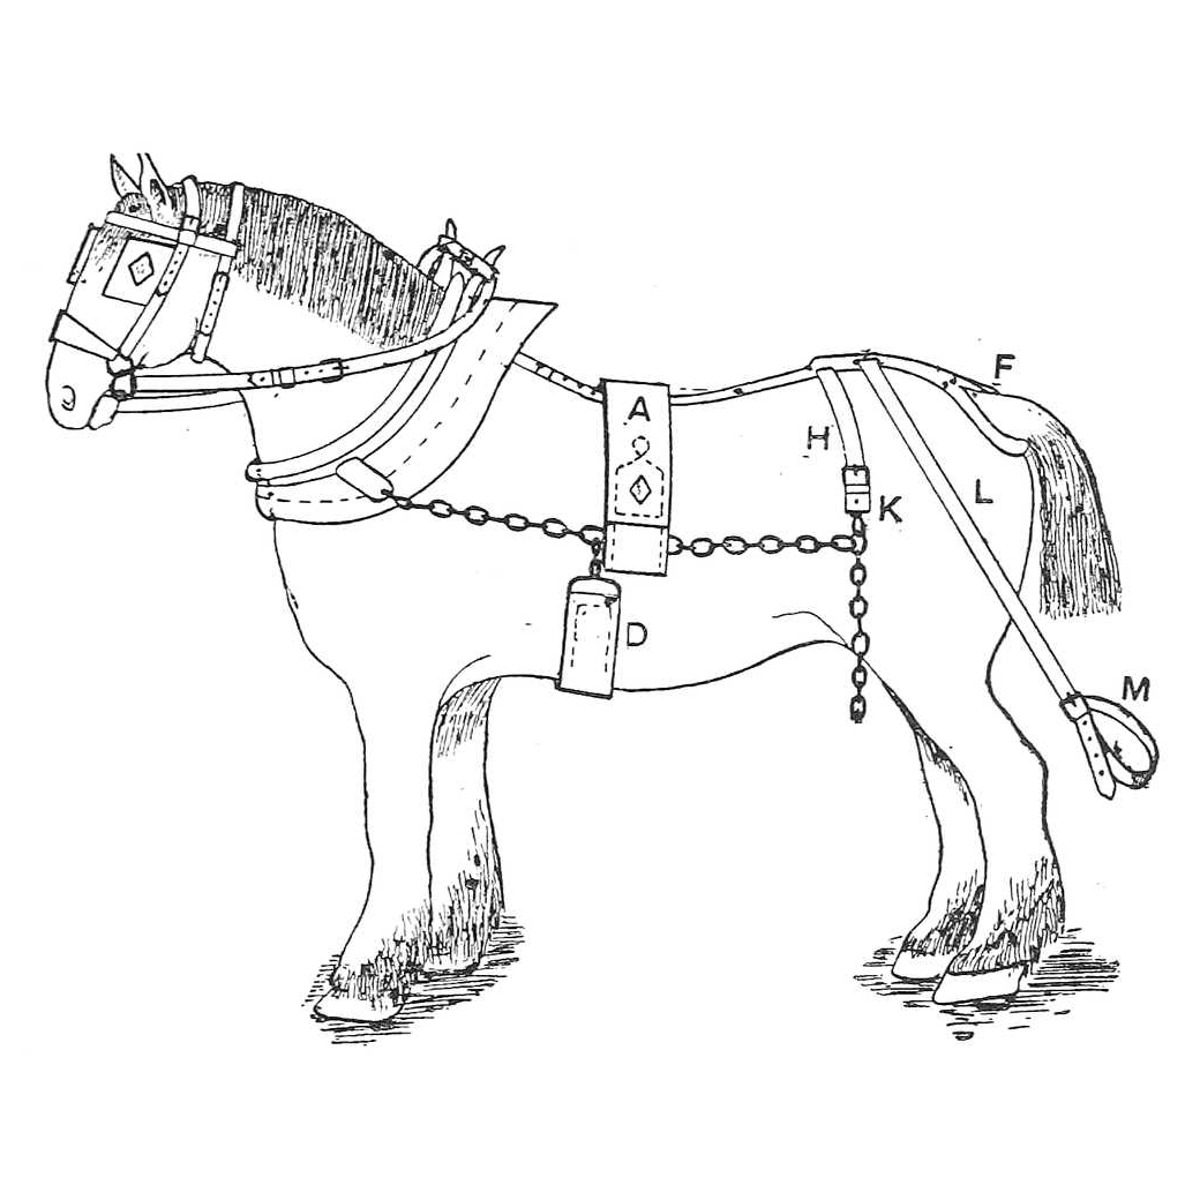


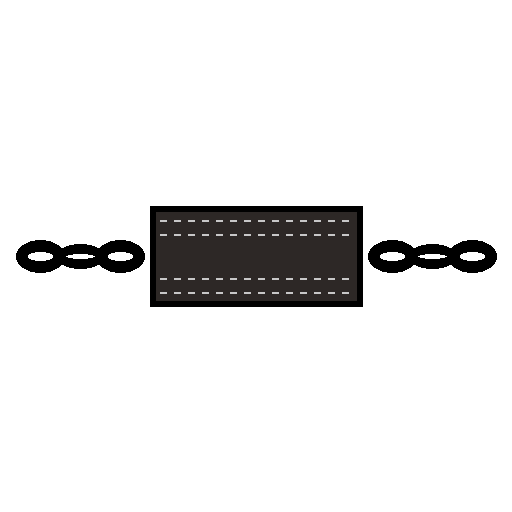
Leader Harness Back-Band and Belly-Band: Eyed Back-Band With Dees, Chain Belly-Band (Hasluck, Harness Making, 1904)
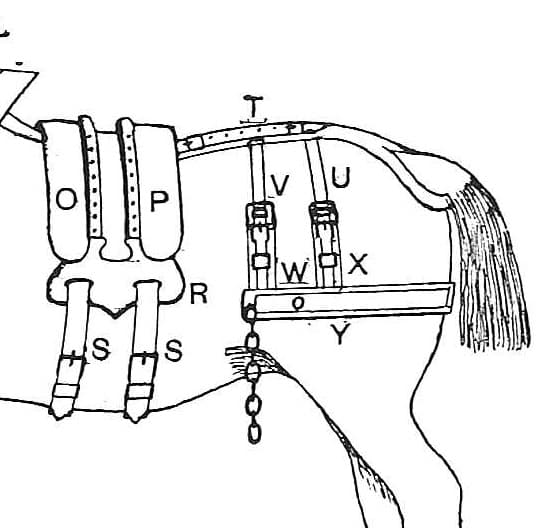
In leader (fore-gear) harness for a horse working in front of the shaft horse, the back-band (A in Fig. 102) carries the chain traces and the belly-band (D) keeps them down. This is the pair from Paul N. Hasluck's Harness Making (1904): a back-band about 4 ft 4 in long with a stitched eye at each end and two dees, and a 3 in belly-band between two chains. Every size is his.
Menengah
About 1 day
Instruksi
1
1
The back-band marks
The back-band marks
Memuat notebook Jupyter…
2
2
Read Harness Making, ch. VIII
Read Harness Making, ch. VIII
"The back-band A, to carry the traces, is the next part of the harness to be made. It must measure about 4 ft. 4 in. from tip to tip, including the terminal chains or the eye, to which the traces are hooked."
3
3
Cut and mark the back-band
Cut and mark the back-band
If pipe, cut the leather 6 ft 4 in by 5 in. Mark a cross-line 1 ft from each end and another 6 in from each of those, leaving 3 ft 4 in between the two middle marks. Cut a lining piece for each end, as wide as the back-band and 1 ft 3 in long. Shave both tips of the linings and the ends of the turn-in of the back-band thin. Crease, black and rub the back-band, creasing from the extreme lines right along.
Material untuk langkah ini:
 Kulit pelana dan tali kuda1 buah
 Pewarna kulit1 buah
Alat yang dibutuhkan:
 Pisau kulit
 Pensil
 Alat pelipat
 Obor Propana
 Penggosok tepi kulit
 Meteran Gulung
4
4
Prick, line and stitch the eye parts
Prick, line and stitch the eye parts
Prick from the outer cross-line at each end as far as the double will run, five rows with two on each side. Put the lining under the space between the two lines so that it is 6 in over one and 3 in over the other. Put a narrow piece, shaved at the inner edge and about 6 in long, on both ends at each side of the 6 in space, to strengthen the eye. Stitch the four rows in the 6 in space with three-cord thread, eight stitches per inch; turn the edges of this part and black and rub them.
Material untuk langkah ini:
Kulit pelana dan tali kuda1 buah Benang kulit1 buah
 Malam Lebah1 buahPewarna kulit1 buah
Alat yang dibutuhkan:
 Pahat jahit kulitPisau kulit
 Alat pembentuk tepi miring
 Penusuk (Uncek)
 Dua jarum pelana
 Penjepit kayu untuk menjahit kulit
5
5
Form the eyes and fit the dees
Form the eyes and fit the dees
Turn down the ends, bringing the cross-lines that divide the eye exactly opposite each other; flatten the eye so the lined parts come close together, and tack it. Take two 1 in dees, with a piece of leather inside each on the flat side for about half their width. Put one in each end between the double, close to the eye, one on each side of the back-band, low enough to stitch through the leather inside when stitching the outer row. Tack down the dees and the double, stitch right along both sides, the four rows at both ends and sides running to the top of the double from the cross rows. Stitch across the back-band along the cross-lines near the eye (he says stitch or spot with lace), and open out the eye with a thick piece of wood inside.
Material untuk langkah ini:
 Cincin D perlengkapan kuda2 buahKulit pelana dan tali kuda1 buah
 Paku penahan atasan1 buahBenang kulit1 buahMalam Lebah1 buah
Alat yang dibutuhkan:
 PaluPenusuk (Uncek)Dua jarum pelanaPenjepit kayu untuk menjahit kulit
 Papan pinus
6
6
Make the two trace straps
Make the two trace straps
Cut two straps 10 in by 3/4 in, put a buckle and loop on one end and punch four or five holes in the other. They pass through the dee at the side of the back-band and through a link in the trace, to hold the back-band in place. Some makers line the inner part of the eye with sole leather and put a safe under it, about 1 in wider at the bottom, narrowing to the back-band's width at the top, with the lower corners rounded, stitched in from the eye upwards.
Material untuk langkah ini:
Kulit pelana dan tali kuda1 buah Gesper besi berlidah2 buah
 Kulit sol1 buahBenang kulit1 buahMalam Lebah1 buah
Alat yang dibutuhkan:
Pisau kulit Mal sengkelit
 Plong kulitPenusuk (Uncek)Dua jarum pelana
7
7
Make the belly-band
Make the belly-band
Get a pair of 3 in chains and cut the leather 3 ft 4 in by 3 in. Turn in 4 in at the ends, and shave, edge, black and crease them. Put the leather into the openings in the chains, stitch four rows along the double part, and spot or stitch across near the chain.
Material untuk langkah ini:
 Rantai besi2 buahKulit pelana dan tali kuda1 buahPewarna kulit1 buahBenang kulit1 buahMalam Lebah1 buah
Alat yang dibutuhkan:
Pisau kulitAlat pembentuk tepi miringAlat pelipatObor PropanaPenusuk (Uncek)Dua jarum pelanaPenjepit kayu untuk menjahit kulitMeteran Gulung8
8
Troubleshooting
Troubleshooting
Back-band troubleshooting.
Flow
Loading...
9
9
History and honest limits
History and honest limits
From **Harness Making**, edited by Paul N. Hasluck, Cassell, 1904 (Project Gutenberg 70169), chapter VIII, "Fore Gear or Leader Harness", pp. 104-106, Fig. 102; every figure was checked on the archive.org scan (harnessmaking00hasl). He does not explain "if pipe" further. The long crupper, hip straps and tugs of the same gear are not made here. Stitching rather than lacing across the eye, the tools and metric figures are ours.
Bahan
9- Placeholder
- 3 buahPlaceholder
- 4 buahPlaceholder
- 4 buahPlaceholder
- Placeholder
- 1 buahPlaceholder
- 2 buahPlaceholder
- 1 buahPlaceholder
- 2 buahPlaceholder
Alat yang Diperlukan
15- Placeholder
- 1 vendor sell this, none ship to you yetPlaceholder
- Placeholder
- Placeholder
- Placeholder
- 1 vendor sell this, none ship to you yetPlaceholder
- Placeholder
- Placeholder
- Placeholder
- Placeholder
- Placeholder
- Placeholder
- Placeholder
- Placeholder
- Placeholder
Cetak biru ini membuat
Blueprint terkait
Blueprint ini berbagi pengetahuan — teknik, bahan, atau prinsip
CC0 Domain Publik
Cetak biru ini dirilis di bawah CC0. Anda bebas untuk menyalin, memodifikasi, mendistribusikan, dan menggunakan karya ini untuk tujuan apa pun, termasuk komersial, tanpa meminta izin.
Dukung Maker dengan membeli produk melalui Cetak Biru mereka di mana mereka mendapatkan Komisi Pembuat yang ditetapkan oleh Penjual, atau buat iterasi baru dari Cetak Biru ini dan masukkan sebagai koneksi di milik Anda sendiri.