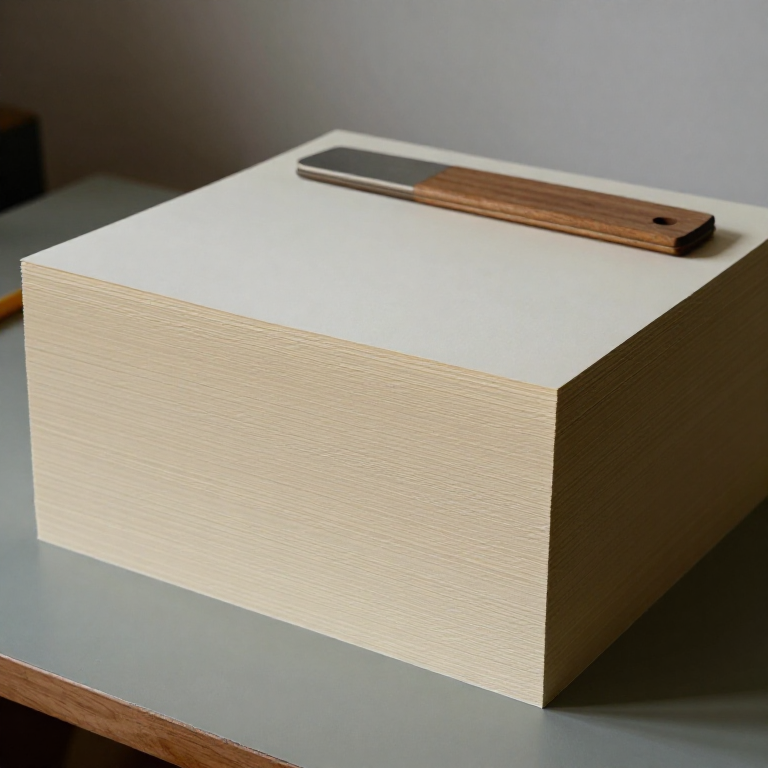


Pasteboard
Pasteboard is not thick paper. It is several thin sheets glued face to face and dried under pressure, and the difference matters: stiffness rises roughly with the cube of thickness, so four laminated sheets are far stiffer than one sheet of the same weight of pulp. That is why every early European playing card, book board and pattern template was laminated rather than cast thick.
The surviving fifteenth-century cards were made from pasteboard of three, four, or up to six sheets pasted together. The material had to be stiff enough to snap back flat after a shuffle, thick enough to be opaque so the face could not be read from the back, and smooth enough to take a printed line.
Everything here is flour paste, paper and patience. The only hard part is drying it flat.
Instruksi
Mix 20 g wheat flour into 100 ml cold water
Mix 20 g wheat flour into 100 ml cold water
Whisk 20 g of wheat flour into 100 ml of cold water until there are no lumps. Cold first — flour dropped into hot water seizes into knots that never disperse.
Material untuk langkah ini:
 Tepung gandum utuh20 g
Cook the paste to translucent
Cook the paste to translucent
Add 200 ml more water, heat gently and stir constantly until the mix turns from milky to translucent and thickens — around 80 °C. That change is the starch gelatinising, and it is what makes the paste adhesive.
Alat yang dibutuhkan:
 Termometer dapur
 Panci tim
Cool and strain the paste
Cool and strain the paste
Cool to room temperature and strain through a sieve. Lumps in the paste become visible bumps in the finished board.
Alat yang dibutuhkan:
 Ayakan Halus
Cut four sheets oversize
Cut four sheets oversize
Cut four sheets of paper 20 mm larger all round than the finished board. The edges will not laminate perfectly and get trimmed off at the end.
Material untuk langkah ini:
 Kertas cat air4 lembar
Find the grain direction of the paper
Find the grain direction of the paper
Tear a scrap both ways: it tears straighter along the grain. Mark the grain on each sheet.
Alternate the grain in the stack
Alternate the grain in the stack
Plan the stack so each sheet's grain runs at right angles to the one below. Cross-grain lamination is what stops the board curling — paper expands more across the grain than along it, so opposing layers cancel the movement.
Paste the first sheet evenly
Paste the first sheet evenly
Brush paste over one full face of the first sheet, working from the centre outward. Thin and even beats thick — excess paste squeezes out and cockles the surface.
Alat yang dibutuhkan:
 Set kuas lukis
Lay the next sheet and expel air
Lay the next sheet and expel air
Lay the second sheet down at 90° to the first and smooth from the centre out with a folder or the flat of your hand. Any trapped bubble becomes a permanent blister.
Repeat to four layers
Repeat to four layers
Paste and lay the third and fourth sheets the same way, alternating grain each time. Four layers is the middle of the historical range; three to six was normal.
Press between boards under weight
Press between boards under weight
Sandwich the wet stack between two flat boards with blotting paper either side and weight it down. Change the blotters after an hour.
Dry under load for 48 hours
Dry under load for 48 hours
Leave it weighted for two days. Drying free rather than under load is the single reliable way to produce a curled, useless board.
Trim to size
Trim to size
Trim off the ragged margin with a straightedge and knife, cutting several light passes rather than one heavy one.
Alat yang dibutuhkan:
 Pisau Kerajinan
 Penggaris
Burnish the working face
Burnish the working face
Rub the face down hard with a smooth stone, bone folder or the back of a spoon. Burnishing compresses the surface fibres and gives the smooth finish that a printed line needs.
Measure the stiffness you gained
Measure the stiffness you gained
Clamp a single sheet and then the finished board so 100 mm overhangs the edge of a table, and measure how far each tip droops. The comparison is the whole engineering argument for lamination, in one number.
Alat yang dibutuhkan:
PenggarisCheck it is opaque
Check it is opaque
Hold the board up to a lamp. If light passes, add a layer. For playing cards this was not cosmetic — a card you can read from the back is not a card, and later card stock added a dark middle layer specifically to defeat it.
History & Context
History & Context
The material behind the first mass-produced pictures. Most surviving fifteenth-century European playing cards are pasteboard of three, four, or up to six sheets glued together. The same material made bookbinding boards, pattern templates and later the mounts for photographs. It is the oldest engineered laminate in common use.
Flour and starch. Period paste was flour and starch cooked in water. It is cheap, reversible with moisture — a genuine advantage in conservation, where an old board can be taken apart — and it is also food for insects and mould, which is why old pasteboard is so often found damaged from the inside.
Grain, and why it curls. Machine and hand papers both have a grain from the way fibres settle. Paper swells across the grain much more than along it, so a laminate with all its layers running the same way bends as humidity changes. Alternating the layers puts the movement in opposition. The same principle became plywood four centuries later.
What changed with the machine. Nineteenth-century mills began making thick board directly on multi-cylinder machines, laying wet layers onto each other in one pass rather than pasting dry sheets. Hand pasteboard survived where the extra control was worth it, and it is still made that way for conservation binding and fine card work.
Bahan
2- Placeholder
- 4 lembarPlaceholder
Blueprint terkait
Blueprint ini berbagi pengetahuan — teknik, bahan, atau prinsip

CC0 Domain Publik
Cetak biru ini dirilis di bawah CC0. Anda bebas untuk menyalin, memodifikasi, mendistribusikan, dan menggunakan karya ini untuk tujuan apa pun, termasuk komersial, tanpa meminta izin.
Dukung Maker dengan membeli produk melalui Cetak Biru mereka di mana mereka mendapatkan Komisi Pembuat yang ditetapkan oleh Penjual, atau buat iterasi baru dari Cetak Biru ini dan masukkan sebagai koneksi di milik Anda sendiri.