
Kolaborasi
SENI
KECANTIKAN & KESEHATAN
KERAJINAN
BUDAYA & SEJARAH
HIBURAN
LINGKUNGAN
MAKANAN & MINUMAN
REKAYASA BALIK
ILMU PENGETAHUAN
OLAHRAGA
TEKNOLOGI
PERANGKAT PAKAI
Wishbone-Mast Ice Yacht: 16 ft Backbone, Twin-Pole Mast and Double Lateen Booms (Boy Mechanic, 1919)
Woody

Dibuat oleh

Woody

13. November 2026NO
8
0
0
0
0

Wishbone-Mast Ice Yacht: 16 ft Backbone, Twin-Pole Mast and Double Lateen Booms (Boy Mechanic, 1919)

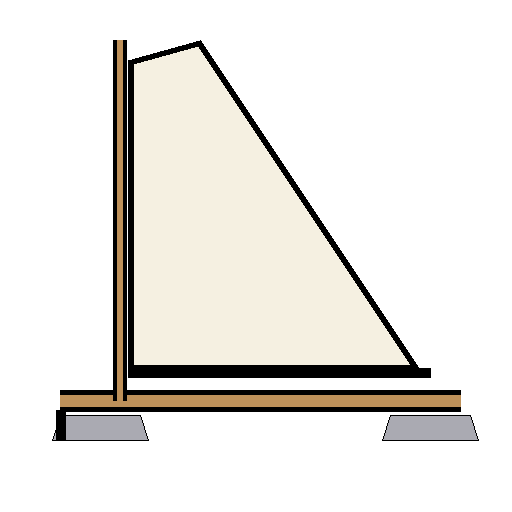
John F. Pjerrou's ice yacht from The Boy Mechanic, Book 3 (1919), for one or two passengers: a 16 ft spruce backbone on a 12 ft 6 in runner plank, oak runners shod with half-round iron, a mast of two 12 ft poles joined at the head, and two lateen sails on a yard and two 16 ft booms that spread into a V when running before the wind. It takes down for storage.
Lanjutan
Several weeks

Instruksi

1

Main sizes and the mast's height

Memuat notebook Jupyter…
2

Read The Boy Mechanic, Book 3

"The dimensions given are for a small yacht, and care must be taken, in adapting the design, to maintain proper proportions for stability and safety."
3

Make the backbone and runner plank

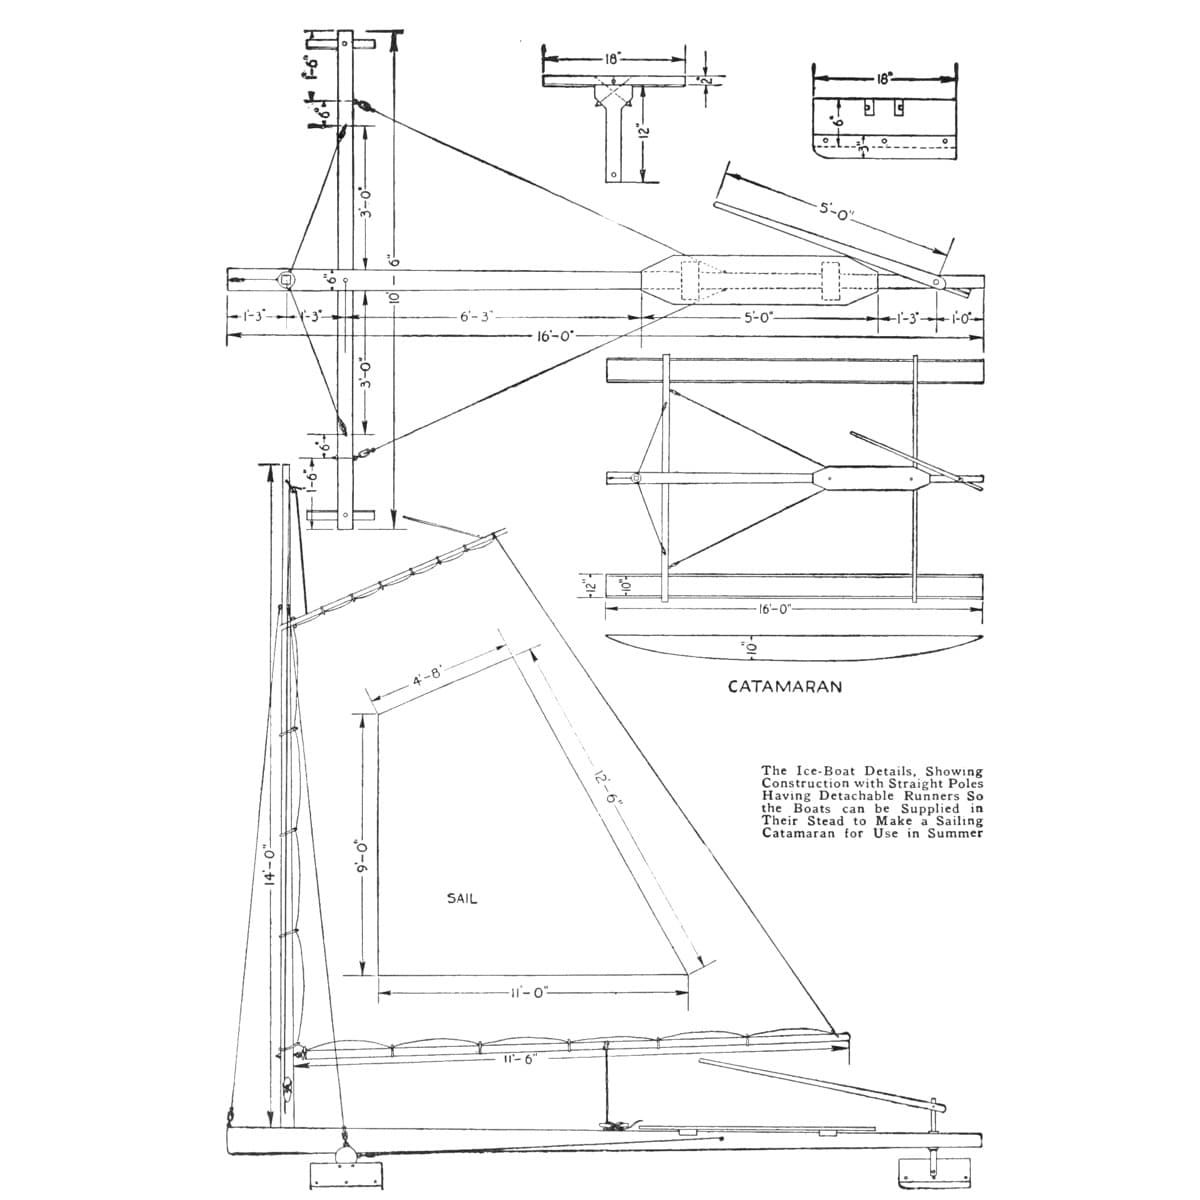
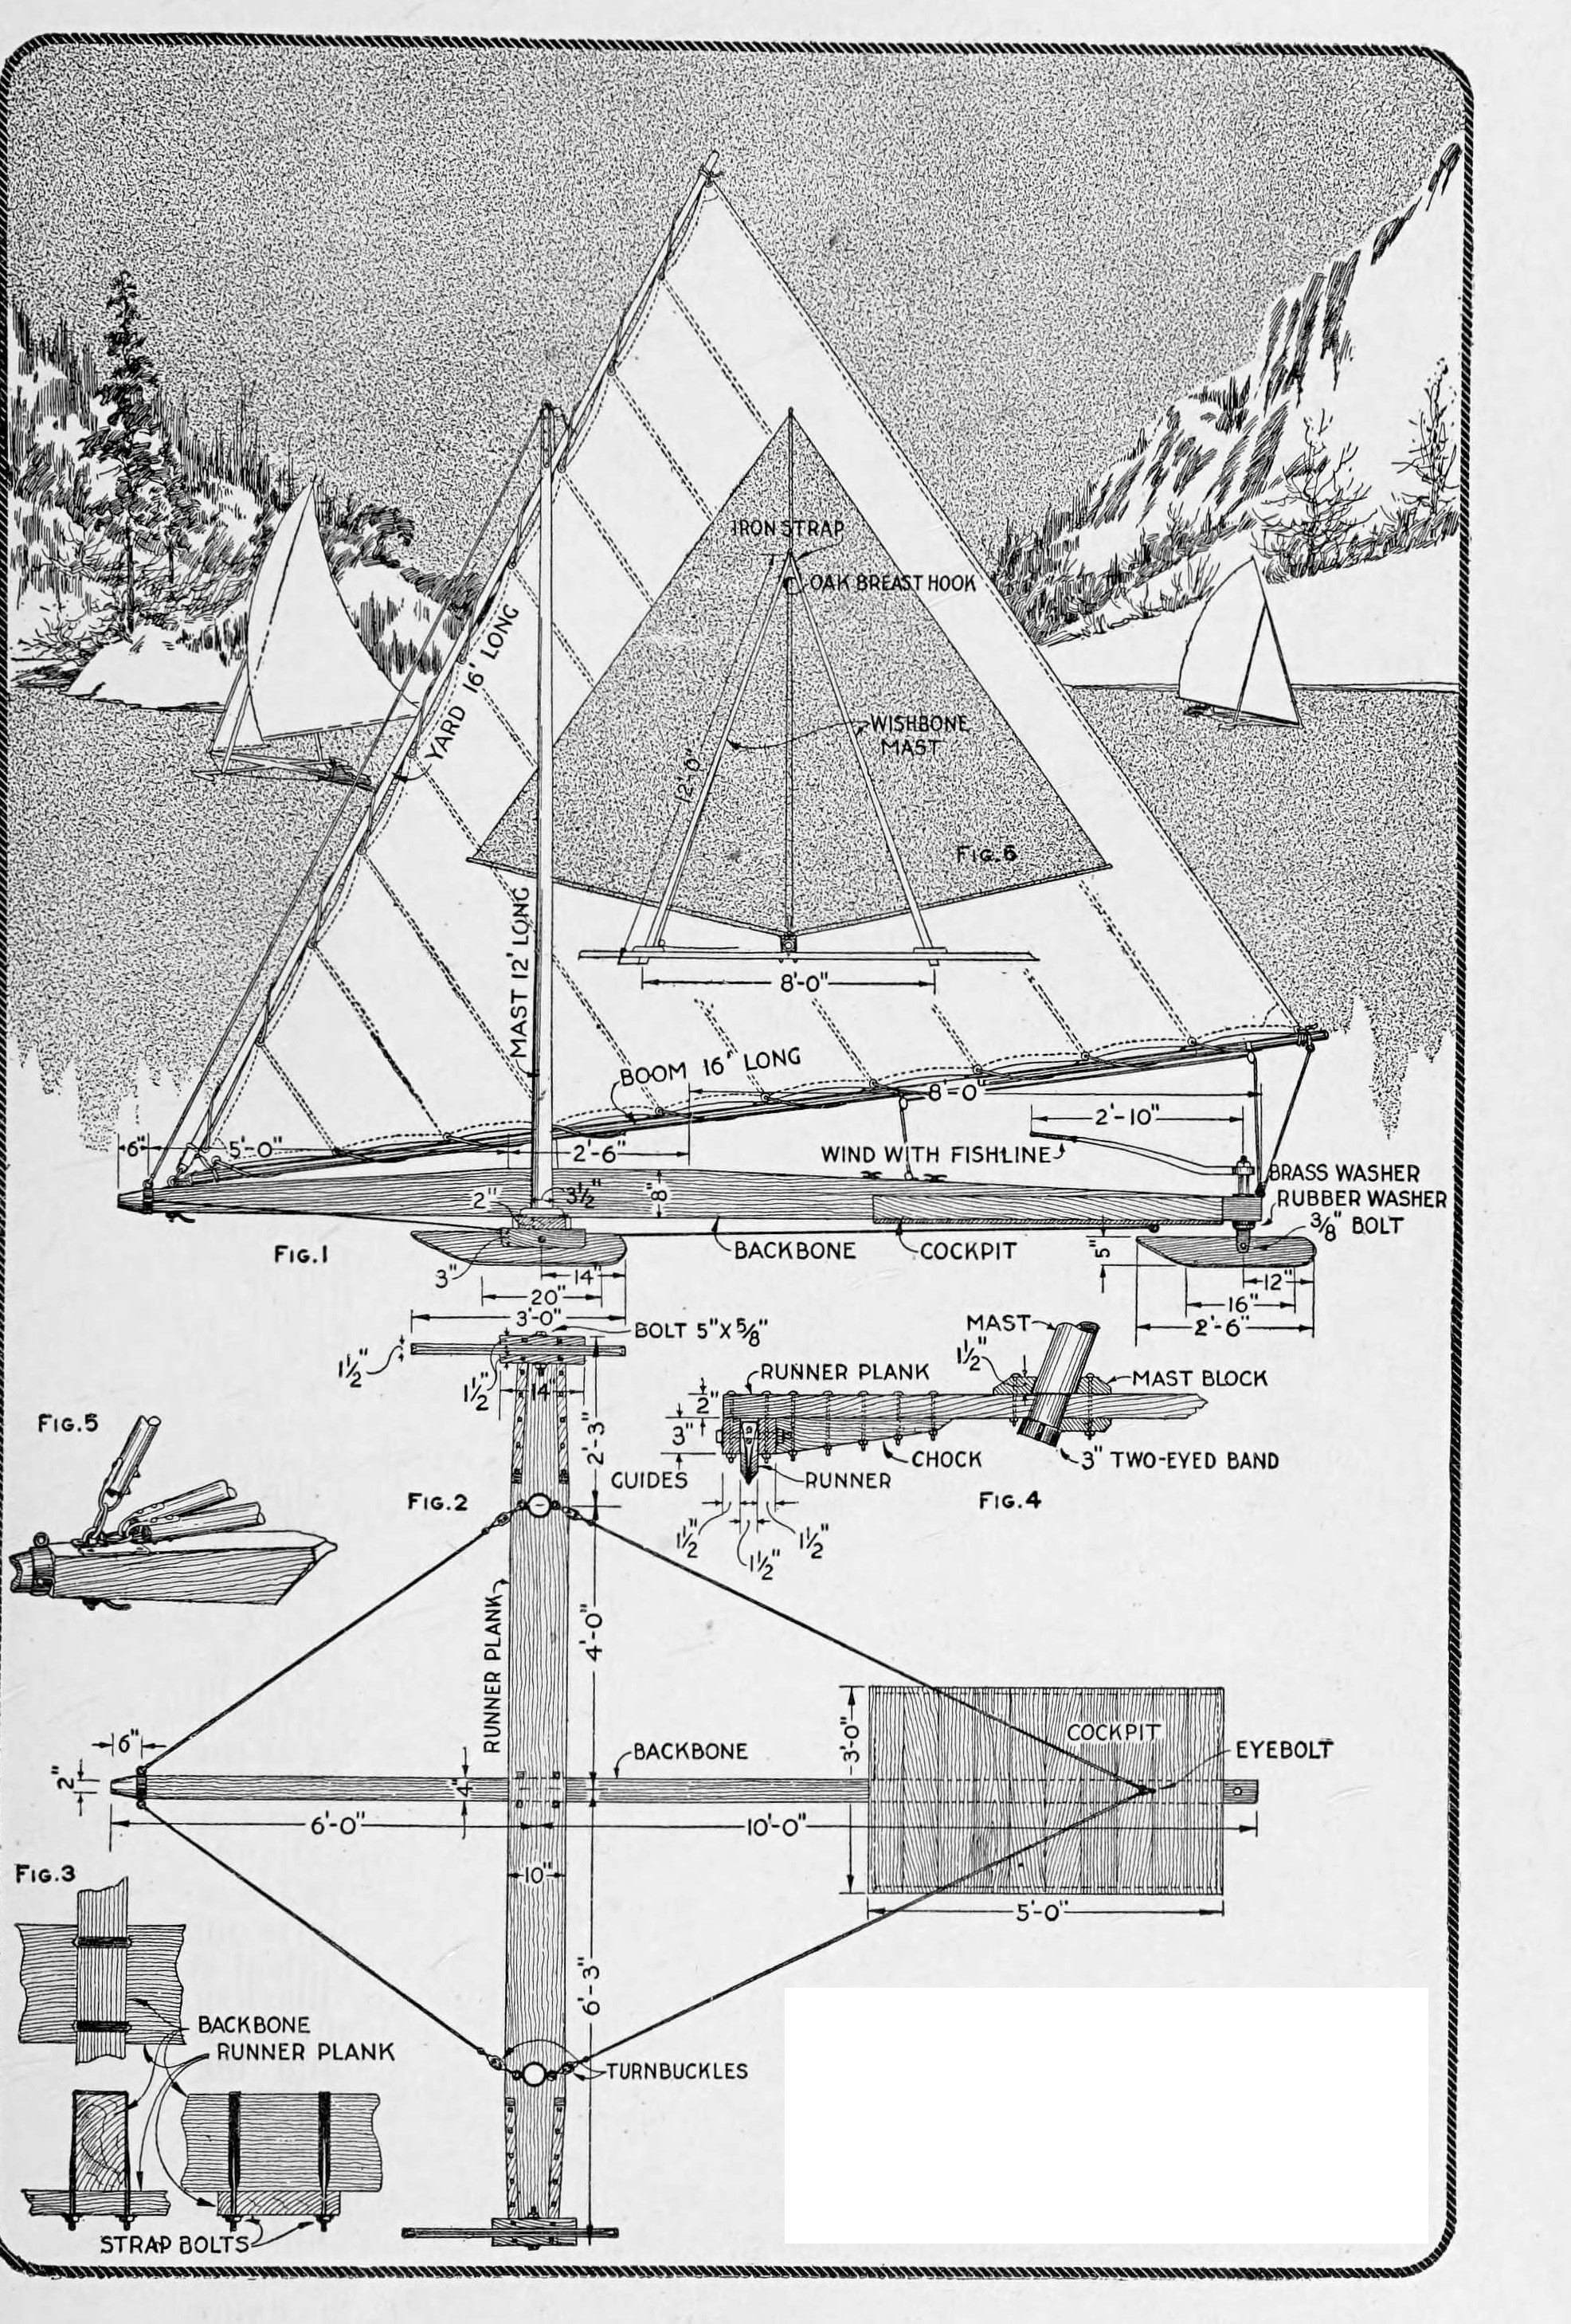
Use only the best straight-grained spruce or white pine. Backbone: 4 in thick, 16 ft long and 8 in high at the centre, with a ridge 8 in high and 2 ft 6 in long; taper it from the middle, 5 ft 6 in from the forward end, to 4 in at each end, and fit a three-eye metal ring at the bow (Figs. 1, 5). Runner plank: 2 in thick, 10 in wide, 12 ft 6 in long, tapered to 8 in at the ends. Set the backbone on the plank at right angles, 6 ft from the bow, and clamp them with two strap bolts, washers and nuts (Figs. 2, 3).

Material untuk langkah ini:

Kayu pinusKayu pinus2 buah
Cincin logamCincin logam1 buah
Baut UBaut U2 buah
Ring RataRing Rata4 buah
Mur Segi EnamMur Segi Enam4 buah

Alat yang dibutuhkan:

Gergaji TanganGergaji Tangan
Ketam tanganKetam tangan
Pisau TarikPisau Tarik
Bor engkol dan mata borBor engkol dan mata bor
Kunci InggrisKunci Inggris
Meteran GulungMeteran Gulung
PensilPensil
4

Fit the guides and forward runners

Bolt guides of straight-grained oak, 1-1/2 by 3 by 14 in, to the plank ends with 5/16 in carriage bolts, and bolt oak chocks at each tapered edge (Fig. 4). Make the forward runners of oak, 1-1/2 by 5 by 36 in, shaped at the ends as drawn, and shoe them with half-round strap iron held by screws with carefully countersunk heads. Pivot them on 5/8 in bolts (5 in long in Fig. 1), nuts to the inner side, with washers and jam nuts, or rivet the bolt ends slightly so the nuts cannot work loose.

Material untuk langkah ini:

Papan ek putihPapan ek putih3 buah
Baut kepala bulat leher persegiBaut kepala bulat leher persegi8 buah
Batang besi setengah bulatBatang besi setengah bulat2 buah
Sekrup kayuSekrup kayu1 buah
Ring RataRing Rata4 buah
Mur Segi EnamMur Segi Enam4 buah

Alat yang dibutuhkan:

Gergaji TanganGergaji Tangan
Ketam tanganKetam tangan
Bor engkol dan mata borBor engkol dan mata bor
Bor tanganBor tangan
Set Mata Bor BenamSet Mata Bor Benam
Gergaji BesiGergaji Besi
Kunci InggrisKunci Inggris
5

Make the stern runner and steering

Make the stern runner of oak, 1-1/2 by 5 by 30 in, shod like the others. Pivot it on a 3/8 in bolt in a hanger of heavy iron strip bent into a U and riveted to a vertical shaft. Put a heavy rubber washer, protected by a metal one, on the shaft; thread its upper end for a washer and nut, slip a section of pipe over the shaft, and clamp the steering handle (2 ft 10 in in Fig. 1) on a squared part of the shaft. The hanger may be forged, or made by a blacksmith.

Material untuk langkah ini:

Papan ek putihPapan ek putih1 buah
Batang besi setengah bulatBatang besi setengah bulat1 buah
Besi Strip Baja LunakBesi Strip Baja Lunak1 buah
Batang bulat baja lunakBatang bulat baja lunak1 buah
Paku keling besiPaku keling besi2 buah
Baut kepala bulat leher persegiBaut kepala bulat leher persegi1 buah
Ring karetRing karet1 buah
Ring RataRing Rata2 buah
Mur Segi EnamMur Segi Enam2 buah
Pipa baja galvanisPipa baja galvanis1 buah

Alat yang dibutuhkan:
Tungku TempaTungku Tempa
Landasan TempaLandasan Tempa
PaluPalu
Ragum MejaRagum Meja
Gergaji BesiGergaji Besi
Bor tanganBor tangan
Kikir (Kikir Tangan)Kikir (Kikir Tangan)
Kunci InggrisKunci Inggris
6

Build the cockpit

Fix a cockpit 5 ft long and 3 ft wide, with 4 in coaming, to the lower side of the backbone toward the stern; fasten its floor to the backbone with lag screws and fasten the coaming securely. Square corners are easiest; rounded ends with steamed, bent coaming are better. Larger craft may carry it on ribs.

Material untuk langkah ini:

Papan pinusPapan pinus4 buah
Sekrup lag (sekrup kepala baut)Sekrup lag (sekrup kepala baut)6 buah
Sekrup kayuSekrup kayu1 buah

Alat yang dibutuhkan:

Gergaji TanganGergaji Tangan
Bor engkol dan mata borBor engkol dan mata bor
Kunci InggrisKunci Inggris
Meteran GulungMeteran Gulung
7

Square up and stay the frame

Line up runners, plank and backbone at right angles so the craft tracks true. Hold them with four 1/4 in wire-rope stays with turnbuckles, from eyes on the bow band and on the bands at the plank ends to an eyebolt below the cockpit (Fig. 2). Loop each rope end and clamp the eye with steel clamps made for the purpose (wire-rope clips); metal thimbles in the loops make a better finish.

Material untuk langkah ini:

Tali kawat baja (sling)Tali kawat baja (sling)1 buah
Spanskrup (turnbuckle)Spanskrup (turnbuckle)4 buah
BidalBidal8 buah
Klem tali kawatKlem tali kawat8 buah
Baut mataBaut mata1 buah

Alat yang dibutuhkan:

Gergaji BesiGergaji Besi
Kunci InggrisKunci Inggris
Meteran GulungMeteran Gulung
8

Make the wishbone mast

Shape two poles of hickory or ash, 3-1/2 in thick at the base and 2 in at the top (12 ft in Fig. 6). Join them carefully at the masthead, bolt them together into an oak breast hook, and reinforce the joint with an iron strap with an eye at its upper end for the forward stay. Step the lower ends in sockets in the runner plank, about 8 ft apart, reinforced with oak mast blocks, and fit their projecting ends with 3 in two-eyed bands for the stays (Figs. 4, 6).

Material untuk langkah ini:

Galah kayuGalah kayu2 buah
Papan ek putihPapan ek putih1 buah
Besi Strip Baja LunakBesi Strip Baja Lunak1 buah
Baut kepala bulat leher persegiBaut kepala bulat leher persegi2 buah
Mur Segi EnamMur Segi Enam2 buah

Alat yang dibutuhkan:

Pisau TarikPisau Tarik
Ketam tanganKetam tangan
Gergaji TanganGergaji Tangan
Bor engkol dan mata borBor engkol dan mata bor
Pahat kayuPahat kayu
Tungku TempaTungku Tempa
Landasan TempaLandasan Tempa
PaluPalu
9

Make the yard and booms

Make the yard and two booms of hickory or ash, each 16 ft long, 2-3/4 in at the middle tapering to 1-1/2 in at the ends, with metal rings on the ends against splitting. Bolt loops to their forward ends to engage an eyebolt and ring on the backbone at the bow; set the eyebolt in a slotted plate of 3/16 in sheet iron, fastened by a lever nut (Fig. 5).

Material untuk langkah ini:

Galah kayuGalah kayu3 buah
Cincin logamCincin logam6 buah
Baut mataBaut mata1 buah
Pelat Baja LunakPelat Baja Lunak1 buah
Besi Strip Baja LunakBesi Strip Baja Lunak1 buah
Baut kepala bulat leher persegiBaut kepala bulat leher persegi3 buah
Mur Segi EnamMur Segi Enam3 buah

Alat yang dibutuhkan:

Pisau TarikPisau Tarik
Ketam tanganKetam tangan
Gergaji BesiGergaji Besi
Bor tanganBor tangan
Kikir (Kikir Tangan)Kikir (Kikir Tangan)
Ragum MejaRagum Meja
10

Sew the sails

Make two lateen sails of 8-oz unbleached cotton duck: lap the breadths about 1 in and stitch along the edge (or fold 1 in and double-stitch), the seams parallel to the leech. Reinforce each corner with a triangular patch of duck and bind the edges with 1/4 in tarred rope, using a sailor's palm, a diamond-pointed needle and sail twine, well waxed (the wax is ours: beeswax). Along the yard and boom edges punch holes, set two 3/4 in brass grommet rings in each, one each side, and overcast them with buttonhole stitch. Sew in reef points of 1/8 in cotton rope, whipped at the ends.

Material untuk langkah ini:

Kain kanvasKain kanvas1 buah
Benang layarBenang layar1 buah
Malam LebahMalam Lebah1 buah
Tali bertirTali bertir1 buah
Gromet kuninganGromet kuningan40 buah
Tambang kapasTambang kapas1 buah

Alat yang dibutuhkan:
Pelindung telapak penjahit layarPelindung telapak penjahit layar
Jarum layarJarum layar
Pelubang kertasPelubang kertas
GuntingGunting
Meteran GulungMeteran Gulung
11

Set up and rig

Fit the forward ring and strap bolts, the runners and steering, then step the mast, clamp the masthead and fit the bands; set the bottom stays and the masthead stay with the turnbuckles. Lace the sails to yard and booms and fix the forward ends at the bow. Run a 3/8 in halyard from the yard through a pulley at the masthead and a second on the runner plank to cleats by the cockpit, and haul up so the sails set. Lash the main sheets to the boom ends, through pulleys at the stern of the backbone and on the booms about 1 ft and 5 ft from their ends, then to cleats at the cockpit; the second boom needs a duplicate set. Taking down is the reverse.

Material untuk langkah ini:

TaliTali1 buah
KatrolKatrol6 buah
Kleat tambatKleat tambat4 buah
Sekrup kayuSekrup kayu1 buah

Alat yang dibutuhkan:

Kunci InggrisKunci Inggris
Bor tanganBor tangan
12

Finish

Smooth the masts, yard and booms, sandpaper them lightly and give them several coats of spar varnish; paint the other woodwork. He gives the metal fittings two coats of red lead "or other good paint for use on metals exposed to the weather": red lead is a lead poison, so use the other paint.

Material untuk langkah ini:

AmplasAmplas1 buah
Pernis tiang kapalPernis tiang kapal1 buah
Cat minyakCat minyak1 buah

Alat yang dibutuhkan:

Kuas lebarKuas lebar
13

Sailing and troubleshooting

Ice yacht sailing.

Flow

Loading...
14

History and honest limits

From "A Wishbone-Mast Ice Yacht" by John F. Pjerrou, in **The Boy Mechanic, Book 3**, Popular Mechanics, 1919 (Project Gutenberg 71856; checked on the archive.org scan boymechanic0003unse, pp. 17-20). He gives no sail outline sizes. The tools, the metric figures and the choice of the non-lead paint he allows are ours.

Bahan

35

Alat yang Diperlukan

21

Cetak biru ini membuat

CC0 Domain Publik

Cetak biru ini dirilis di bawah CC0. Anda bebas untuk menyalin, memodifikasi, mendistribusikan, dan menggunakan karya ini untuk tujuan apa pun, termasuk komersial, tanpa meminta izin.

Dukung Maker dengan membeli produk melalui Cetak Biru mereka di mana mereka mendapatkan Komisi Pembuat yang ditetapkan oleh Penjual, atau buat iterasi baru dari Cetak Biru ini dan masukkan sebagai koneksi di milik Anda sendiri.

Diskusi

(0)

Masuk untuk bergabung dengan diskusi

Memuat komentar...