कला
सौंदर्य और कल्याण
हस्तशिल्प
संस्कृति और इतिहास
मनोरंजन
पर्यावरण
खाद्य और पेय
रिवर्स इंजीनियरिंग
विज्ञान
खेल
प्रौद्योगिकी
पहनने योग्य
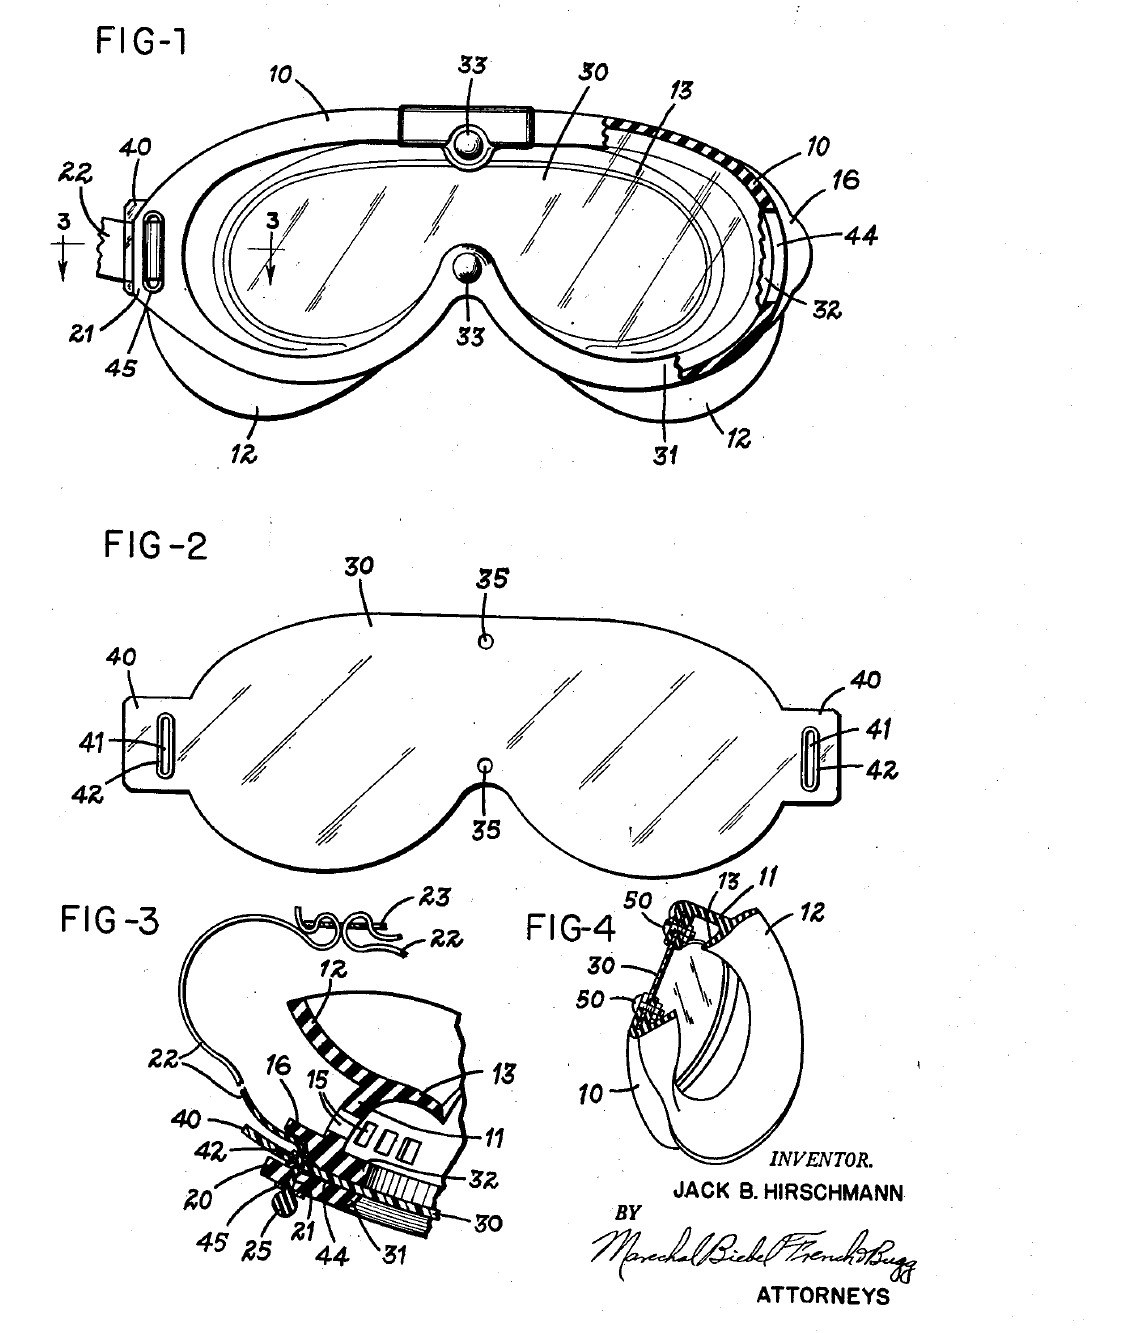


Chemical Splash Goggles: One Sealed Lens in a Moulded Rubber Frame (Hirschmann, 1954)
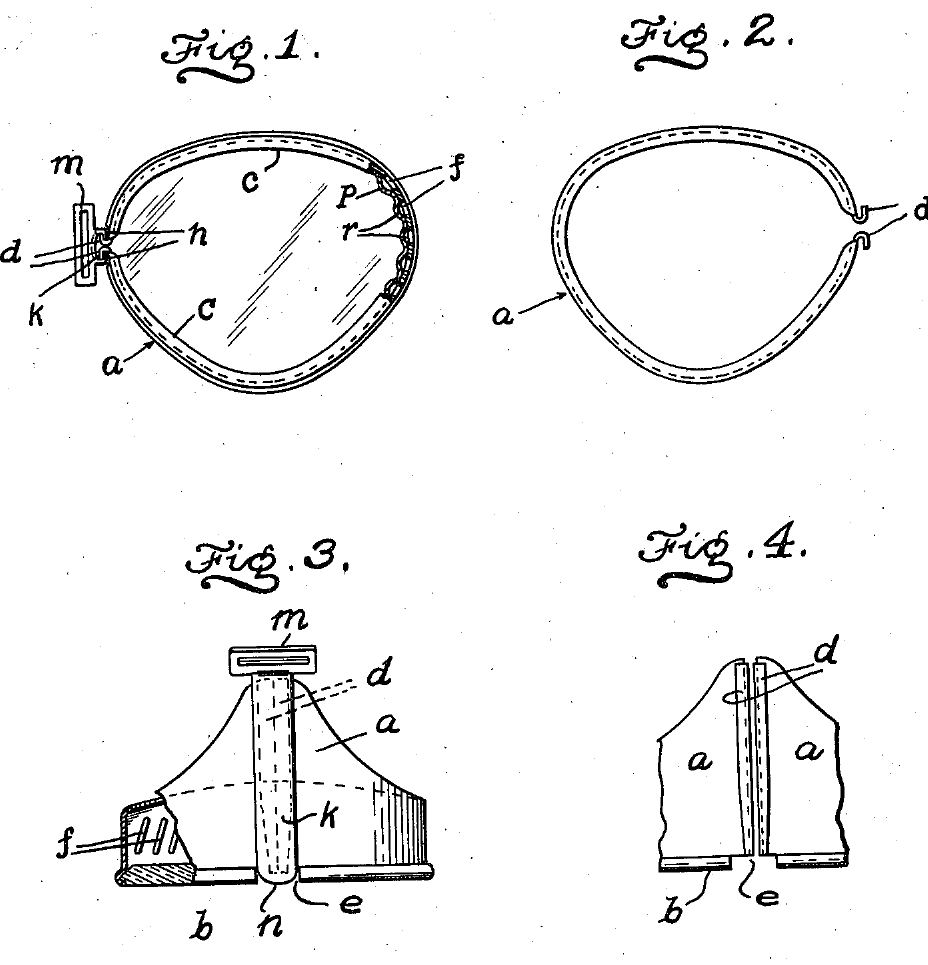
Goggles for work with corrosive liquids. One clear plastic lens covers both eyes and sits sealed all round in a soft moulded rubber frame that seals against the face. The version for gas and corrosive liquids has no vent holes at all, and the strap passes through tabs outside the lens, so nothing can leak through or around the part you look through.
Result: chemical splash goggles with a lens you can pull out and replace, and a strap pull shared evenly between lens and frame, so neither warps.
Source: J. B. Hirschmann, US Patent 2,680,846 (1954), Fig. 4 version. Unknown: sizes, the rubber compound, the strap material and how the frame is moulded. Ours: the mould; the patent tested a cellulose acetate lens. Picture: patent drawing.
मध्यवर्ती
2 days
निर्देश
1
1
Mould the rubber frame
Mould the rubber frame
Mould the frame in one piece from rubber. The front rim has one opening shaped for both eyes, narrower above the nose. Behind it, a wall forms the eye chamber and ends in a double flange that seals against the face. Inside the rim, form a channel between an outer and an inner flange to hold the lens edge. At each end, mould a lug with a strap slot and a slit through the channel for the lens tab. For corrosive liquids, leave out all vent holes. Ours: a compression mould.
इस चरण के लिए सामग्री:
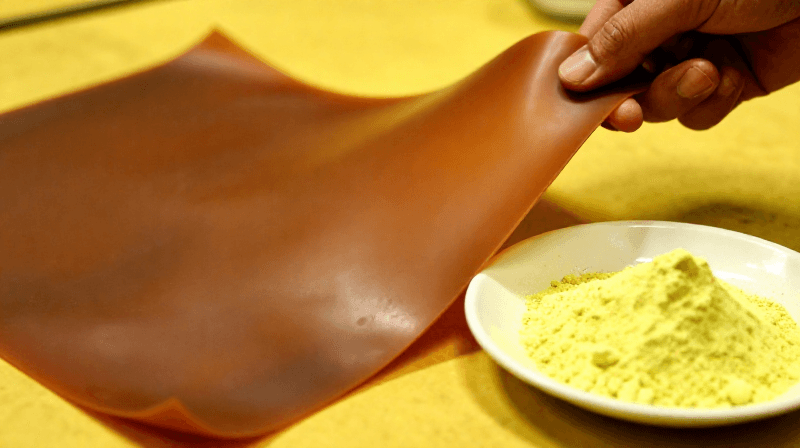
 रबर कंपाउंड1 frame
आवश्यक उपकरण:
 संपीडन साँचा
 अज्ञात माप
2
2
Cut the lens
Cut the lens
Cut one lens from flexible clear plastic, shaped to match the rim. The patent tested cellulose acetate. Leave a tab at each end, outside the area you look through. Cut a closed slot in each tab and line it with a grommet. Make two holes at the centre for the bolts. Leave no other holes in the viewing area.
इस चरण के लिए सामग्री:
 पारदर्शी प्लास्टिक की चादर1 lens
 आईलेट2 tab grommets
आवश्यक उपकरण:
 चादर काटने की कैंची
 केंद्र-छेदक
3
3
Seal the lens in the frame
Seal the lens in the frame
Spring the lens edge into the channel all the way round, pushing each tab out through its slit so it lies under the lug, slot over slot. Fasten the centre with two stainless-steel bolts and nuts. (The vented version uses snap fasteners here.)
इस चरण के लिए सामग्री:
 मशीन पेंच2 stainless steel
 षट्कोणीय नट2 stainless steel
आवश्यक उपकरण:
 पेचकस सेट
4
4
Fit the head strap
Fit the head strap
Use a strap in two halves, joined at the back by a buckle, each half with a thickened end. Slide a slotted plate of metal or plastic onto each half, then thread it from the front through the lug slot and the lens-tab slot. The thick end stops against the plate and lug. The pull of the strap now goes into both lens and frame, holds the lens in, and stays outside the field of view.
इस चरण के लिए सामग्री:
 सुरक्षा चश्मे की सिर पट्टी1 two halves
 जीभदार पीतल का बकसुआ1 टुकड़ा
 अज्ञात सामग्री1 two slotted plates
आवश्यक उपकरण:
अज्ञात मापसामग्री
8- 1 frameप्लेसहोल्डर
- प्लेसहोल्डर
- 2 tab grommetsप्लेसहोल्डर
- 2 stainless steelप्लेसहोल्डर
- 2 stainless steelप्लेसहोल्डर
- 1 two halvesप्लेसहोल्डर
- 1 टुकड़ाप्लेसहोल्डर
- 1 two slotted platesप्लेसहोल्डर
आवश्यक उपकरण
5- प्लेसहोल्डर
- प्लेसहोल्डर
- प्लेसहोल्डर
- प्लेसहोल्डर
- प्लेसहोल्डर
कनेक्टेड ब्लूप्रिंट सामग्री
यह ब्लूप्रिंट बनाता है

संबंधित ब्लूप्रिंट
ये ब्लूप्रिंट ज्ञान साझा करते हैं — तकनीक, सामग्री या सिद्धांत

CC0 पब्लिक डोमेन
यह ब्लूप्रिंट CC0 के तहत जारी किया गया है। आप बिना अनुमति माँगे इस कार्य को किसी भी उद्देश्य के लिए कॉपी, संशोधित, वितरित और उपयोग करने के लिए स्वतंत्र हैं।
उनके ब्लूप्रिंट के माध्यम से उत्पाद खरीदकर मेकर का समर्थन करें जहाँ वे मेकर कमीशन कमाते हैं जो विक्रेताओं द्वारा निर्धारित होता है, या इस ब्लूप्रिंट का नया संस्करण बनाएँ और राजस्व साझा करने के लिए इसे अपने ब्लूप्रिंट में कनेक्शन के रूप में शामिल करें।