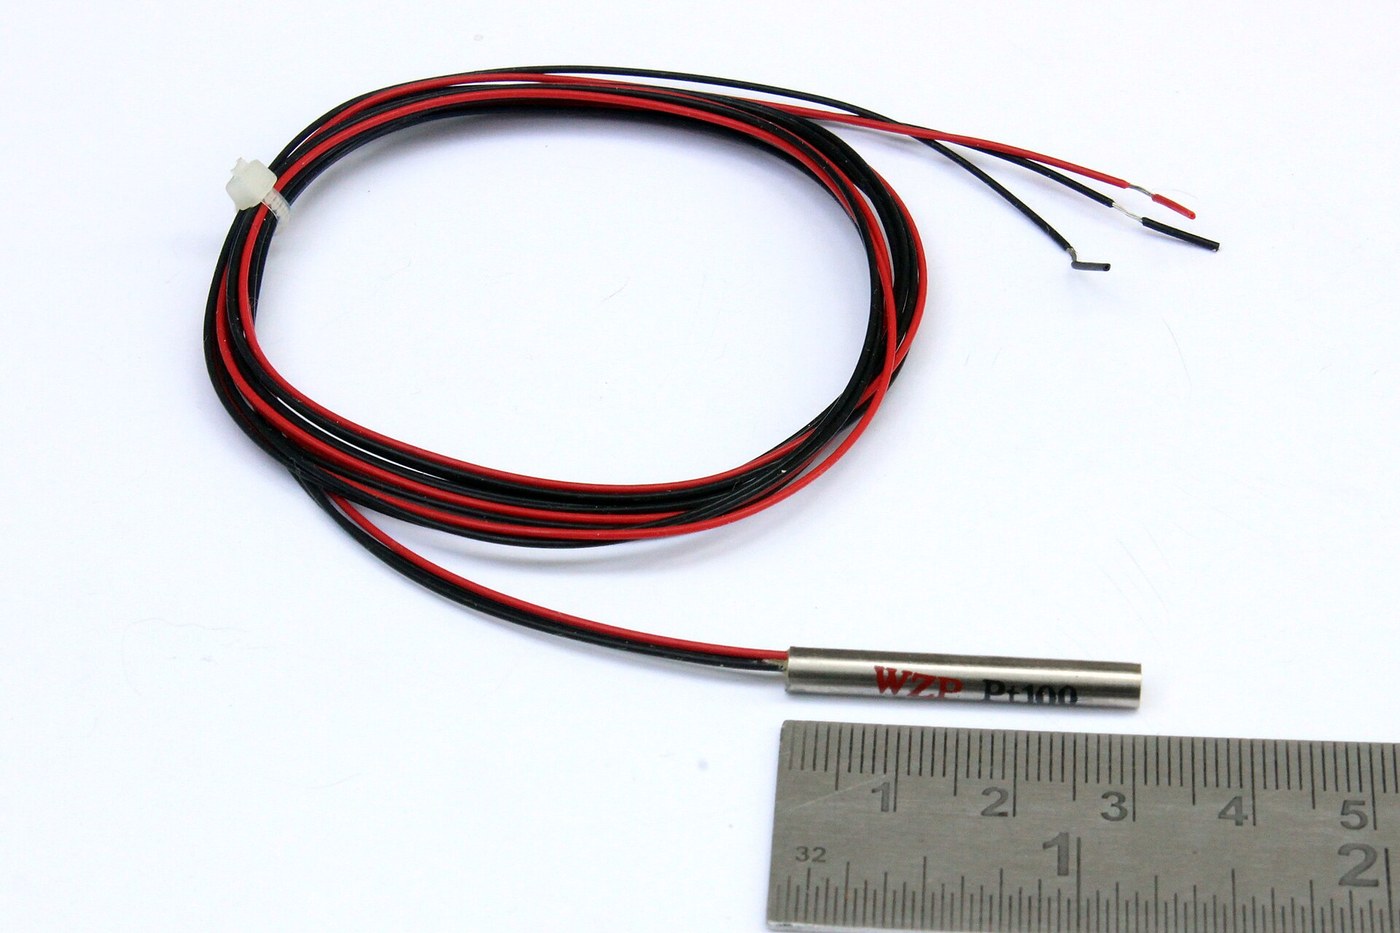


Resistance Thermometer
निर्देश
Wind a sensing element and measure its coefficient
Wind a sensing element and measure its coefficient
A length of fine wire whose resistance you can watch change.
- Wind about two metres of fine enamelled copper wire onto a small ceramic or glass former, non-inductively if you can.
- Measure its resistance at room temperature with a four-wire meter or a bridge.
- Immerse it in melting ice and measure again.
- Immerse it in boiling water and measure again.
- Compute the change per degree as a fraction of the resistance at 0 °C.
Copper's resistance changes by roughly 0.4 per cent per degree. That sounds large until you realise a 100 ohm element changes by only 0.4 ohms per degree — comparable to the resistance of a few metres of connecting cable. The smallness of the signal relative to the wiring is the entire engineering problem of resistance thermometry.
Wind it non-inductively — fold the wire double and wind the pair together — so the element does not act as a coil. It matters when the element is used in an environment with changing magnetic fields, and it costs nothing to do.इस चरण के लिए सामग्री:
 इनैमल-लेपित ताँबे का तार1 रोल
 सिरेमिक रिटॉर्ट नली (अग्निसह मिट्टी)1 टुकड़ा
 ग्राफ़ पेपर1 pad
आवश्यक उपकरण:
 प्रयोगशाला श्रेणी का डिजिटल मल्टीमीटर
 रसोई थर्मामीटर
 डिजिटल वर्नियर कैलिपर, 6 इंच
Build a Wheatstone bridge around it
Build a Wheatstone bridge around it
The bridge turns a small resistance change into a readable voltage.
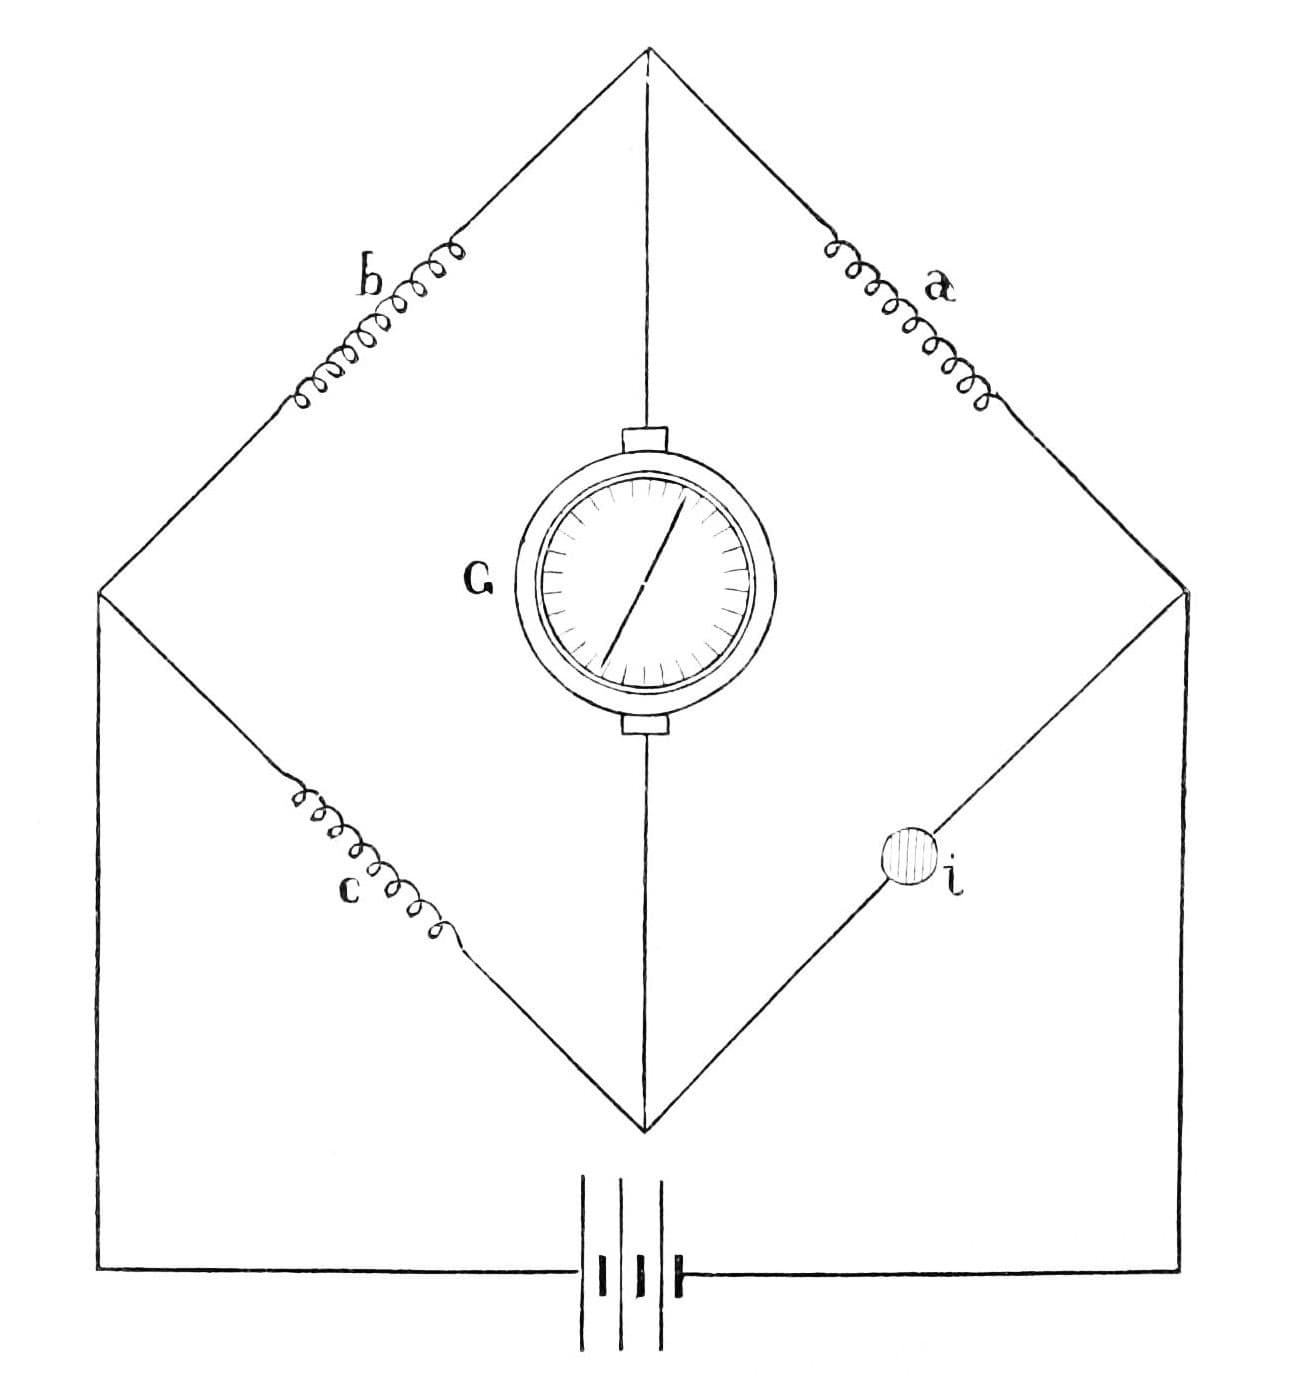
- Build the classic four-arm bridge: your sensing element in one arm, three fixed resistors in the others.
- Choose the fixed resistors to equal the element's resistance at 0 °C.
- Power the bridge from a low, stable voltage.
- Measure across the bridge's midpoints with the multimeter.
- Adjust one arm until the output is zero at 0 °C — this is balancing the bridge.
The bridge measures a DIFFERENCE from a reference, not an absolute value. That is what gives it sensitivity: instead of trying to detect a 0.4 ohm change in 100 ohms with a meter, you null out the 100 ohms entirely and measure only what is left. The technique is Wheatstone's, published in 1843, and it turns up again at the end of this batch measuring strain rather than temperature.
Use a low excitation voltage. Current through the sensing element heats it, and a sensor that warms itself reports its own dissipation as process temperature — self-heating error, and it is easy to create and hard to notice.इस चरण के लिए सामग्री:
 1/4 वाट प्रतिरोधक किट1 किट
 समायोज्य बेंच विद्युत आपूर्ति1 टुकड़ा
आवश्यक उपकरण:
प्रयोगशाला श्रेणी का डिजिटल मल्टीमीटर एनालॉग मल्टीमीटरडिजिटल वर्नियर कैलिपर, 6 इंच
Prove that the cable is in your reading
Prove that the cable is in your reading
The classic two-wire error, demonstrated deliberately.
- Connect the element with short leads and record the indicated temperature.
- Now insert ten metres of the same wire in each lead, without changing anything else.
- Record the indicated temperature again.
- Warm the long cable — not the sensor — with a hair dryer and watch the reading change.
इस चरण के लिए सामग्री:
 ताँबे का तार1 रोल
आवश्यक उपकरण:
प्रयोगशाला श्रेणी का डिजिटल मल्टीमीटर स्टॉपवॉचरसोई थर्मामीटर
Compare directly against the thermocouple
Compare directly against the thermocouple
Two sensors, one bath, and the differences are exactly the selection criteria.
- Put your resistance element and your thermocouple in the same water bath.
- Heat the bath slowly and record both readings every 30 seconds.
- Plot both against time.
- Now plunge both into hot water from cold and record how quickly each settles.
- Leave both running for an hour at constant temperature and note any drift.
इस चरण के लिए सामग्री:
ग्राफ़ पेपर1 padआवश्यक उपकरण:
प्रयोगशाला श्रेणी का डिजिटल मल्टीमीटरस्टॉपवॉचरसोई थर्मामीटरWhy platinum defines the scale, and history
Why platinum defines the scale, and history
Hugh Longbourne Callendar published his systematic work on platinum resistance thermometry in 1887, establishing both the practical instrument and the equation relating resistance to temperature. Earlier workers including William Siemens had proposed the principle; Callendar made it into a metrological standard.
Platinum is chosen for stability, not sensitivity. Copper and nickel both change resistance more per degree, which would seem better. Platinum wins because it does not oxidise, does not contaminate easily, can be made extremely pure and repeatably so, and behaves identically decade after decade. An instrument that is very sensitive but drifts is worse than one that is less sensitive and does not — and that trade recurs constantly in measurement.
It became the definition. The International Temperature Scale specifies the platinum resistance thermometer as the defining instrument across most of its range, calibrated at fixed points like the triple point of water. This is an unusual honour: not merely a good way to measure temperature, but the agreed embodiment of what the temperature scale IS between those fixed points.
Its honest limits: an upper temperature well below what thermocouples reach; slower response because the element has real mass; self-heating if excited too hard; and a sensitivity to lead resistance that forces three- or four-wire installation. For furnaces you use a thermocouple, for a laboratory bath you use platinum, and knowing why is the point of the comparison in step 4.
सामग्री
6- प्लेसहोल्डर
- प्लेसहोल्डर
- 1 padप्लेसहोल्डर
- प्लेसहोल्डर
- 1 टुकड़ाप्लेसहोल्डर
- 1 रोलप्लेसहोल्डर
यह ब्लूप्रिंट बनाता है
संबंधित ब्लूप्रिंट
ये ब्लूप्रिंट ज्ञान साझा करते हैं — तकनीक, सामग्री या सिद्धांत
CC0 पब्लिक डोमेन
यह ब्लूप्रिंट CC0 के तहत जारी किया गया है। आप बिना अनुमति माँगे इस कार्य को किसी भी उद्देश्य के लिए कॉपी, संशोधित, वितरित और उपयोग करने के लिए स्वतंत्र हैं।
उनके ब्लूप्रिंट के माध्यम से उत्पाद खरीदकर मेकर का समर्थन करें जहाँ वे मेकर कमीशन कमाते हैं जो विक्रेताओं द्वारा निर्धारित होता है, या इस ब्लूप्रिंट का नया संस्करण बनाएँ और राजस्व साझा करने के लिए इसे अपने ब्लूप्रिंट में कनेक्शन के रूप में शामिल करें।