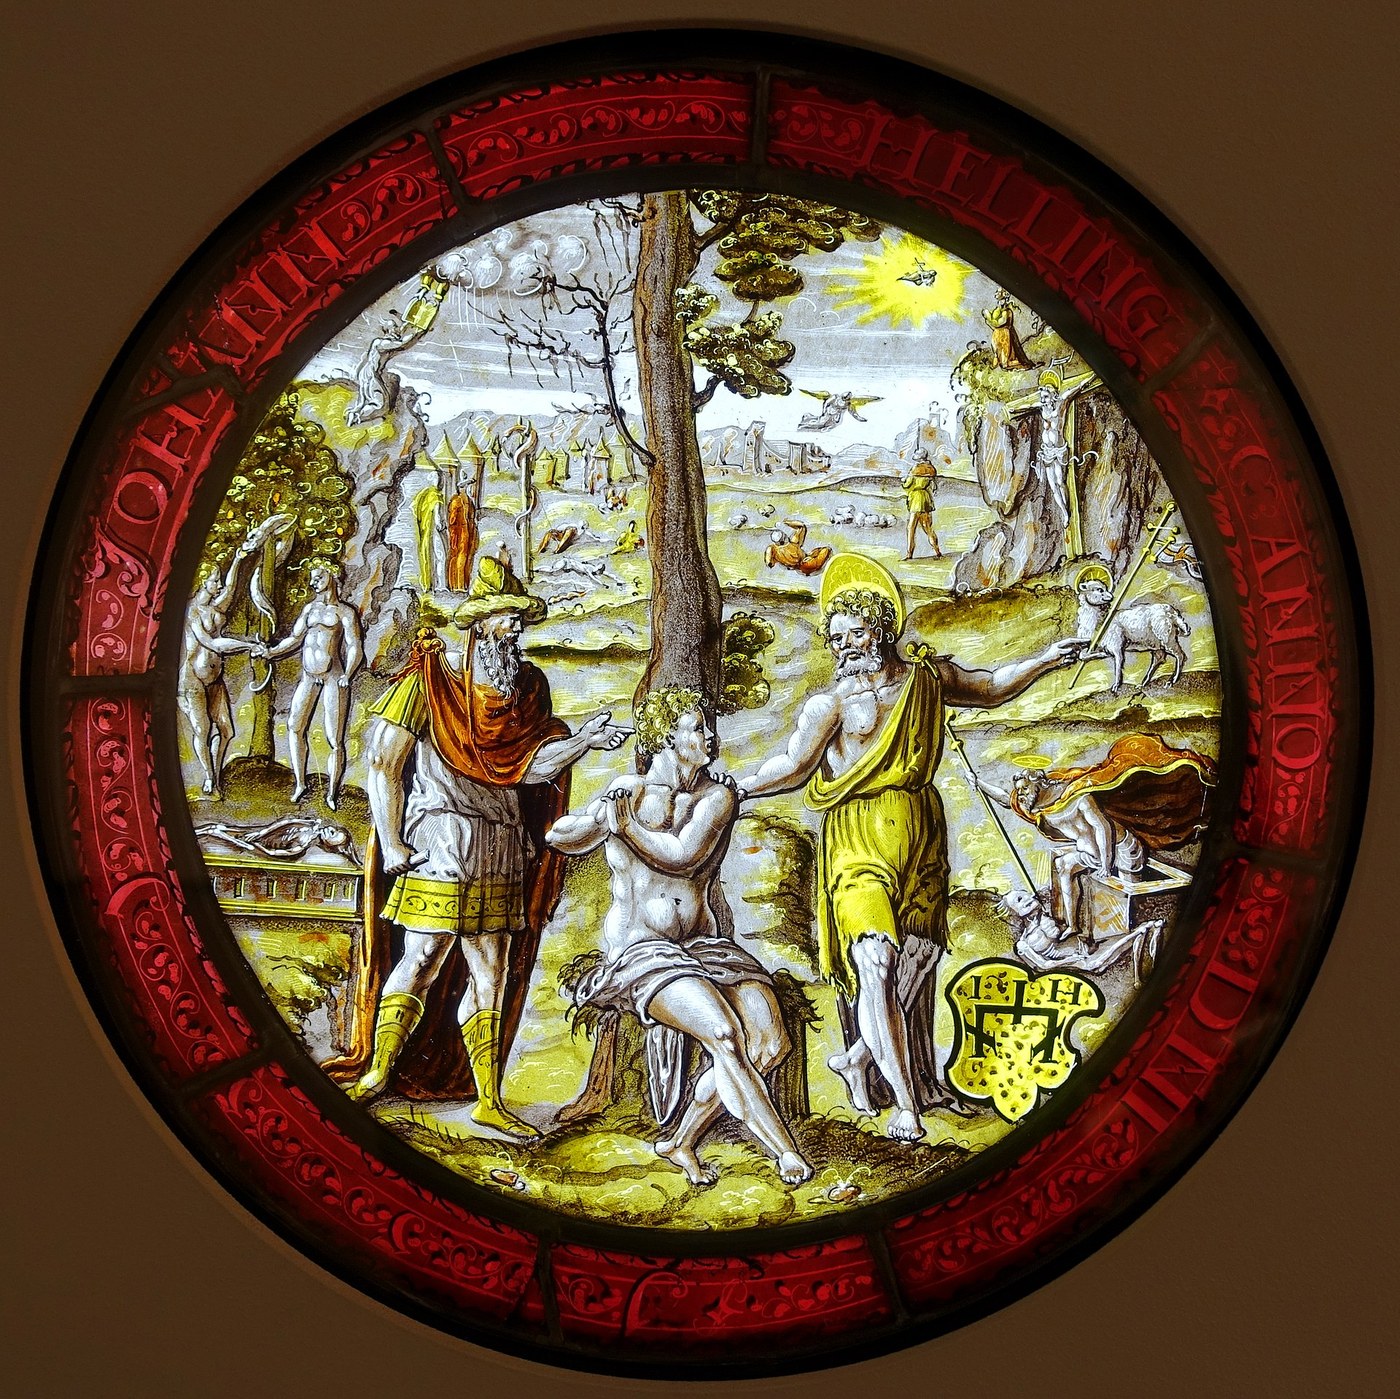


Silver Stain for Glass
Silver stain arrived in the 14th century and changed what a stained glass window could be. Before it, every colour meant a separate piece of coloured glass cut to shape and joined with lead. Silver stain let a glazier put yellow onto clear glass — so a face and its golden hair could be one piece, with no lead line running through it.
It is not paint. Painted enamels sit on the surface and can be scratched off. Silver stain is fired at 500–650 °C and the silver ions exchange into the glass itself, becoming part of its molecular structure. The colour is in the glass, not on it, which is why 600-year-old stain is still there while much of the surface paint from the same windows has weathered away.
Confusingly, it is applied to the back of the glass. Everything below follows from that.
निर्देश
Set up protection
Set up protection
Safety glasses and a dust mask. Silver salts stain skin and everything else brown-black on contact with light, and the ochre carrier is a respirable powder. Work on a wipeable surface.
आवश्यक उपकरण:
 पारदर्शी सुरक्षा चश्मा
 धूल मास्क
Clean the glass
Clean the glass
Wash a clear glass panel and dry it completely. Any grease leaves a patch where the stain will not take, and it will only show after firing.
इस चरण के लिए सामग्री:
 टेम्पर्ड काँच का पैनल1 टुकड़ा
Grind the silver compound with ochre
Grind the silver compound with ochre
Grind 1 part silver nitrate with 8 parts yellow ochre in a mortar. The ochre is an inert carrier — it holds the silver against the glass during firing and is washed off afterwards. It contributes no colour of its own.
इस चरण के लिए सामग्री:
 सिल्वर नाइट्रेट विलयन5 ग्रा
 पीला गेरू वर्णक (कच्चा)40 ग्रा
आवश्यक उपकरण:
 खरल और मूसल
Mix to a brushable paste
Mix to a brushable paste
Add water a few drops at a time to a thin cream. Too thick and it flakes off in the kiln before the exchange happens; too thin and it runs off the vertical parts of a design.
Paint it on the BACK of the glass
Paint it on the BACK of the glass
Brush the paste onto the reverse — the face that will point outward in the finished window. This is the step people get wrong. Stain is applied to the back so it fires into that surface, leaving the front free for painted detail.
आवश्यक उपकरण:
 चपटी अक्षर-लेखन कूची
Lay it in an even film
Lay it in an even film
Aim for a flat, even coat with no ridges. Thickness controls depth of colour, so a brush mark that leaves a ridge fires as a visible darker stripe.
Make a test strip in three thicknesses
Make a test strip in three thicknesses
On a scrap, lay three patches — thin, medium, thick — and mark them. Silver stain is unforgiving: you cannot judge the fired colour from the raw paste, which is a dull brownish-yellow whatever the result will be.
Dry completely before firing
Dry completely before firing
Air-dry for several hours. Water still in the paste turns to steam in the kiln and blows the film off the glass in patches.
Fire between 500 and 650 °C
Fire between 500 and 650 °C
Fire stain-side up. Ramp slowly and hold at temperature. Lower in that range gives pale lemon; higher gives amber and deep orange. Overshoot and the glass slumps.
आवश्यक उपकरण:
 भट्ठी (किल्न)
Cool slowly
Cool slowly
Cool to room temperature at no more than 100 °C per hour. A thin panel taken out hot will crack from thermal shock.
आवश्यक उपकरण:
भट्ठी (किल्न)Wash off the spent ochre
Wash off the spent ochre
Scrub the dull residue off under water with a stiff brush. The ochre has done its job and carries away; the yellow that remains is inside the glass and will not scrub off.
Read the test strip against the light
Read the test strip against the light
Hold the strip up to daylight, not against a white surface. Stain only reads correctly in transmission — that is the only way a window is ever seen.
History & Context
History & Context
Why it mattered so much. A medieval window is a mosaic: each colour is a separate piece of pot-metal glass, and every join needs a lead came. Lead lines are structural and they are also drawing — they chop the image up. Silver stain broke that constraint for one colour. Suddenly a head could be a single piece of clear glass with yellow hair and a yellow halo, painted with detail on the front and stained on the back. Look at 14th-century glass and you can see glaziers working out what this new freedom was for.
It is a chemical change, not a coating. The technique paints a silver compound — nitrate, chloride, sulphate or oxide — onto the glass and fires it, and during firing silver ions exchange into the glass surface and the stain becomes part of the molecular structure rather than adhering to it. This is ion exchange, the same family of process used industrially to colour and to strengthen glass today. It is why the colour survives centuries of weathering that removes surface paint.
The range is temperature and thickness. Fired between roughly 500 and 650 °C, the result runs from pale lemon through yellow to deep orange. Two variables control it — how much silver is present and how hot and long the firing — and neither is visible before the kiln. Every serious glass painter fires test strips, which is why step 7 is not optional.
Applied to the back, for a reason. Stain goes on the exterior face. That keeps the interior face available for the black or brown vitreous paint that carries the drawing, and it means the two are fired into opposite surfaces and cannot muddy each other. A window is therefore built up in layers on both sides of a single sheet.
The name is a false friend. "Stained glass" as a term refers to the whole craft of leaded coloured windows, most of which involves no stain at all — it involves pot-metal glass coloured in the melt. Silver stain is the one process in the field that literally stains. The overlap of terms causes endless confusion, and it is worth being precise: this blueprint is about the stain, not about cutting and leading a window.
सामग्री
3- 1 टुकड़ाप्लेसहोल्डर
- 5 ग्राप्लेसहोल्डर
- 40 ग्राप्लेसहोल्डर
आवश्यक उपकरण
5- प्लेसहोल्डर
- प्लेसहोल्डर
- प्लेसहोल्डर
- प्लेसहोल्डर
- प्लेसहोल्डर
CC0 पब्लिक डोमेन
यह ब्लूप्रिंट CC0 के तहत जारी किया गया है। आप बिना अनुमति माँगे इस कार्य को किसी भी उद्देश्य के लिए कॉपी, संशोधित, वितरित और उपयोग करने के लिए स्वतंत्र हैं।
उनके ब्लूप्रिंट के माध्यम से उत्पाद खरीदकर मेकर का समर्थन करें जहाँ वे मेकर कमीशन कमाते हैं जो विक्रेताओं द्वारा निर्धारित होता है, या इस ब्लूप्रिंट का नया संस्करण बनाएँ और राजस्व साझा करने के लिए इसे अपने ब्लूप्रिंट में कनेक्शन के रूप में शामिल करें।