همکاری
هنر
زیبایی و سلامت
صنایع دستی
فرهنگ و تاریخ
سرگرمی
محیط زیست
غذا و نوشیدنی
مهندسی معکوس
علوم
ورزش
فناوری
پوشیدنیها


Pigeon House for 20 Birds: Swastika Compartments, Sliding Shutters and a Gable Roof on a Post (Boy Mechanic, 1919)
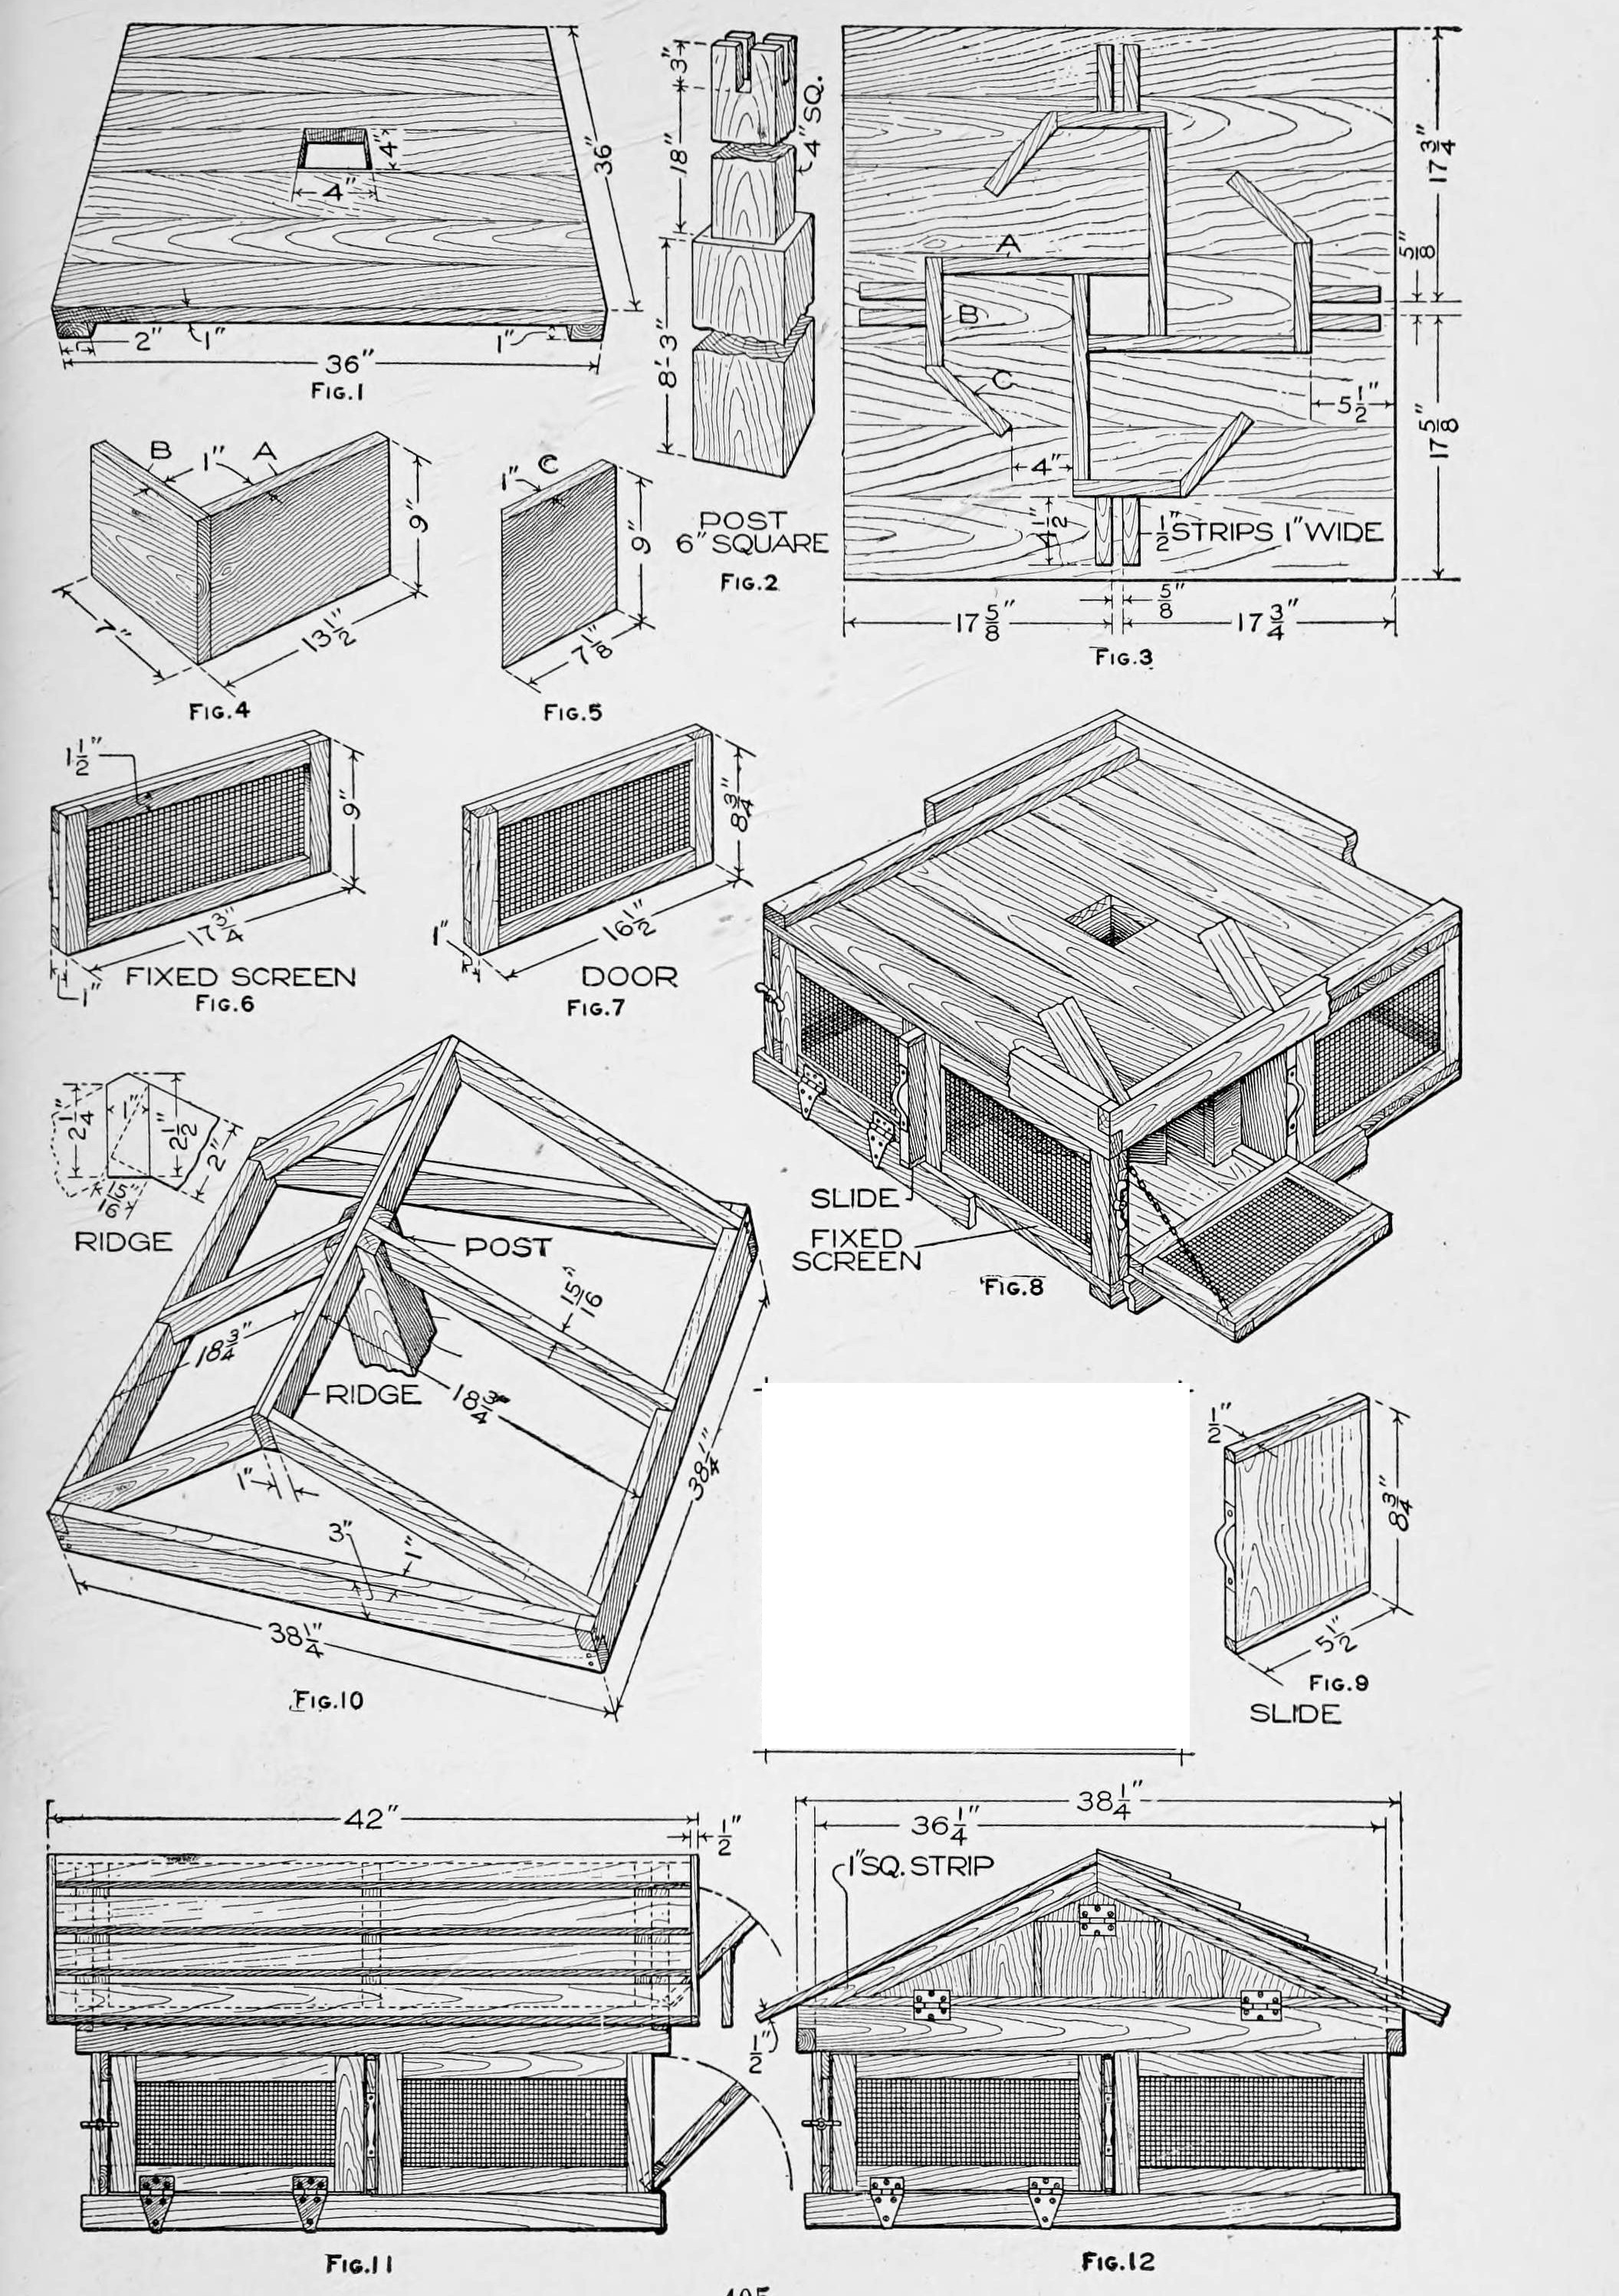
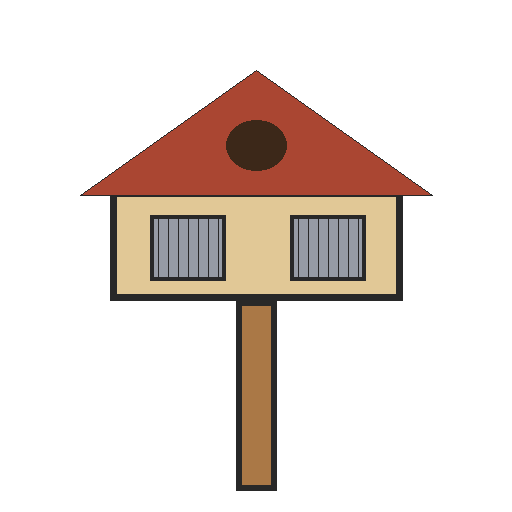
Robert Baker's pigeon house from The Boy Mechanic, Book 3 (1919), mostly from box wood: a 36 in square lower story on a 6 in post, divided into four compartments by pinwheel (swastika-pattern) partitions, with wire-mesh screens, hinged doors and sliding shutters, under a removable framed and shingled gable roof. It houses 20 pigeons.
متوسط
Several days
دستورالعملها
1
1
Parts in centimetres
Parts in centimetres
در حال بارگذاری دفترچهٔ Jupyter…
2
2
Read The Boy Mechanic, Book 3
Read The Boy Mechanic, Book 3
"The house described will accommodate 20 pigeons, and additional stories of the same type may be added to provide for more."
3
3
Make the floor, ceiling and post
Make the floor, ceiling and post
Make floor and ceiling alike, 36 in square of boards on cleats screwed on (or nails clinched), each with an accurate 4 in square centre hole (Fig. 1). Cut the post 6 in square, about 9 ft long, with a 4 in square shoulder at the top to fit the holes (Fig. 2); cut the notches for the ridge and centre rafters only when the roof boards are ready.
مواد مورد نیاز این مرحله:
 تختهٔ کاج6 قطعه
 الوار کاج1 قطعه
 پیچ چوب1 قطعه
ابزارهای مورد نیاز:
 ارهٔ دستی
 اسکنهها
 دریل دستهٔ گردان با مته
 ارهٔ مویی
 گونیای ثابت
 متر نواری
4
4
Build the compartments
Build the compartments
Make four each of the pieces A, B and C, 9 in high of 1 in stuff, exactly to Figs. 4 and 5 (A/B legs 13-1/2 and 7 in, C 7-1/8 in). Mark 4 in from one end of each A, pair the pieces with the line even with the end of the other and nail, then fit the pairs into a 4 in square at the centre. Fit each C to a B at an angle, trim the corners, nail, and nail B-C to the ends of A to complete the pattern (Fig. 3). Fix it over the floor hole with nails or screws through the floor, and nail two strips exactly 4-1/2 in long beside each opening to guide the slides. Fix the ceiling on top, cleats up, with its strips the same way.
مواد مورد نیاز این مرحله:
تختهٔ کاج3 قطعه میخ1 قطعه
ابزارهای مورد نیاز:
ارهٔ دستی چکشگونیای ثابت
 مداد
5
5
Make screens, doors and slides
Make screens, doors and slides
Build fixed screens (17-3/4 by 9 in) and doors (16-1/2 by 8-3/4 in) of 1/2 in wood with 1/2 in square-mesh wire grating fixed between the pieces; screens stand 1/4 in higher than the doors and are fastened between ceiling and floor as braces. Hang the doors on combination strap hinges bent over the baseboard (or butts covered by it) with catches and chains; nail on 2-1/2 in baseboards. Make each slide of three pieces so it will not warp: a 7-3/4 in main piece with 1/2 in square strips on the ends (8-3/4 by 5-1/2 in), with a band-iron handle drilled for screws.
مواد مورد نیاز این مرحله:
تختهٔ کاج2 قطعه توری سیمی گالوانیزه1 قطعه
 لولای تسمهای آهنی4 قطعه
 قزن قفلی4 قطعه
 زنجیر ظریف1 قطعه
 تسمه فولاد نرم1 قطعهمیخ1 قطعهپیچ چوب1 قطعه
ابزارهای مورد نیاز:
ارهٔ دستیچکش قیچی
 دریل دستی
 گیرهٔ رومیزی
 پیچگوشتی تخت
6
6
Frame and cover the roof
Frame and cover the roof
Build the plate of pieces 3 in wide, 1/4 in larger inside than the ceiling so it fits snugly over it, with halved corners nailed both ways (Fig. 10). Lay out the end rafters full size on paper or a board, fit them first, then the others and the ridge. Nail rough boards 1/2 in apart, projecting 2 in past the plate ends, with a 1/2 in strip over their ends, and shingle or cover with tar paper. Nail a 1 in strip under each roof end and fit the gables, one with a door, the other with a screened opening the same size.
مواد مورد نیاز این مرحله:
تختهٔ کاج4 قطعه ورقههای چوبی پوشش بام1 قطعهمیخ1 قطعهتوری سیمی گالوانیزه1 قطعهلولای تسمهای آهنی2 قطعه
ابزارهای مورد نیاز:
ارهٔ دستیچکشگونیای ثابتمداد7
7
Set it up
Set it up
Set the post, put the lower story over its shoulder, cut the post-top notches to the ridge and centre rafters and seat the roof story on the lower one. The roof story lifts off for cleaning; for added stories put a post at each corner.
ابزارهای مورد نیاز:
 بیلارهٔ دستیاسکنهها
8
8
Troubleshooting
Troubleshooting
Pigeon house troubleshooting.
Flow
Loading...
9
9
History and honest limits
History and honest limits
From "A Pigeon House" by Robert Baker, in **The Boy Mechanic, Book 3**, Popular Mechanics, 1919 (Project Gutenberg 71856; checked on the archive.org scan boymechanic0003unse, pp. 403-405). The text calls the post about 9 ft; Fig. 2 marks 8 ft 3 in, 18 in and 3 in. The tools and metric figures are ours.
مواد
10- 6 قطعهجایگزین
- 1 قطعهجایگزین
- 2 قطعهجایگزین
- 3 قطعهجایگزین
- 2 قطعهجایگزین
- 4 قطعهجایگزین
- 4 قطعهجایگزین
- 1 قطعهجایگزین
- 1 قطعهجایگزین
- 1 قطعهجایگزین
ابزارهای لازم
13- جایگزین
- جایگزین
- جایگزین
- جایگزین
- جایگزین
- 1 vendor sell this, none ship to you yetجایگزین
- جایگزین
- 1 vendor sell this, none ship to you yetجایگزین
- جایگزین
- جایگزین
- جایگزین
- جایگزین
- جایگزین
این نقشه میسازد
نقشههای مرتبط
این نقشهها دانش مشترکی دارند — تکنیکها، مواد یا اصول
CC0 مالکیت عمومی
این نقشه تحت مجوز CC0 منتشر شده است. شما آزاد هستید آن را کپی، ویرایش، توزیع و برای هر هدفی بدون نیاز به اجازه استفاده کنید.
با خرید محصولات از طریق نقشه از سازنده حمایت کنید و او کمیسیون سازنده تعیین شده توسط فروشندگان، دریافت میکند یا یک نسخه جدید از این نقشه ایجاد کنید و آن را به عنوان اتصال در نقشه خود قرار دهید تا درآمد به اشتراک گذاشته شود.