

Flex Sensor Glove — Control 5 Servo Motors with Hand Gestures
دستورالعملها
Parts & Introduction
Parts & Introduction
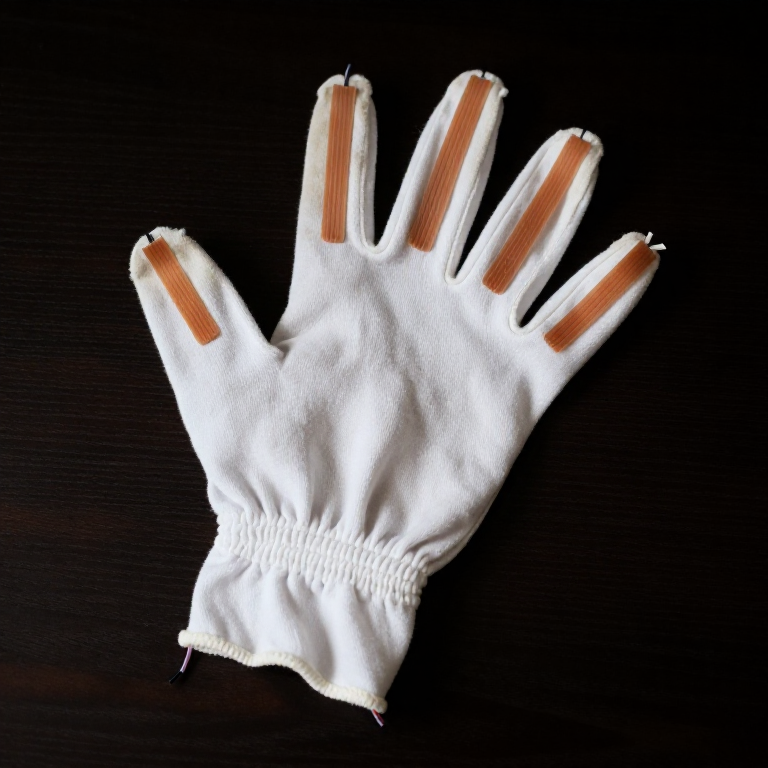
This project extends the SIK Circuit 9 (flex sensor + servo) concept to five fingers. Instead of holding a flex sensor in your hand, you'll glue one onto each finger of a cloth glove, creating a wearable gesture controller that drives five independent servo motors.
Parts Needed (from the SparkFun Inventor's Kit + extras)
- 1x SparkFun RedBoard (Arduino Uno compatible) + USB cable
- 1x Solderless Breadboard
- 5x Flex Sensors (2.2 inch) — kit includes 1, you need 4 more
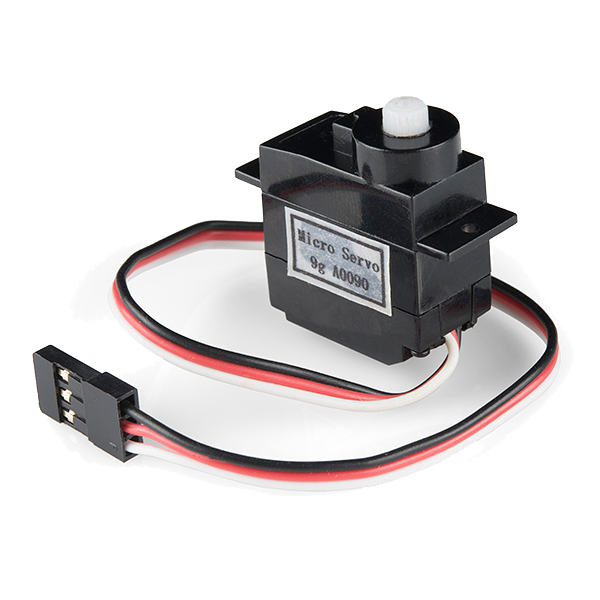
- 5x SG90 Micro Servo Motors
- 5x 10KΩ Resistors (for voltage dividers)
- ~30x Jumper Wires (M-M and M-F mix)
- 1x Cloth or cotton glove (tight-fitting)
- Super glue (cyanoacrylate)
Concept: Each flex sensor forms a voltage divider with a 10K resistor. Bending a finger changes the sensor's resistance (flat ≈ 10KΩ, bent ≈ 30KΩ), which shifts the voltage at the analog pin. The Arduino reads all 5 analog inputs and maps each to a servo angle (0°–180°).
مواد مورد نیاز این مرحله:
 کیت مخترع SparkFun - V3.21 کیت
 حسگر خمش ۵۶ میلیمتری4 قطعه
 SG90 Micro Servo Motor (5-Pack)1 بسته
 مقاومت ۱۰ کیلواهم1 بسته
 سیم رابط (نر-نر)1 کیت
 چسب قطرهای1 بطری
 دستکش پارچهای (پنبه)1 قطعه
ابزارهای مورد نیاز:
 رایانه با Arduino IDE
 USB Cable (Type A to B)
Prepare the Glove
Prepare the Glove
Use a tight-fitting cotton or jersey glove — it needs to follow your finger movements precisely.
Attaching the Flex Sensors
- Put the glove on your hand and mark the center line of each finger (top side, from knuckle to fingertip).
- Remove the glove and lay it flat.
- Apply a thin line of super glue along each finger's center line.
- Press a flex sensor onto each finger, component side (striped side) facing outward. The sensor should sit along the top of each finger so it bends when you curl your fingers.
- Let the glue cure for 5 minutes. The sensor leads should extend past the wrist area of the glove.
Tip: Leave 2-3 cm of sensor lead free at the base (near the wrist) — you'll attach jumper wires here.
مواد مورد نیاز این مرحله:
حسگر خمش ۵۶ میلیمتری4 قطعهسیم رابط (نر-نر)1 کیتچسب قطرهای1 بطریدستکش پارچهای (پنبه)1 قطعهWire the Voltage Dividers
Wire the Voltage Dividers
Breadboard Layout — 5 Voltage Dividers
Each flex sensor needs a voltage divider circuit. Repeat this for all 5 fingers:
- Connect one lead of the flex sensor to the 5V rail on the breadboard.
- Connect the other lead to a row on the breadboard — this is the signal node.
- From that same signal node, connect a 10KΩ resistor to GND.
- From that same signal node, run a jumper wire to an Arduino analog pin.
Pin Assignments
| Finger | Analog Pin | Servo Pin |
|---|---|---|
| Thumb | A0 | D3 |
| Index | A1 | D5 |
| Middle | A2 | D6 |
| Ring | A3 | D9 |
| Pinky | A4 | D10 |
Important: Use the PWM-capable digital pins (marked with ~) for the servos. Pins 3, 5, 6, 9, 10 are all PWM on the Arduino Uno.
مواد مورد نیاز این مرحله:
کیت مخترع SparkFun - V3.21 کیتحسگر خمش ۵۶ میلیمتری4 قطعهSG90 Micro Servo Motor (5-Pack)1 بستهمقاومت ۱۰ کیلواهم1 بستهسیم رابط (نر-نر)1 کیتچسب قطرهای1 بطریدستکش پارچهای (پنبه)1 قطعهWire the Servo Motors
Wire the Servo Motors
Servo Connections
Each SG90 servo has 3 wires:
- Red → 5V rail (shared power)
- Brown/Black → GND rail (shared ground)
- Orange/White → Digital PWM pin (see table in Step 3)
Arrange all 5 servos in a row next to the breadboard. You can tape or hot-glue them to a piece of cardboard to keep them stable.
Power Considerations
5 servos drawing current simultaneously can overload the Arduino's USB power. If you notice erratic servo behavior:
- Use an external 5V power supply (e.g., a phone charger with stripped USB cable) connected to the breadboard's power rail
- Connect the external supply's GND to the Arduino's GND (common ground)
- Keep the Arduino powered via USB for programming and serial communication
مواد مورد نیاز این مرحله:
کیت مخترع SparkFun - V3.21 کیتحسگر خمش ۵۶ میلیمتری4 قطعهSG90 Micro Servo Motor (5-Pack)1 بستهمقاومت ۱۰ کیلواهم1 بستهسیم رابط (نر-نر)1 کیتچسب قطرهای1 بطریدستکش پارچهای (پنبه)1 قطعهUpload the Arduino Code
Upload the Arduino Code
Open the Arduino IDE, paste the code below, and upload it to your board.
ابزارهای مورد نیاز:
رایانه با Arduino IDECalibrate & Test
Calibrate & Test
Initial Calibration
- Upload the code and open Serial Monitor (9600 baud).
- With the glove on, hold your hand flat and open. Note the analog values for each finger (F0–F4). These are your
FLEX_FLATvalues. - Make a tight fist. Note the new values. These are your
FLEX_BENTvalues. - Update the constants in the code and re-upload.
Each finger may have slightly different ranges — for precision, you can use per-finger calibration arrays instead of shared constants.
What You Should See
Each servo responds independently to its corresponding finger. Open your hand → servos at 0°. Close your fist → servos at 180°. Individual finger movements control individual servos.
Troubleshooting
- Servo jitters: Add a small capacitor (100µF) across the servo power rails, or use external power.
- Sensor reads don't change: Check the voltage divider — the 10K resistor must go to GND, not 5V.
- Wrong finger maps to wrong servo: Verify your pin assignments match the table in Step 3.
- Servos move erratically: USB power may be insufficient for 5 servos. Use an external 5V supply.
Ideas for Next Steps
- Build a robotic hand where each servo pulls a tendon (string) connected to a 3D-printed finger.
- Add an LCD display showing each finger's angle in real-time.
- Use the glove to control a robot arm over Bluetooth or WiFi.
- Map finger gestures to keyboard shortcuts for accessibility input.
مواد
7- کیت مخترع SparkFun - V3.210% کمیسیون1 کیت$104.50
- 4 قطعهجایگزین
- Servo - Generic (Sub-Micro Size)10% کمیسیون1 بسته$8.20
- جایگزین
- جایگزین
- 1 بطریجایگزین
- 1 قطعهجایگزین
ابزارهای لازم
3- جایگزین
- SparkFun Cerberus USB Cable - 1.8 meter10% کمیسیون$5.61
- USB Cable (Type A to B)
CC0 مالکیت عمومی
این نقشه تحت مجوز CC0 منتشر شده است. شما آزاد هستید آن را کپی، ویرایش، توزیع و برای هر هدفی بدون نیاز به اجازه استفاده کنید.
با خرید محصولات از طریق نقشه از سازنده حمایت کنید و او کمیسیون سازنده تعیین شده توسط فروشندگان، دریافت میکند یا یک نسخه جدید از این نقشه ایجاد کنید و آن را به عنوان اتصال در نقشه خود قرار دهید تا درآمد به اشتراک گذاشته شود.