هنر
زیبایی و سلامت
صنایع دستی
فرهنگ و تاریخ
سرگرمی
محیط زیست
غذا و نوشیدنی
مهندسی معکوس
علوم
ورزش
فناوری
پوشیدنیها
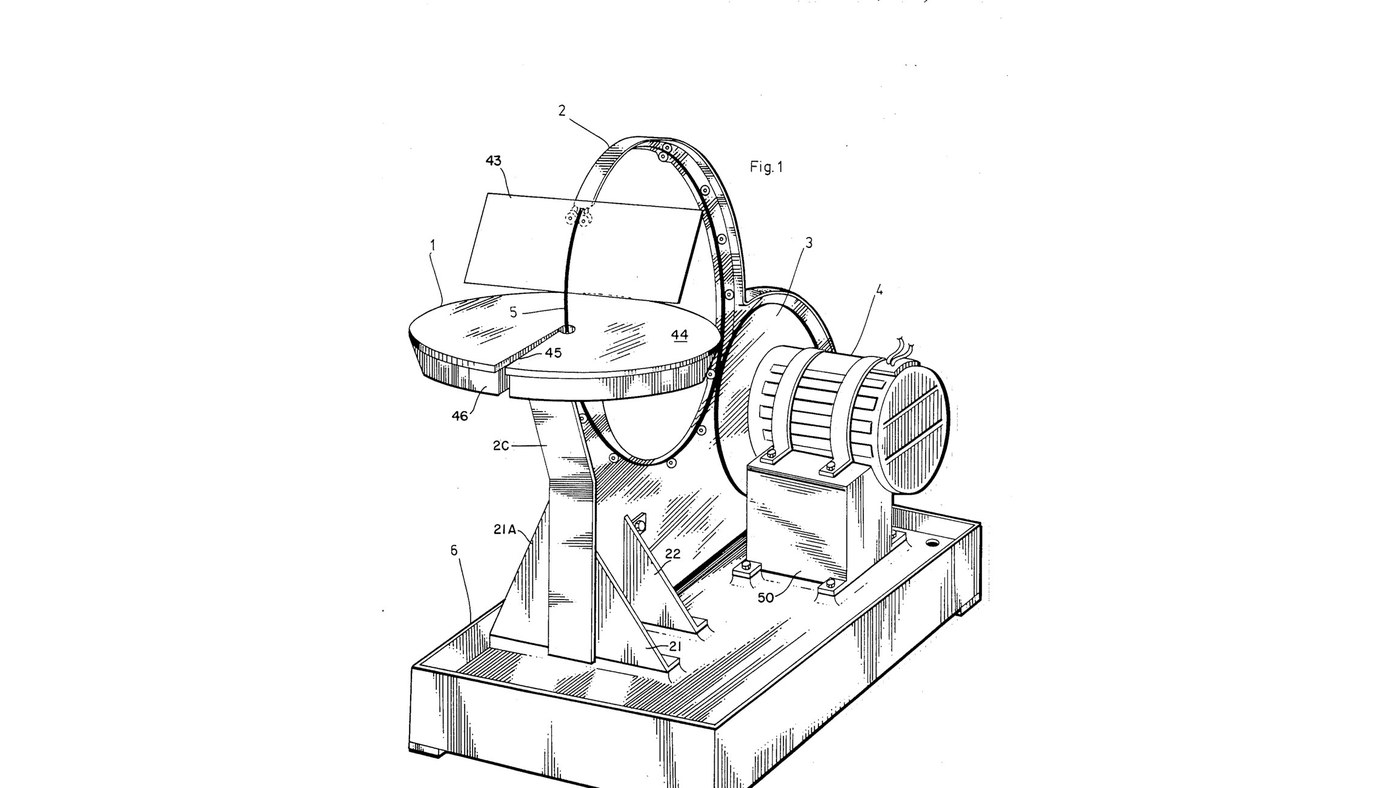


Glass Saw: Rigid Diamond Wire Ring Driven by Its Rim
Jesse Cogswell's ring saw (US 4,576,139, 1986) for glass, ceramics and stone. The blade is a rigid circle of wire coated with bonded diamond, standing upright through a cutting table. A rubber-tyred wheel on the motor drives it by friction round its own rim at 3000 ft/min or more, and twelve guide wheels on slots round an aluminium back-plate hold it true. Because it cuts with any part of its rim, the work can be turned freely for curves and inside shapes; a sponge in a water tray wets the wire.
The patent sizes the ring from the thickest work to be cut (8 in ring for 3/16 in); the notebook does the sums. The picture: the patent's Fig. 1.
پیشرفته
3 days
دستورالعملها
1
1
Cut and brace the back-plate
Cut and brace the back-plate
Cut the back-plate (2A) from aluminium plate, its upper part curved as an arc to shield the saw, stiffened by an angle (2B) along the top and a flat splatter strip (2C) at the front. Bolt on two front struts (21, 21A) and two side struts (22) and bolt them to the base. Ours: drill press.
مواد مورد نیاز این مرحله:
 ورق آلومینیوم1 قطعه
 نبشی آلومینیوم1 قطعه
 پیچ سرششگوش - ردهٔ 8.81 قطعه
ابزارهای مورد نیاز:
 دریل ستونی
 آچار فرانسه
2
2
Cut the wheel-slider apertures
Cut the wheel-slider apertures
Cut slots (32) through the back-plate's arc at 0, 30, 60, 90, 120, 210, 240, 270, 300 and 330° round the ring's centre: two slots at 90° and 210° for the guide pairs, one at each of the others. The slots let each guide wheel slide to the ring.
ابزارهای مورد نیاز:
دریل ستونی3
3
Assemble the guide wheels
Assemble the guide wheels
For each of the twelve guide wheels, stretch two rubber O-rings (27) into the grooves of a bearing wheel (26) with sealed roller bearings, and mount it on a shoulder bolt (28) with a washer, lockwasher and nut.
مواد مورد نیاز این مرحله:
 غلتک راهنما12 قطعه
 اورینگ24 قطعه
 پیچ شانهدار12 قطعه
 واشر تخت12 قطعه
 Spring Washer12 قطعه
 مهرهٔ ششگوش12 قطعه
ابزارهای مورد نیاز:
آچار فرانسه4
4
Turn the drive wheel
Turn the drive wheel
Turn an aluminium disk with a hub, a bored axle hole and a deep groove round its rim, and seat a large rubber O-ring (23) in the groove as its driving tyre. Ours: lathe.
مواد مورد نیاز این مرحله:
ورق آلومینیوم1 قطعهاورینگ1 قطعهابزارهای مورد نیاز:
 تراش فلز
5
5
Mount the motor and drive axle
Mount the motor and drive axle
Strap the electric motor (51) onto its pillow block (50) with fastening bands (52) and bolt the block to the base. Fix the drive wheel on the motor's axle (24) and carry the axle's end in an axle pillow block (24A, 24B).
مواد مورد نیاز این مرحله:
 موتور برقی1 قطعه
 تسمه نگهدارنده موتور2 قطعه
 یاتاقانگیر2 قطعه
 محور فولادی1 قطعهپیچ سرششگوش - ردهٔ 8.81 قطعه
ابزارهای مورد نیاز:
آچار فرانسه6
6
Fit the ring and its guides
Fit the ring and its guides
Stand the ring saw on the drive wheel's tyre. Bolt the guide wheels through their slots: each pair with a tension spring between its two wheels, each single with a spring to the back-plate's lower rim, the one at 330° pressing the ring onto the drive wheel. Set them against the ring, then tighten the nuts. Fit two horizontal roller-guides (17) at 150°, sprung together, just before the cut.
مواد مورد نیاز این مرحله:
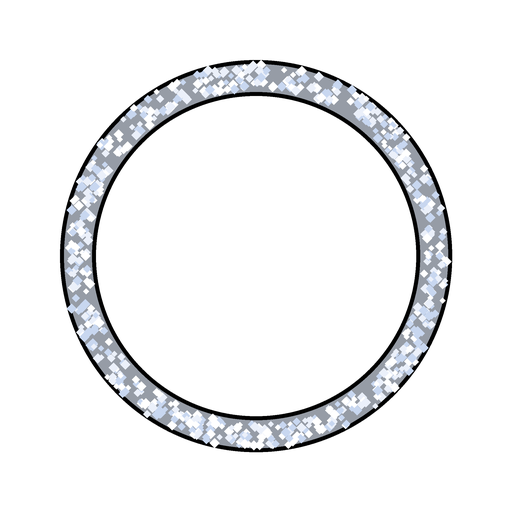 تیغه اره حلقهای الماسه1 قطعه
 فنر کششی11 قطعهغلتک راهنما2 قطعه
ابزارهای مورد نیاز:
آچار فرانسه7
7
Fit the table, tray and sponge
Fit the table, tray and sponge
Bolt the water tray (46) on four bracket supports (19, 20) by its four studs; put a ring-shaped sponge (47) in it and the cutting table (44) over it, the ring passing through centre holes reached by slots offset half an inch from a radius. Set the table top below the ring's centre line by the thickest work you will cut. Add water to the tray.
مواد مورد نیاز این مرحله:
 سینی1 قطعه
 اسفنج1 قطعهورق آلومینیوم1 قطعه
 آب1 batch
ابزارهای مورد نیاز:
آچار فرانسه8
8
Fit the face shield and drip pan
Fit the face shield and drip pan
Bolt the shield arm (41) to the back-plate and pivot a clear acrylic face shield (43) in its holder (42) on a locking screw. The base is a catchment for the coolant with a drain hole in one corner.
مواد مورد نیاز این مرحله:
 ورق آکریلیک1 قطعهورق آلومینیوم1 قطعه
 سینی چکهگیر1 قطعه
ابزارهای مورد نیاز:
آچار فرانسه9
9
Ring size and drive speed
Ring size and drive speed
در حال بارگذاری دفترچهٔ Jupyter…
مواد
20- 1 قطعهجایگزین
- 1 قطعهجایگزین
- 2 قطعهجایگزین
- 12 قطعهجایگزین
- 25 قطعهجایگزین
- 12 قطعهجایگزین
- 12 قطعهجایگزین
- 12 قطعهجایگزین
- 12 قطعهجایگزین
- 1 قطعهجایگزین
- 2 قطعهجایگزین
- 2 قطعهجایگزین
- 1 قطعهجایگزین
- 1 قطعهجایگزین
- 11 قطعهجایگزین
- 1 قطعهجایگزین
- 1 قطعهجایگزین
- 1 batchجایگزین
- 1 قطعهجایگزین
- 1 قطعهجایگزین
این نقشه میسازد

CC0 مالکیت عمومی
این نقشه تحت مجوز CC0 منتشر شده است. شما آزاد هستید آن را کپی، ویرایش، توزیع و برای هر هدفی بدون نیاز به اجازه استفاده کنید.
با خرید محصولات از طریق نقشه از سازنده حمایت کنید و او کمیسیون سازنده تعیین شده توسط فروشندگان، دریافت میکند یا یک نسخه جدید از این نقشه ایجاد کنید و آن را به عنوان اتصال در نقشه خود قرار دهید تا درآمد به اشتراک گذاشته شود.