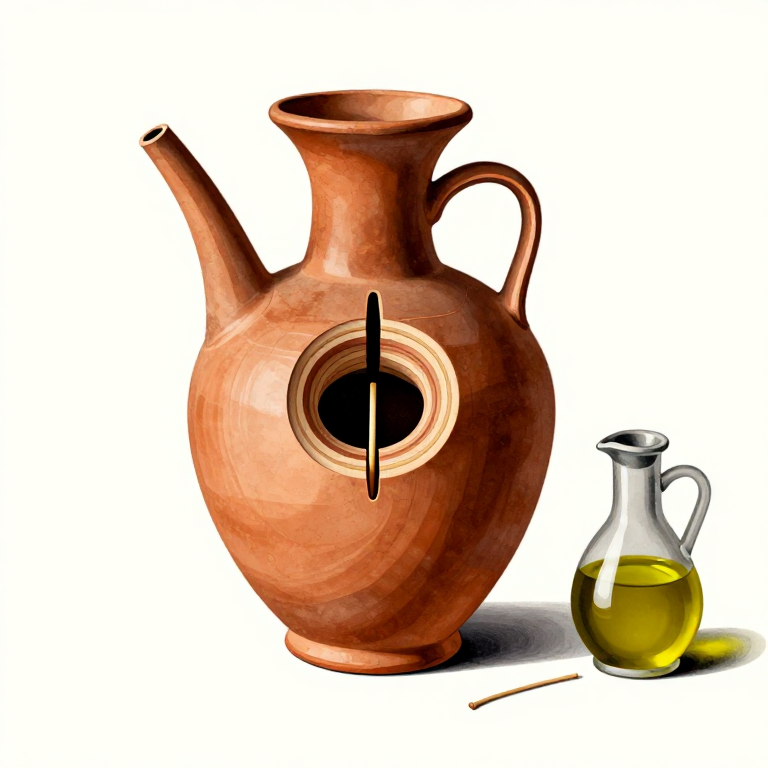
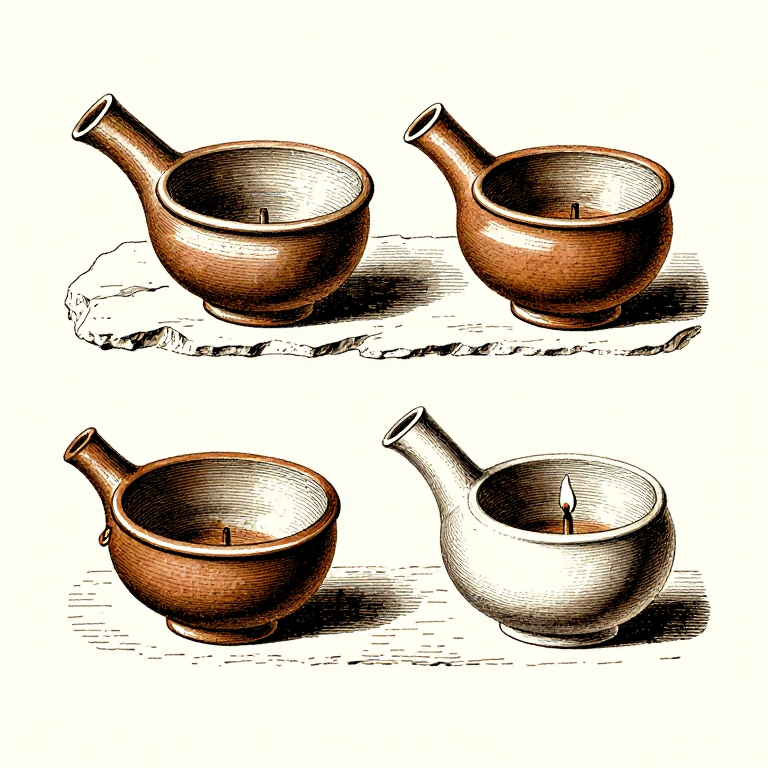
Greek Oil Lamp — Shaping a Greek Ceramic Oil Lamp
دستورالعملها
Form the Lamp Body
Form the Lamp Body
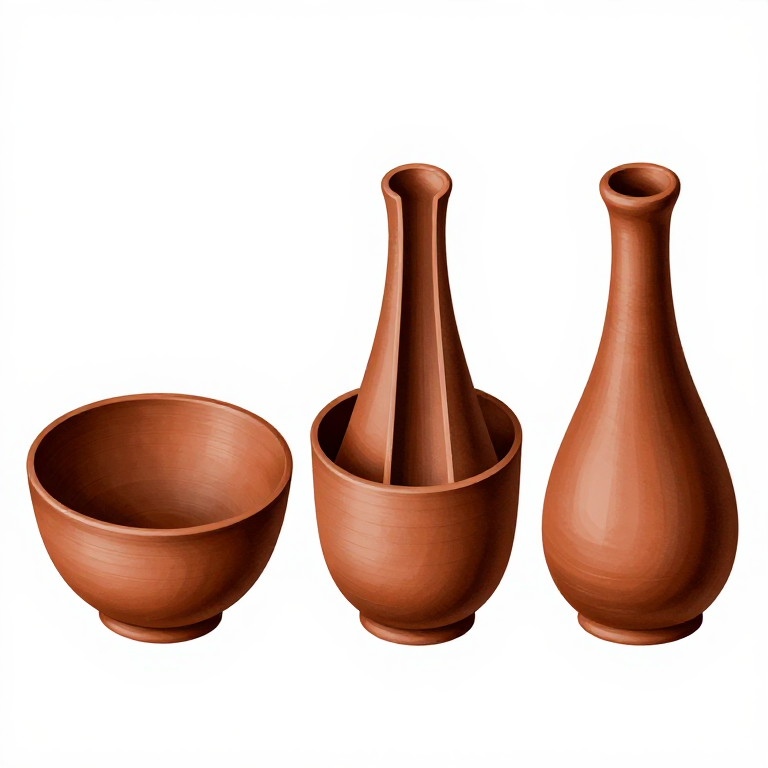
Take a ball of clay approximately 200-300 g and either throw a small, shallow, open bowl on the potter's wheel (approximately 8-10 cm diameter, 3-4 cm deep) or hand-form the same shape by pressing and pinching. The earliest Greek lamps (7th-6th century BCE) were simply open saucers — later forms developed enclosed reservoirs with only a filling hole. For this project, an open bowl form is simplest and historically accurate for the Archaic period. The walls should be approximately 5-8 mm thick, with a smooth interior surface that will hold oil without seeping through. The base should be flat so the lamp sits stably on a surface.
مواد مورد نیاز این مرحله:
 Wild Clay200-300 g g
ابزارهای مورد نیاز:
 Modeling tools
 Kiln
KilnForm the Wick Spout
Form the Wick Spout
While the clay is still soft, pinch one edge of the bowl outward and upward to form a narrow channel or nozzle — this is the wick spout where the burning wick rests. The spout should extend approximately 2-3 cm beyond the rim of the bowl and be narrow enough (1-2 cm wide) to support the wick while allowing air to reach the flame from below. The channel should slope slightly downward from the bowl so that oil wicked up by the linen naturally drains back into the reservoir. Greek lamps typically had a single spout, though multi-spouted lamps existed for greater illumination. The spout is the most critical functional element — if too wide, the wick falls into the oil; if too narrow, it restricts airflow and the flame smokes.
Add a Handle and Refine the Form
Add a Handle and Refine the Form
Form a small loop handle on the side of the lamp opposite the spout by attaching a rolled coil of clay, scoring and slipping the contact points. The handle allows the lamp to be carried safely when hot. Greek lamp handles evolved from simple loops to elaborate raised handles that prevented oil from spilling when the lamp was lifted. Smooth the entire exterior surface with a damp sponge and refine the spout channel. If desired, decorate the rim or body with simple geometric patterns using a pointed tool — early Greek lamps were usually plain, while later Hellenistic and Roman lamps featured elaborate relief decoration on the discus (top surface).
Dry and Fire the Lamp
Dry and Fire the Lamp
Allow the lamp to dry slowly for several days until completely bone-dry. Fire in a kiln at 850-950 degrees Celsius. Greek lamps were typically fired in an oxidizing atmosphere, producing a warm red-orange to buff color depending on the clay body. Some lamps received a black slip coating using the same three-phase firing technique as black-figure pottery, creating a glossy black surface. The fired lamp should be watertight — test by filling with water and checking for seepage. If the clay is slightly porous (common with earthenware fired below 1000 degrees), the oil will eventually saturate the walls, which is acceptable as it does not drip or present a fire hazard in thin-walled vessels.
Prepare the Wick and Test the Lamp
Prepare the Wick and Test the Lamp
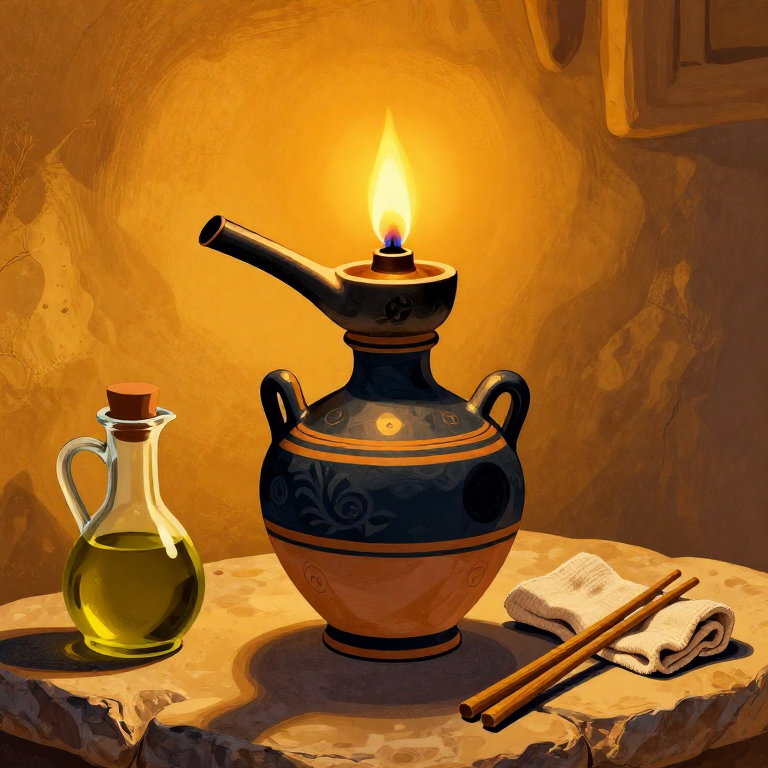
Twist or braid a wick from linen thread, papyrus fiber, or cotton — a strip approximately 5 mm wide and 10-15 cm long works well. Soak the wick in olive oil, then lay it in the spout channel with one end submerged in the oil reservoir and the tip extending slightly beyond the spout end. Fill the lamp approximately three-quarters full with olive oil. Light the protruding wick tip. The flame should be steady and bright with minimal smoke. Olive oil is an excellent lamp fuel: it has a high flash point (approximately 300 degrees Celsius), burns cleanly, and produces less soot than animal fats. A small Greek lamp burning approximately 10 ml of olive oil per hour could provide several hours of illumination from a single filling. Trim the wick as it chars to maintain a clean flame. Ancient Greek houses had dedicated lamp niches in their walls for permanent lamp placement.
مواد
3- small amount pieceجایگزین
- 1 piece, 10-15 cm pieceجایگزین
ابزارهای لازم
4- جایگزین
- جایگزین
- جایگزین
Related blueprints
Other builds that share materials, tools, or techniques with this one.
CC0 مالکیت عمومی
این نقشه تحت مجوز CC0 منتشر شده است. شما آزاد هستید آن را کپی، ویرایش، توزیع و برای هر هدفی بدون نیاز به اجازه استفاده کنید.
با خرید محصولات از طریق نقشه از سازنده حمایت کنید و او کمیسیون سازنده تعیین شده توسط فروشندگان، دریافت میکند یا یک نسخه جدید از این نقشه ایجاد کنید و آن را به عنوان اتصال در نقشه خود قرار دهید تا درآمد به اشتراک گذاشته شود.