Greek Timber Truss — Constructing a Timber Roof Truss
دستورالعملها
Design and Mark the Truss Members
Design and Mark the Truss Members
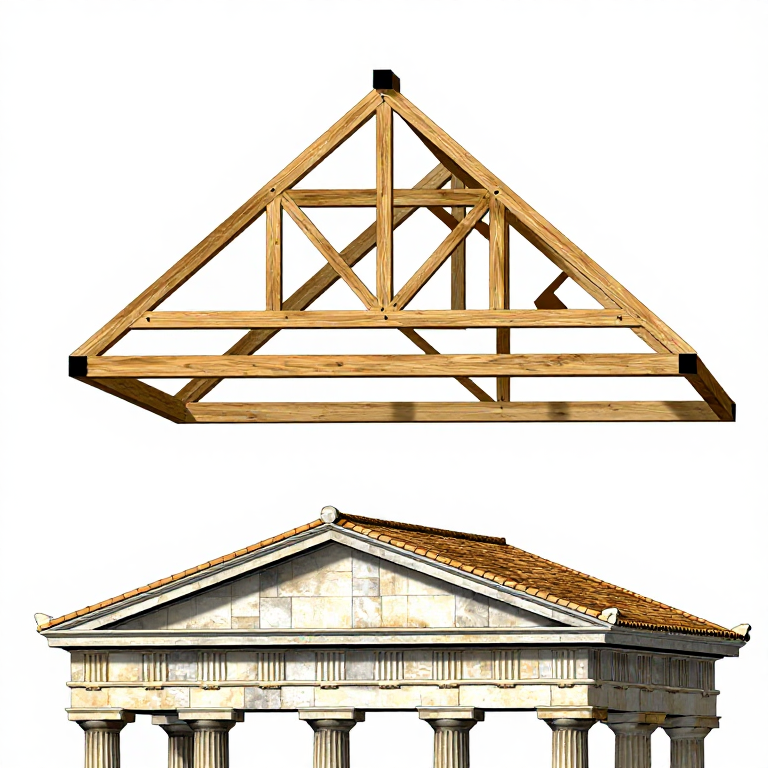
Lay out the truss design full-scale on a flat surface. A basic king-post truss consists of a horizontal tie beam spanning the building width, two inclined rafters meeting at the ridge, and a vertical king post connecting the ridge to the center of the tie beam. The roof pitch for Greek temples was typically 15-20 degrees (lower than medieval European roofs), reflecting the Mediterranean climate where heavy snow loads were rare. Mark the timber members to length with angle cuts at the joints. Greek temple roofs used substantial timber sections — the Parthenon's roof beams were estimated at 40-50 cm square, spanning approximately 10 meters, requiring imported timber (likely from Macedonia or the Black Sea region, as mainland Greece lacked large trees).
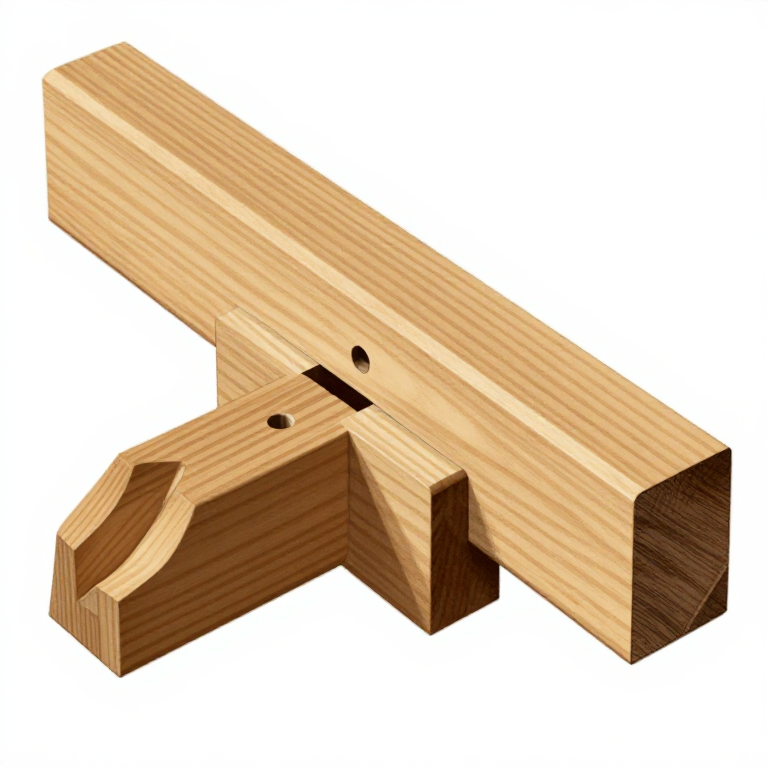
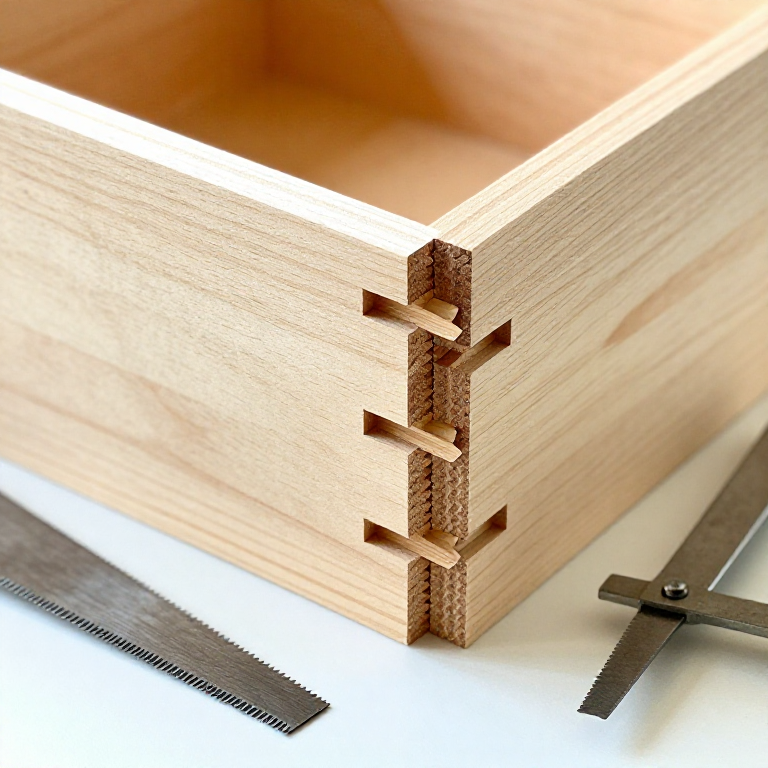
Cut the Mortise-and-Tenon Joints
Cut the Mortise-and-Tenon Joints
At each joint intersection, cut matching mortise and tenon joints. Where the rafters meet the tie beam, cut angled mortises in the tie beam ends and corresponding tenons on the rafter feet. The tenon shoulders must be cut at the correct angle to bear the roof load in compression. At the ridge, the rafter tops can be joined with a half-lap joint or mortise-and-tenon through a ridge beam. The king post connects to the tie beam with a mortise-and-tenon and to the ridge with a similar joint or metal strap. Use a marking gauge to lay out each joint precisely — poorly fitted joints will be weak points under load. Greek carpentry was precise and sophisticated, as evidenced by the complex timber formwork required for building marble temples.
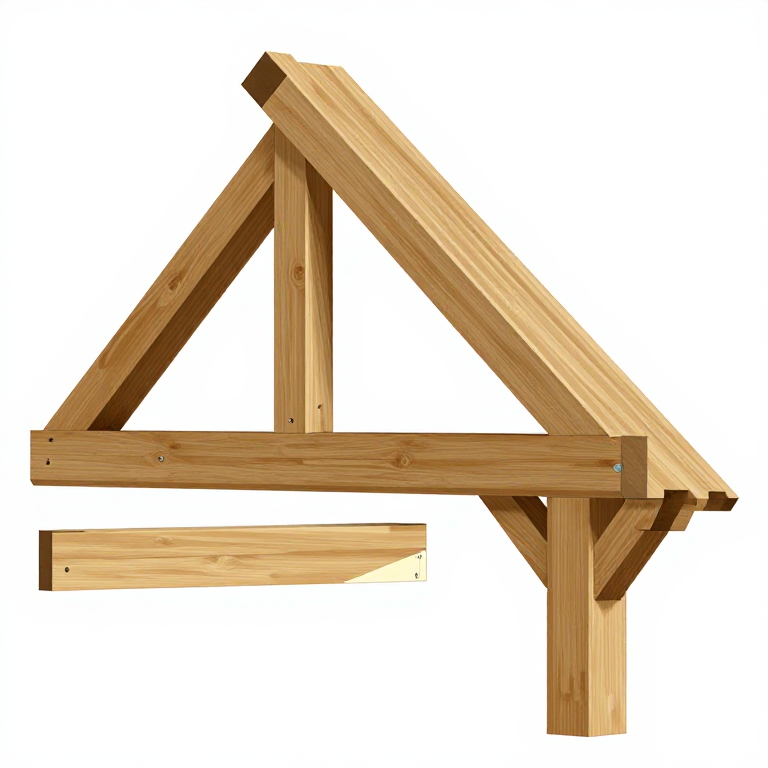
Assemble the Truss Frame
Assemble the Truss Frame
Assemble the truss on a flat surface (the workshop floor or framing platform). Insert the rafter tenons into the tie beam mortises and tap them home with a mallet. Fit the king post between the tie beam center and the ridge junction. Check the truss for squareness using a level and by measuring the diagonals — both diagonal measurements from opposite corners should be equal. Adjust joint fits as needed before pegging. The triangular form of the truss is inherently stable — unlike a rectangular frame, a triangle cannot be racked (parallelogrammed) out of shape by lateral forces, making it the fundamental structural unit of roof engineering.
مواد مورد نیاز این مرحله:
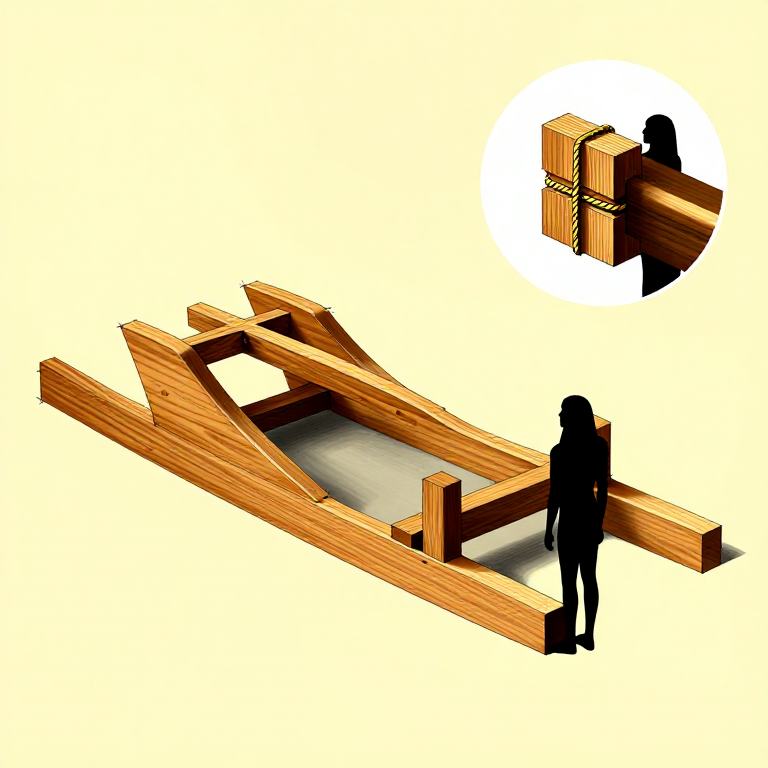
Peg the Joints
Peg the Joints
Drill holes through each assembled joint for the locking pegs. For maximum strength, drill the hole through the tenon slightly offset (1-2 mm) from the hole through the mortise walls — when the peg is driven through, it draws the tenon tighter into the mortise. This technique, called draw-boring, creates a permanently tight joint without glue. Drive hardwood pegs through each hole, trimming the ends flush. The pegs should fit tightly without splitting the surrounding wood. Greek carpenters used iron nails for some applications but relied primarily on wooden joinery for structural framing, as wooden joints flex with seasonal timber movement while rigid metal fasteners can work loose.
Test the Truss and Plan for Installation
Test the Truss and Plan for Installation
Lift the assembled truss to vertical and check that it stands plumb and stable. Test the joints by applying moderate lateral pressure — the truss should feel rigid with no racking or joint looseness. In actual construction, multiple trusses are erected at regular intervals (typically 1-2 meters apart) along the building length, then connected by horizontal purlins that support the roofing material. Greek temple roofs carried terracotta tiles (weighing approximately 30-50 kg per square meter) or marble tiles (even heavier), requiring very strong trusses. The timber structure was entirely hidden by the coffered stone or terracotta ceiling below, so Greek roof carpentry was purely structural, not decorative. Despite this hidden role, the engineering had to be precise — roof failures in temples with heavy stone tile loads would be catastrophic.
مواد
2- Timber beams (pine, oak, or fir)2 rafters (2.5-3m), 1 tie beam (3-4m), 1 king post (1-1.5m) piece
- 8-12 pieces, 2 cm diameter pieceجایگزین
ابزارهای لازم
6- جایگزین
- Drill or auger for peg holes
- Square and level
- جایگزین
Related blueprints
Other builds that share materials, tools, or techniques with this one.
CC0 مالکیت عمومی
این نقشه تحت مجوز CC0 منتشر شده است. شما آزاد هستید آن را کپی، ویرایش، توزیع و برای هر هدفی بدون نیاز به اجازه استفاده کنید.
با خرید محصولات از طریق نقشه از سازنده حمایت کنید و او کمیسیون سازنده تعیین شده توسط فروشندگان، دریافت میکند یا یک نسخه جدید از این نقشه ایجاد کنید و آن را به عنوان اتصال در نقشه خود قرار دهید تا درآمد به اشتراک گذاشته شود.