
هنر
زیبایی و سلامت
صنایع دستی
فرهنگ و تاریخ
سرگرمی
محیط زیست
غذا و نوشیدنی
آینده سبز
مهندسی معکوس
پروژه‌های مدرسه
علوم
ورزش
فناوری
پوشیدنی‌ها
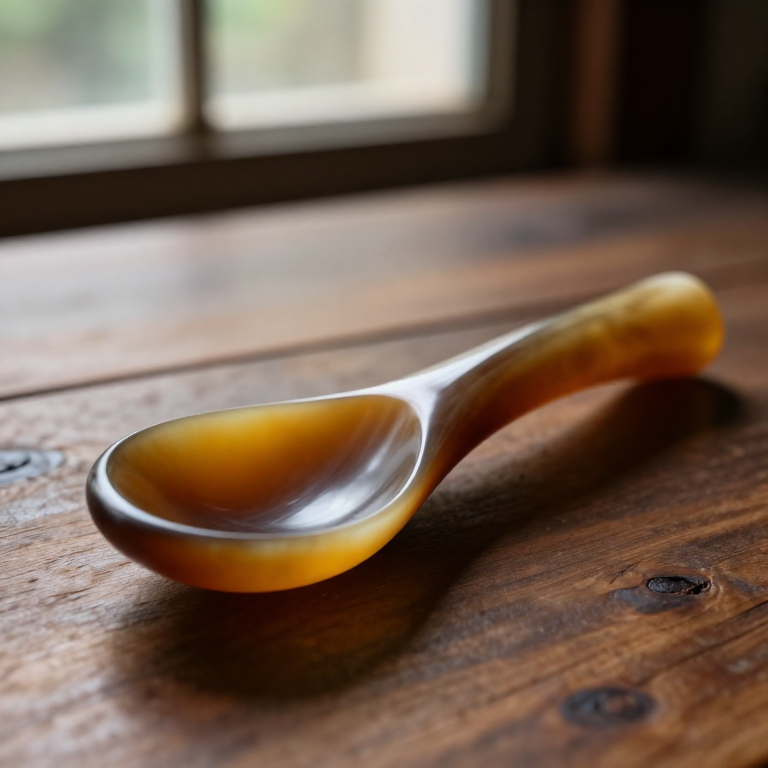
Making a Horn Spoon — Shaping Cattle Horn with Heat and Pressure
Woody

ایجاد شده توسط

Woody

2. ژوئیه 2026NO
۵
۰
۰
۰
۰

Making a Horn Spoon — Shaping Cattle Horn with Heat and Pressure

Cattle horn is a natural thermoplastic: heated in boiling water it turns soft and pliable, and when it cools it locks into whatever shape it was pressed into. For centuries this made horn the ideal material for spoons, cups and combs — cheaper than metal, tougher than wood, and safe against food. This blueprint makes a traditional horn spoon by hand: saw a section from a cow or ox horn, boil it soft, open it flat, cut the spoon blank, press the bowl over a wooden former, and finish it food-safe with a beeswax polish.
متوسط
5

دستورالعمل‌ها

1

Choose and saw a horn section

Pick a clean cow or ox horn. Saw off the solid, curved tip (it has no cavity and is discarded or kept for handles) and saw a length of the wide, hollow part of the horn to become the spoon.

مواد مورد نیاز این مرحله:

Cattle HornCattle Horn1 piece

ابزارهای مورد نیاز:

Hand SawHand Saw
2

Scrape and clean the horn

Scrape away the rough outer skin and any membrane inside the cavity with the knife, so the horn is clean and its natural translucency shows. This is the working stock.

مواد مورد نیاز این مرحله:

Cattle HornCattle Horn1 piece

ابزارهای مورد نیاز:

KnifeKnife
3

Boil the horn until soft

Simmer the horn section in a pot of water for 20 to 30 minutes. As it heats, the keratin softens and becomes pliable and slightly translucent — like thick leather. Keep it fully submerged and hot.

مواد مورد نیاز این مرحله:

WaterWater4 liter
Cattle HornCattle Horn1 piece

ابزارهای مورد نیاز:

Metal CauldronMetal Cauldron
4

Slit and open the horn flat

Lift the hot, soft horn out and quickly slit the tube lengthwise with the knife. Unroll it and press it open into a flat sheet while it is still pliable — work fast, it stiffens as it cools.

ابزارهای مورد نیاز:

KnifeKnife
5

Press the sheet flat and let it set

Clamp the opened horn flat between two boards in the bench vise and leave it until fully cool. Horn keeps whatever shape it holds while cooling, so it sets as a flat plate.

ابزارهای مورد نیاز:

Bench ViseBench Vise
6

Mark out the spoon blank

Draw the spoon outline on the flat plate — a rounded bowl at one end flowing into a straight handle. Choose the thickest part of the plate for the bowl so it can be dished without going too thin.

ابزارهای مورد نیاز:

KnifeKnife
7

Cut out the blank

Saw and cut around the marked outline to free the flat spoon blank from the plate. Leave a little extra material outside the line for final shaping.

ابزارهای مورد نیاز:

Hand SawHand Saw
KnifeKnife
8

Reheat the bowl end

Dip just the bowl end of the blank back into the boiling water for a few minutes until that section goes soft again. The handle can stay stiff.

مواد مورد نیاز این مرحله:

WaterWater4 liter

ابزارهای مورد نیاز:

Metal CauldronMetal Cauldron
9

Press the bowl over the former

Press the softened bowl end firmly down over the rounded wooden former (a spoon-bowl-shaped block of hardwood). The horn takes up the concave shape of a spoon bowl.

ابزارهای مورد نیاز:

Horn Spoon FormerHorn Spoon Former
10

Hold on the former until cool

Keep the bowl pressed against the former — by hand or clamped — until the horn is completely cold. When it releases it holds the dished bowl shape permanently.

ابزارهای مورد نیاز:

Horn Spoon FormerHorn Spoon Former
Bench ViseBench Vise
11

Rasp the shape true

Rasp the edges of the bowl and handle down to the marked outline and thin the handle to a comfortable taper. Work evenly so the spoon is symmetrical.

ابزارهای مورد نیاز:

RaspRasp
12

Scrape smooth

Drag the edge of the knife across the horn as a scraper to remove the rasp marks and bring up a smooth, even surface on both the bowl and handle.

ابزارهای مورد نیاز:

KnifeKnife
13

Polish food-safe with beeswax

Rub beeswax into the finished horn and buff hard with a cloth. This brings up a soft shine and seals the surface with a food-safe finish — the spoon is ready to use.

مواد مورد نیاز این مرحله:

BeeswaxBeeswax1 piece

ابزارهای مورد نیاز:

Clean Cotton ClothClean Cotton Cloth

مواد

3

ابزارهای لازم

7

مواد نقشه‌های متصل

CC0 مالکیت عمومی

این نقشه تحت مجوز CC0 منتشر شده است. شما آزاد هستید آن را کپی، ویرایش، توزیع و برای هر هدفی بدون نیاز به اجازه استفاده کنید.

با خرید محصولات از طریق نقشه از سازنده حمایت کنید و او کمیسیون سازنده تعیین شده توسط فروشندگان، دریافت می‌کند یا یک نسخه جدید از این نقشه ایجاد کنید و آن را به عنوان اتصال در نقشه خود قرار دهید تا درآمد به اشتراک گذاشته شود.

بحث و گفتگو

(0)

ورود برای شرکت در بحث

در حال بارگذاری نظرات...