همکاری
هنر
زیبایی و سلامت
صنایع دستی
فرهنگ و تاریخ
سرگرمی
محیط زیست
غذا و نوشیدنی
مهندسی معکوس
علوم
ورزش
فناوری
پوشیدنیها
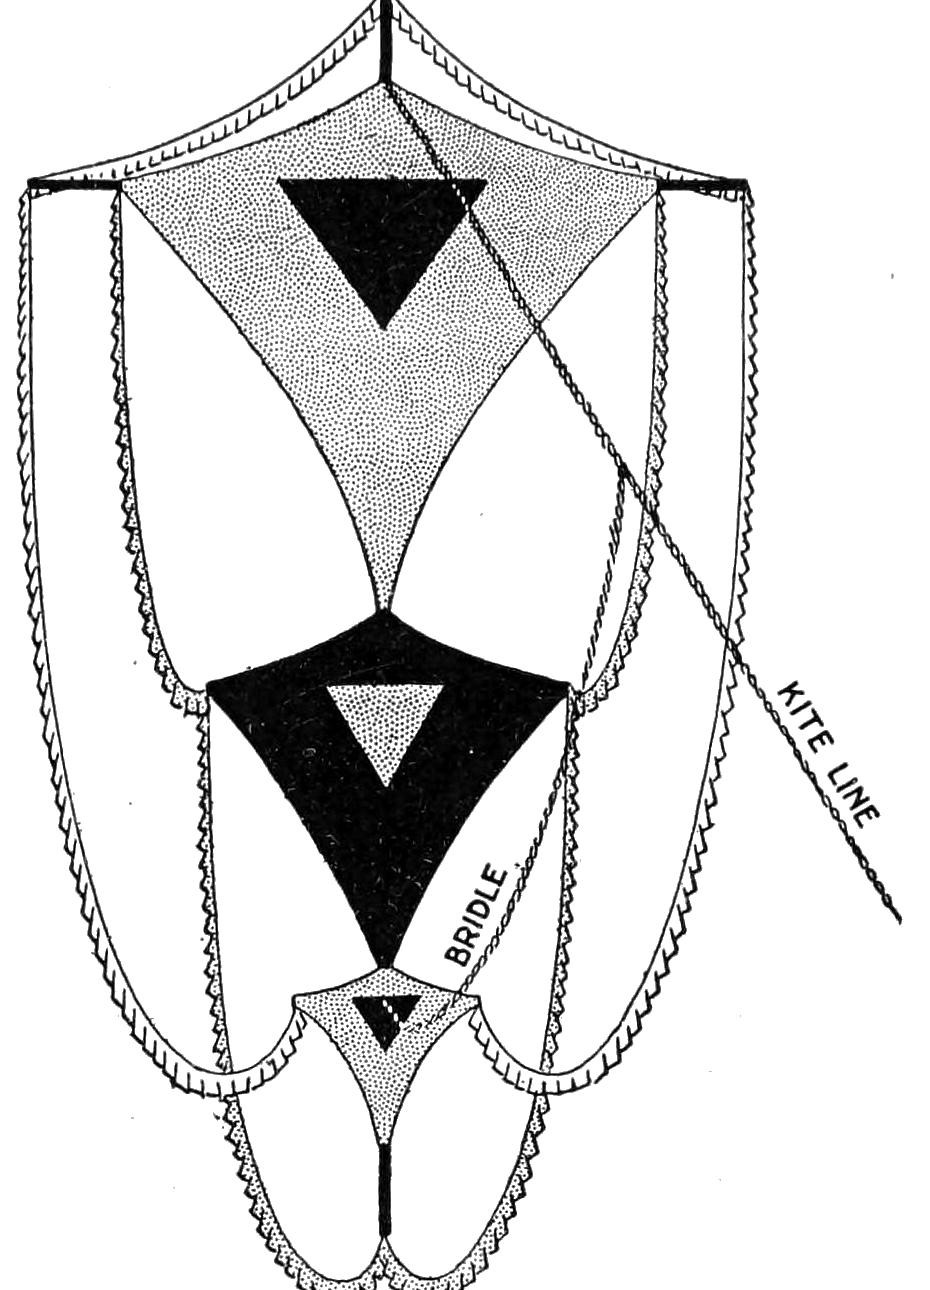


Festooned Kite: Three Tailless Kites on One 7 ft Spruce Spine With Tissue-Paper Fringes (Boy Mechanic, 1919)
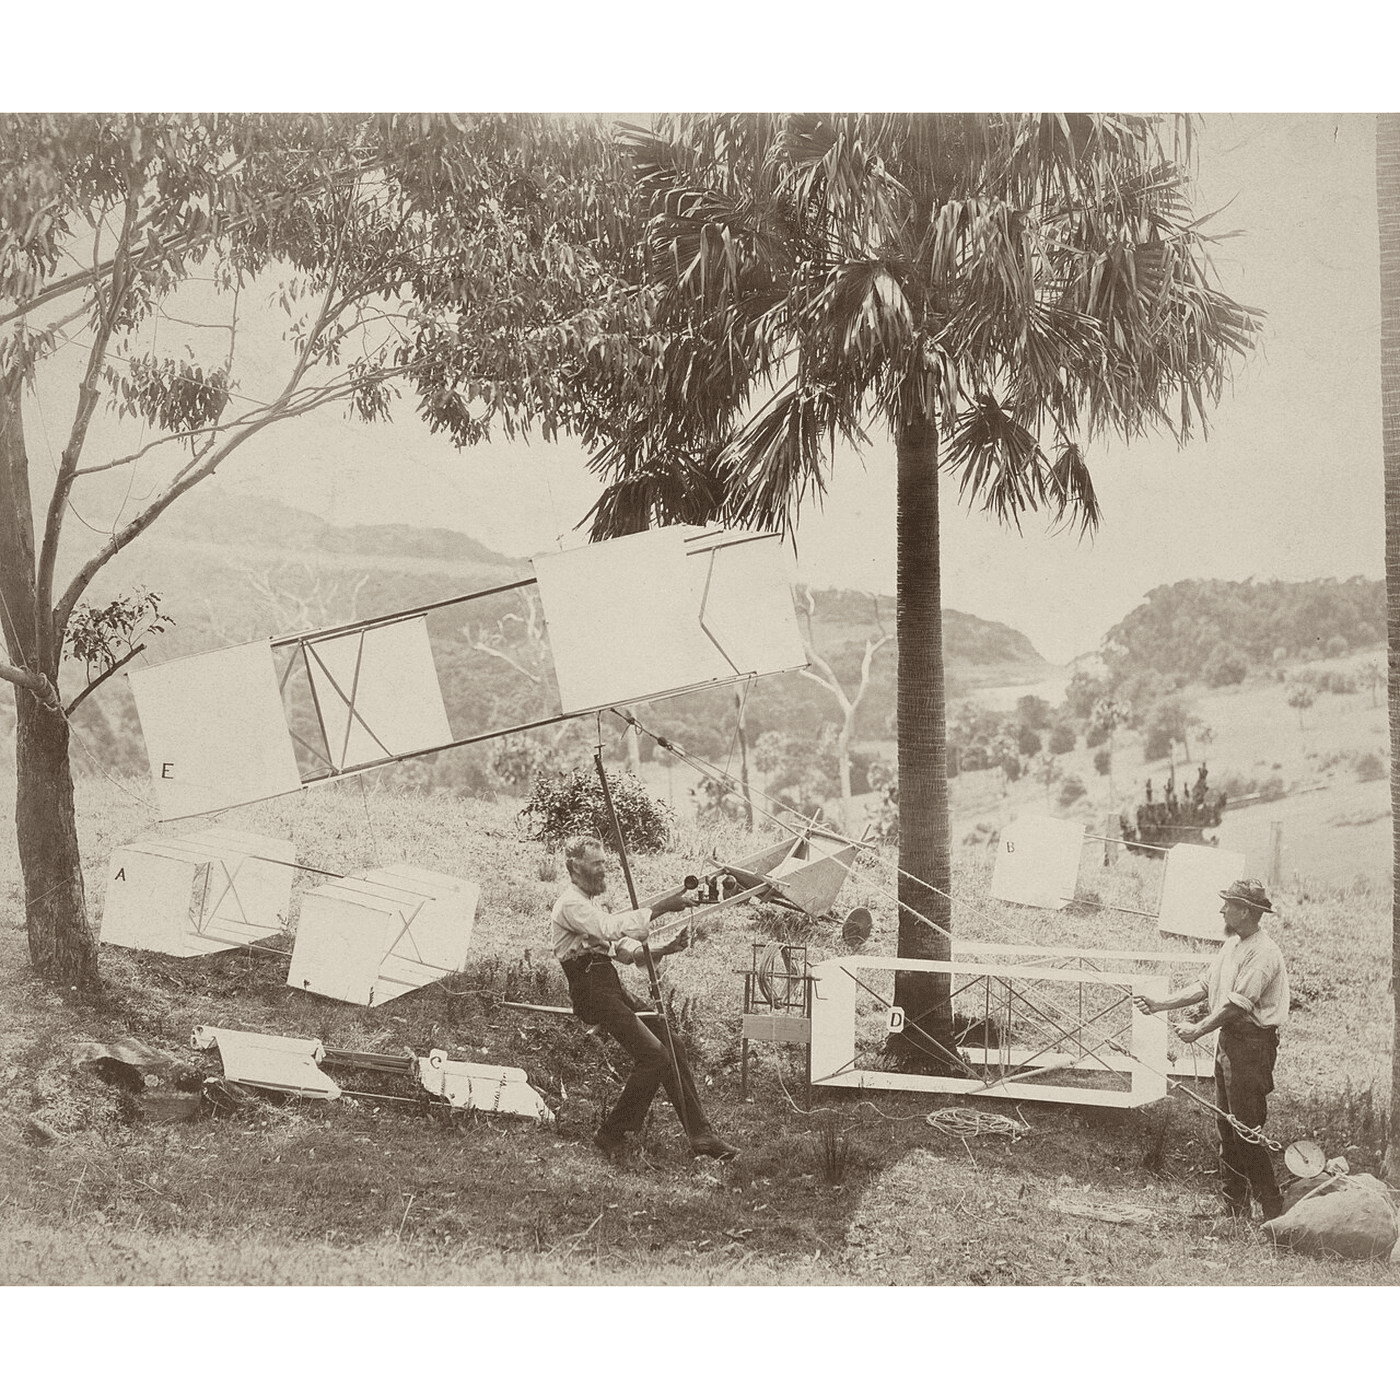
C. M. Miller's compound kite from The Boy Mechanic, Book 3 (1919): three tailless kites, 3 ft, 2 ft and 1 ft wide, strung on one 7 ft spruce spine, covered in tissue paper and hung with fringed tissue festoons from the ends of the sticks. An 87 in bridle sets it to the wind.
متوسط
About 1 day
دستورالعملها
1
1
Spine stations and string lengths
Spine stations and string lengths
در حال بارگذاری دفترچهٔ Jupyter…
2
2
Read The Boy Mechanic, Book 3
Read The Boy Mechanic, Book 3
"More than one kite on the same framework is known as a compound kite. The one illustrated consists of three tailless kites on one long stick, called the spine."
3
3
Cut the sticks
Cut the sticks
Cut the spine of straight-grained spruce (or pine or bass) without a twist, 7 ft long by 1/4 by 1/2 in; if the wood breaks easily make it 3/4 in wide, or 3/8 in thick. Cut the bows 4 ft by 1/4 by 1/2 in, 2 ft by 1/4 by 3/8 in, and 1 ft by 1/4 by 1/4 in. A twisted spine keeps the three kites out of one plane and makes the kite unsteady.
مواد مورد نیاز این مرحله:
 تیرک چوب نرم4 قطعه
ابزارهای مورد نیاز:
 ارهٔ دستی
 رندهٔ دستی
 متر نواری
 مداد
4
4
Lash on the bows
Lash on the bows
Lash the upper bow 13 in from the top of the spine, its ends 6 in past the kite for the festoons; then the centre bow 5 in below D and the lower bow as in the drawing (6, 7, 29, 5, 19, 2, 10 and 6 in down the spine). Lash, do not nail: wind diagonally both left and right round the two sticks, then wind between them round the other windings to draw everything tight.
مواد مورد نیاز این مرحله:
 نخ بادبادک1 قطعه
ابزارهای مورد نیاز:
متر نواریمداد قیچی
5
5
String the outlines
String the outlines
Drill small holes (or notch with a knife or saw) in the spine 6 in from the top at A, 6 in from each end of the upper bow at B and C, and 29 in below the upper bow at D. Tie the outline at A and pass it through C, D and B back to A; draw it tight without springing spine or bow. Check that AC equals AB and CD equals BD, shift the string until they do, and wind each point (E) so it cannot slip. String the centre and lower kites the same way.
مواد مورد نیاز این مرحله:
نخ بادبادک1 قطعهابزارهای مورد نیاز:
 دریل دستی
 چاقوی جیبی فولادیمتر نواری
6
6
Cover and fringe
Cover and fringe
Cut the tissue about 1 in larger all round than each kite, turn over about half the allowance and paste it, leaving the cover loose. French tissue comes in fine colours and is stronger than common tissue; Chinese rice paper is strongest but only natural colour. For the festoons cut tissue strips 2-1/2 in wide, paste 1/2 in of one long edge over a string, and slit the loose edge every 1 in. Hang the festoons from the stick ends in easy curves, not tight, keeping both sides balanced.
مواد مورد نیاز این مرحله:
 کاغذ کشی نازک رنگی5 ورق
 چسب آرد گندم1 قطعهنخ بادبادک1 قطعه
ابزارهای مورد نیاز:
قیچی قلمموی چسب
 خطکش
7
7
Bow the kites and bridle
Bow the kites and bridle
Tie a string from end to end of the upper and centre bows on the back and spring in short brace sticks to bend them, as usual for tailless kites. Tie the 87 in bridle at A and to the spine at F, and attach the kite line 30 in from A, leaving 57 in to F.
مواد مورد نیاز این مرحله:
نخ بادبادک1 قطعهتیرک چوب نرم1 قطعهابزارهای مورد نیاز:
چاقوی جیبی فولادیمتر نواری8
8
Flying and troubleshooting
Flying and troubleshooting
Festooned kite flying.
Flow
Loading...
9
9
History and honest limits
History and honest limits
From "How to Make Combined Kites, Part II: A Festooned Kite" by C. M. Miller, in **The Boy Mechanic, Book 3**, Popular Mechanics, 1919 (Project Gutenberg 71856; checked on the archive.org scan boymechanic0003unse, pp. 155-156). He does not name the string, the paste or the kite line. The tools and metric figures are ours.
مواد
4- 4 قطعهجایگزین
- 4 قطعهجایگزین
- 5 ورقجایگزین
- 1 قطعهجایگزین
این نقشه میسازد
نقشههای مرتبط
این نقشهها دانش مشترکی دارند — تکنیکها، مواد یا اصول

CC0 مالکیت عمومی
این نقشه تحت مجوز CC0 منتشر شده است. شما آزاد هستید آن را کپی، ویرایش، توزیع و برای هر هدفی بدون نیاز به اجازه استفاده کنید.
با خرید محصولات از طریق نقشه از سازنده حمایت کنید و او کمیسیون سازنده تعیین شده توسط فروشندگان، دریافت میکند یا یک نسخه جدید از این نقشه ایجاد کنید و آن را به عنوان اتصال در نقشه خود قرار دهید تا درآمد به اشتراک گذاشته شود.