
Pagkuha ng Capiz Shell — Mula Dagat Hanggang Palamuti
دستورالعملها
Pagkilala sa tamang lugar ng pag-aani
Pagkilala sa tamang lugar ng pag-aani
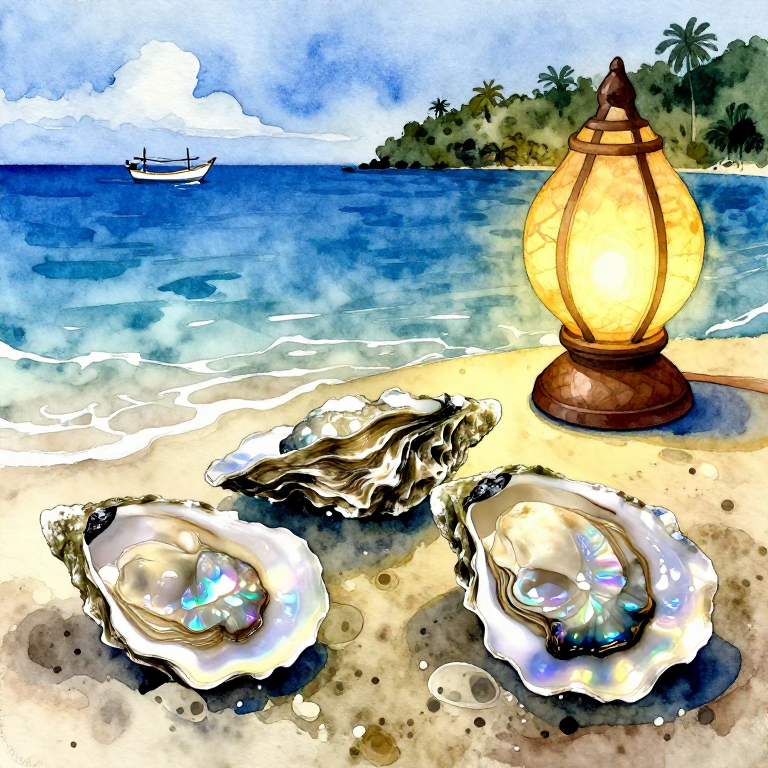
Kilalanin ang mga lugar na may likas na populasyon ng windowpane oyster (Placuna placenta), na tinatawag na 'kapis' sa Pilipinas. Ang mga kabibe na ito ay tumutubo sa mabuhanging o maputik na sahig ng dagat sa mababaw na bahagi ng dagat — karaniwang 1-3 metro ang lalim kapag kati. Sa lalawigan ng Capiz, lalo na sa Roxas City at mga munisipyo ng Ivisan, Sapian, at Pontevedra, ang mga pinakamainam na harvesting grounds ay nasa mga estuaryo at mababaw na baybayin na may malambot na substrato. Obserbahan ang mga palatandaan: mga lumang kabibe na nakakalat sa baybayin, malinaw na tubig na may buhangin-putik na sahig, at kalmadong daloy ng tubig. Siguraduhing may tamang permiso mula sa Bureau of Fisheries and Aquatic Resources (BFAR) bago mag-ani — ang pag-aani ng capiz ay regulado upang mapanatili ang populasyon.
ابزارهای مورد نیاز:
 دفترچه صحرایی
Paghahanda ng kagamitan sa pag-aani
Paghahanda ng kagamitan sa pag-aani
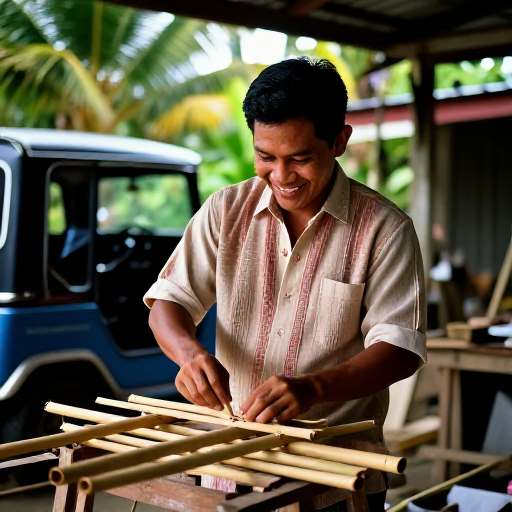
Ihanda ang lahat ng kagamitan bago lumabas sa dagat. Ang pangunahing paraan ng pagkuha ng capiz ay paglalakad sa mababaw na tubig habang kati at pagkalkal sa buhangin gamit ang kamay o simpleng rake. Para sa mas malalim na bahagi (2-3 metro), kailangan ng snorkel at diving mask. Maghanda ng mga basket na yari sa kawayan o plastic para sa pangongolekta. Ang mga harvester ng capiz ay karaniwang naglalakad na nakatapak sa sahig ng dagat at nadarama ang mga kabibe sa ilalim ng paa — ang manipis na gilid ng kabibe ay nararamdaman sa malambot na buhangin. Maghanda ng takip na damit upang protektahan ang balat mula sa araw — ang mga harvester ay nasa tubig ng maraming oras.
مواد مورد نیاز این مرحله:
 سبد گردآوری از بامبوی بافته3 قطعه
 کیسهٔ توری نایلونی5 قطعه
ابزارهای مورد نیاز:
 ماسک غواصی با لولهٔ تنفس
 شنکش دستی کوچک بامبو
 پیراهن ضد آفتاب آبی
Pagkolekta ng kabibe sa mababaw na tubig
Pagkolekta ng kabibe sa mababaw na tubig
Pumasok sa tubig kapag mababang kati — ito ang pinakamainam na oras dahil mas mababaw ang tubig at mas madaling makita at madama ang mga kabibe. Maglakad nang dahan-dahan sa mabuhanging sahig, ginagamit ang talampakan upang maramdaman ang manipis na bilog na kabibe na nakabaon sa ilalim ng 2-5 cm ng buhangin. Kapag naramdaman ang matigas at patag na hugis ng capiz, yumuko at kunin gamit ang kamay. Ang bawat kabibe ay karaniwang 8-15 cm ang lapad, halos bilog, at napaka-manipis (1-2 mm). Mag-ingat sa paghawak — ang mga gilid ay maaaring matalas. Ilagay ang mga nakolektang kabibe sa basket na nakasabit sa baywang. Ang isang bihasang harvester ay makakakolekta ng 100-200 piraso sa isang araw na pagtatrabaho (4-6 na oras sa tubig).
ابزارهای مورد نیاز:
ماسک غواصی با لولهٔ تنفس دستکش لاستیکی
 سبد گردآوری کمری
Paunang paglilinis sa dalampasigan
Paunang paglilinis sa dalampasigan
Dalhin ang mga nakolektang kabibe sa dalampasigan at hugasan ng tubig-dagat upang alisin ang buhangin, putik, at mga maliliit na hayop na nakadikit sa ibabaw. Ibabad ang mga kabibe sa malaking batya na may malinis na tubig-dagat sa loob ng 1-2 oras — ito ay nagbibigay-daan sa mga buhay na organismo na lumabas mula sa pagitan ng mga kabibe. Itapon ang mga nasirang kabibe — ang mga may bitak, basag, o labis na nipis ay hindi na magagamit. Paghiwalayin ang mga kabibe ayon sa laki: malalaki (higit sa 12 cm), katamtaman (8-12 cm), at maliliit (mas mababa sa 8 cm). Ang malalaking kabibe ay may pinakamataas na halaga sa merkado.
مواد مورد نیاز این مرحله:
 آب دریا50 لیتر
ابزارهای مورد نیاز:
 لگن بزرگ پلاستیکی
 برس زبر
Paghihiwalay ng dalawang kalahati ng kabibe
Paghihiwalay ng dalawang kalahati ng kabibe
Ang bawat capiz shell ay binubuo ng dalawang valve (kalahating kabibe) na magkadikit sa isang hinge. Upang paghiwalayin, ipasok ang manipis na talim ng kutsilyo sa gilid ng kabibe malapit sa hinge at dahan-dahang i-twist upang magbukas. Maaari ring ilagay ang mga kabibe sa araw ng ilang oras — ang init ay nagpapatuyo ng hinge ligament, na nagpapadali ng pagbukas. Paghiwalayin ang bawat kalahati nang maingat upang hindi mabasag ang manipis na shell. Ang bawat kalahati ay isang usable na piraso ng capiz. Ang mga laman ng kabibe (soft tissue) ay inilalabas — tradisyunal na ginagamit ito bilang pagkain o pataba sa hardin.
ابزارهای مورد نیاز:
 چاقوی صدفبازکنی با تیغه نازکدستکش لاستیکی
Pag-alis ng organic matter at periostracum
Pag-alis ng organic matter at periostracum
Ang hilaw na capiz shell ay may manipis na organic layer (periostracum) sa labas at natitirang laman sa loob na kailangang alisin upang lumitaw ang translucent na katangian ng shell. Ibabad ang mga hiwalay na shell halves sa solusyon ng tubig at asin (1 kilo ng asin sa bawat 10 litro ng tubig) sa loob ng 24-48 oras. Ang asin ay tumutulong na mapatanggal ang organic matter. Pagkatapos ibabad, kuskusin ang bawat kabibe gamit ang malambot na brush upang alisin ang natitirang periostracum. Huwag gumamit ng maasim na kemikal — ang capiz shell ay calcium carbonate (aragonite) na natutunaw sa acid. Banlawan ng malinis na tubig-tabang pagkatapos.
مواد مورد نیاز این مرحله:
 نمک دریای درشت5 کیلوگرم
 آب شیرین50 لیتر
ابزارهای مورد نیاز:
لگن بزرگ پلاستیکی برس نایلونی نرم
Pagpapatag ng mga kabibe
Pagpapatag ng mga kabibe
Ang mga hilaw na capiz shell ay may bahagyang kurba. Para sa paggamit bilang bintana, lampshade, at palamuti, kailangang patagin ang mga ito. Ibabad muna ang mga malilinis na kabibe sa mainit na tubig (hindi kumukulo — mga 60-70°C) sa loob ng 5-10 minuto upang lumambot ang shell nang bahagya. Habang malambot pa, ilagay ang bawat kabibe sa pagitan ng dalawang patag na kahoy na tabla at lagyan ng pantay na bigat sa ibabaw. Hayaang matuyo ng 24-48 oras habang naka-press. Ang resulta ay isang patag, translucent na piraso ng capiz na handang i-process pa. Mag-ingat sa bigat — labis na presyon ay magbabasag sa manipis na shell.
مواد مورد نیاز این مرحله:
 آب داغ (۶۵-۷۰ درجهٔ سلسیوس)20 لیتر
ابزارهای مورد نیاز:
 تختههای چوبی صاف پرس (یک جفت)
 بلوک بتنی وزنه
 دیگ بزرگ فولاد زنگنزن
Pagpapatuyo at pagpapaputi
Pagpapatuyo at pagpapaputi
Pagkatapos patagin, i-spread ang mga kabibe sa bamboo drying rack sa ilalim ng araw. Ang sunlight ay may natural na bleaching effect sa capiz — ang UV rays ay nagpapaputi ng shell at nagpapataas ng translucency. Ilatag ang mga kabibe nang hindi nagpapatong-patong, sa isang layer lamang. Paikut-ikutin ang mga ito tuwing ilang oras upang pareho ang pagka-expose sa araw ng magkabilang panig. Patuyuin ng 2-3 araw sa magandang panahon. Ang natapos na capiz ay dapat na halos transparent kapag inilalagay sa liwanag — katulad ng frosted glass. Ang kulay ay magiging creamy white hanggang light gold. Kunin ang mga kabibe kapag maulan at itago sa tuyong lugar.
ابزارهای مورد نیاز:
 خشککن بامبو
Pag-uuri ayon sa laki at kalidad
Pag-uuri ayon sa laki at kalidad
Uriin ang mga tuyo at patag na capiz shell ayon sa laki at kalidad. Sukatin ang diameter ng bawat piraso gamit ang ruler. Mga kategorya: Extra Large (higit sa 15 cm) — pinakamahal, ginagamit sa mga lampshade at malalaking bintana; Large (12-15 cm) — para sa mga chandelier at dekorasyon; Medium (8-12 cm) — para sa mga wind chime at maliit na palamuti; Small (mas mababa sa 8 cm) — para sa mosaic work at mga craft. Suriin din ang translucency: itaas ang bawat kabibe sa liwanag — ang pinakamahalaga ay ang mga halos transparent na walang dark spots, bitak, o discoloration. Ihiwalay ang mga may depekto — magagamit pa rin ang mga ito sa mosaic work kung saan pinutol at dinadagdagan ng iba pang materyales.
ابزارهای مورد نیاز:
 خطکش
خطکش میز جداسازی
Pagputol at paghubog para sa partikular na gamit
Pagputol at paghubog para sa partikular na gamit
Para sa mga partikular na produkto, putulin ang capiz shell sa kinakailangang hugis gamit ang gunting na pang-metal o matalim na kutsilyo. Ang capiz ay sapat na manipis upang putulin ng gunting kapag bahagyang basa. Markahan muna ang hugis gamit ang pencil sa ibabaw ng kabibe bago putulin. Para sa mga bilog na lampshade panel, gumamit ng template. Para sa mga parisukat o rectangular na bintana, gupitin ng tuwid gamit ang ruler bilang gabay. Ang mga gilid ng putol na capiz ay maaaring matalim — pakinisin gamit ang pinong sandpaper (grit 220-320). Huwag gamitin ang electric saw — ang vibration ay magbabasag ng manipis na shell. Ang lahat ng pagputol ay ginagawa sa kamay.
مواد مورد نیاز این مرحله:
 ورقهای الگوی مقوایی5 قطعه
 ورق کاغذ سنباده10 قطعه
ابزارهای مورد نیاز:
 قیچی فلز سنگینکارخطکش
 مداد نشانهگذاری
Pagkukura at pangwakas na paggamot
Pagkukura at pangwakas na paggamot
Ang curing ay ang pangwakas na hakbang bago ang pag-iimbak. Ibabad ang mga natapos na capiz shell sa malinis na tubig-tabang na may kaunting baking soda (1 kutsara sa bawat 5 litro ng tubig) sa loob ng 2-3 oras. Ito ay nag-aalis ng natitirang asin at nag-neutralize ng anumang natitirang organic acids. Banlawan ng malinis na tubig at patuyuin muli sa hangin ng 24 oras sa lilim — hindi na kailangan ng direktang araw sa yugtong ito. Kapag tuyo na, maaaring pahiran ng manipis na layer ng mineral oil gamit ang malambot na tela upang mapahusay ang lustre at translucency. Opsyonal ito — ang mga shell na walang oil ay may mas natural na matte finish na mas gusto ng ilang mga craftsmen.
مواد مورد نیاز این مرحله:
 جوششیرین200 gramآب شیرین30 لیتر
 روغن معدنی خوراکی100 میلیلیتر
ابزارهای مورد نیاز:
لگن بزرگ پلاستیکی پارچهٔ نخی نرم
Pag-iimpak at pagsasalansan para sa pagbebenta
Pag-iimpak at pagsasalansan para sa pagbebenta
Iimpak ang mga natapos na capiz shell nang maingat upang maiwasan ang pagkabasag sa transportasyon. Maglagay ng manipis na layer ng papel o tela sa pagitan ng bawat kabibe upang hindi magkagasgas o magkadikit. Isalansan ang mga kabibe na magkakahawig ang laki sa mga bundle na 50-100 piraso, nakabalot sa malambot na papel at nakatali ng lubid. Ilagay sa kahon na may dagdag na padding sa mga gilid. Itago sa tuyong lugar na may magandang bentilasyon — ang capiz shell ay maaaring maging brittle kapag sobrang tuyo o mag-develop ng amoy kapag naiimbak sa mahalumigmig na lugar. Ang tamang temperatura ng pag-iimbak ay 20-30°C na may humidity na mas mababa sa 60%. Ang maayos na naka-imbak na capiz shell ay tatagal ng maraming taon nang walang pagkasira ng kalidad.
مواد مورد نیاز این مرحله:
 کاغذ نازک بدون اسید100 ورق
 جعبهٔ مقوای کنگرهای10 قطعه
 ریسمان پنبهای20 متر
ابزارهای مورد نیاز:
 میز بستهبندی
مواد
15- جایگزین
- 5 قطعهجایگزین
- 50 لیترجایگزین
- 5 کیلوگرمجایگزین
- 80 لیترجایگزین
- 20 لیترجایگزین
- 5 قطعهجایگزین
- 10 قطعهجایگزین
- 200 gramجایگزین
- 100 میلیلیترجایگزین
- 100 ورقجایگزین
- 10 قطعهجایگزین
- 20 مترجایگزین
- 50 لیترجایگزین
- 1 قطعهجایگزین
ابزارهای لازم
20- جایگزین
- جایگزین
- جایگزین
- جایگزین
- جایگزین
- جایگزین
- جایگزین
- جایگزین
- جایگزین
- جایگزین
- جایگزین
- جایگزین
- جایگزین
- جایگزین
- جایگزین
- جایگزین
- جایگزین
- جایگزین
CC0 مالکیت عمومی
این نقشه تحت مجوز CC0 منتشر شده است. شما آزاد هستید آن را کپی، ویرایش، توزیع و برای هر هدفی بدون نیاز به اجازه استفاده کنید.
با خرید محصولات از طریق نقشه از سازنده حمایت کنید و او کمیسیون سازنده تعیین شده توسط فروشندگان، دریافت میکند یا یک نسخه جدید از این نقشه ایجاد کنید و آن را به عنوان اتصال در نقشه خود قرار دهید تا درآمد به اشتراک گذاشته شود.