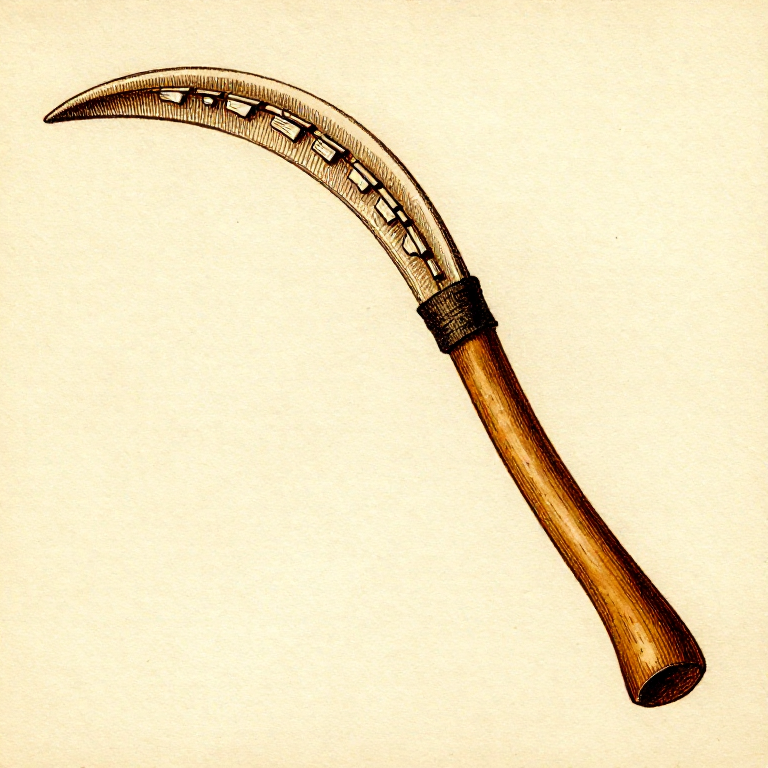
Making a Composite Sickle — Flint-Bladed Harvesting Tool
دستورالعملها
Select and Shape the Handle
Select and Shape the Handle
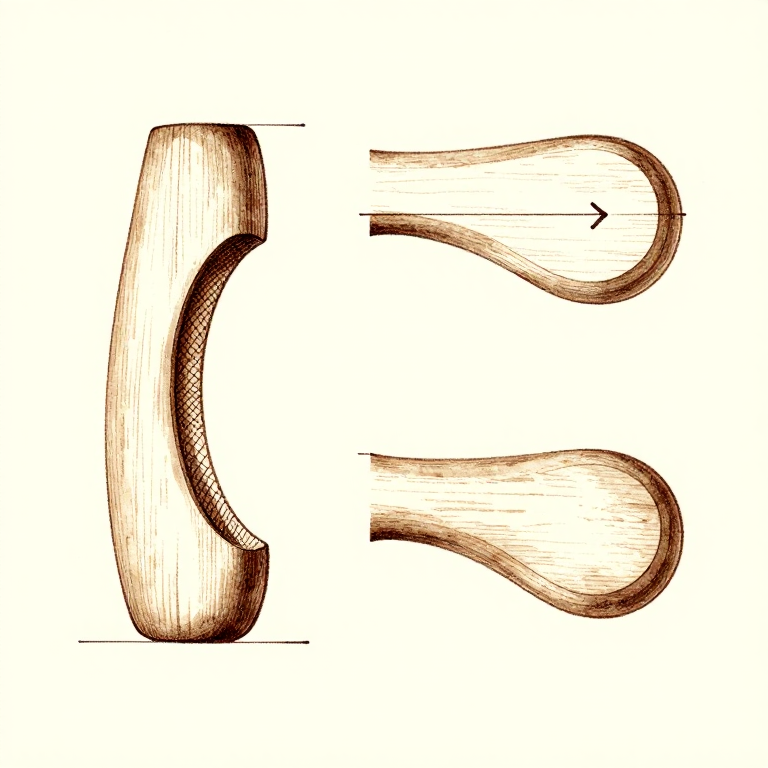
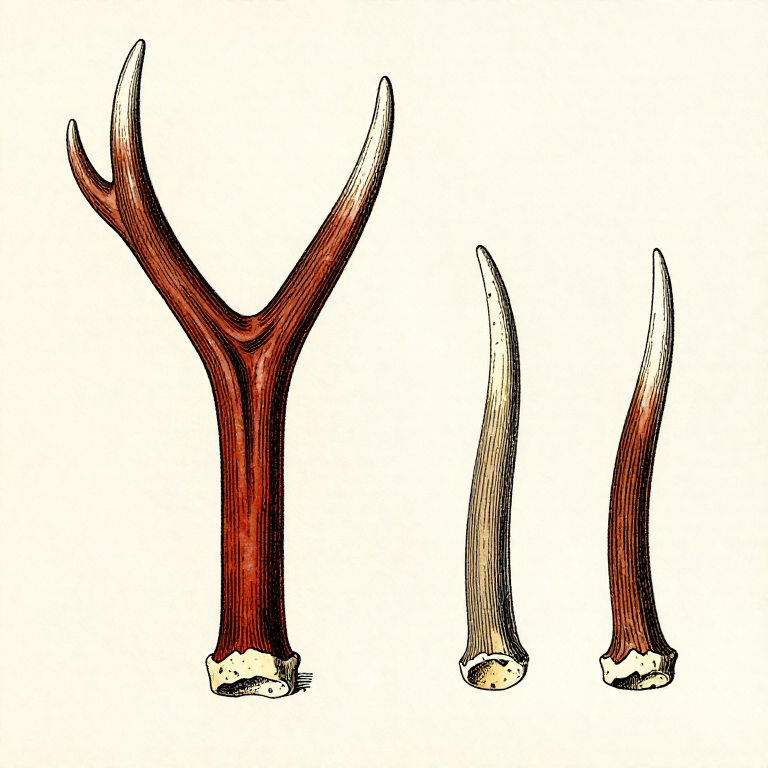
Select a naturally curved branch of dense hardwood (oak, ash, or wild almond are archaeologically attested choices) or a section of red deer antler with a gentle arc. The ideal curve follows a radius of approximately 15-20 cm — similar to the arc of a human forearm sweep when cutting grain. Cut the handle to 30-40 cm in length. The inner edge of the curve will hold the cutting blades. Using a flint burin or sharp graving tool, carve a continuous groove along the inner curve, approximately 5-8 mm deep and 3-5 mm wide — just wide enough to accept the flint bladelets edge-on. The groove must be uniform in depth so that all bladelets project the same height above the handle surface.
مواد مورد نیاز این مرحله:
 Curved Branch (Bow)1, approximately 30-40 cm long cm
 Pine Resin50-100 g g
 Beeswax (Optional)small amount piece
ابزارهای مورد نیاز:
 Smooth Stone
Prepare the Flint Bladelets
Prepare the Flint Bladelets
Select 5-8 pre-knapped flint bladelets (microliths), each 2-4 cm long, 8-12 mm wide, and 2-3 mm thick, with at least one sharp cutting edge. These can be struck from a prepared blade core using indirect percussion — a technique that produces multiple uniform blades from a single flint nodule. The bladelets should be roughly uniform in width so they fit the groove consistently. Lay them out in sequence along the groove to plan their placement — they should form a continuous cutting edge with minimal gaps, like teeth in a jaw. If any bladelet is too wide for the groove, grind the back edge against a sandstone slab to thin it. The cutting edges all face the same direction — toward the user during the cutting stroke.
Prepare the Mastic Adhesive
Prepare the Mastic Adhesive
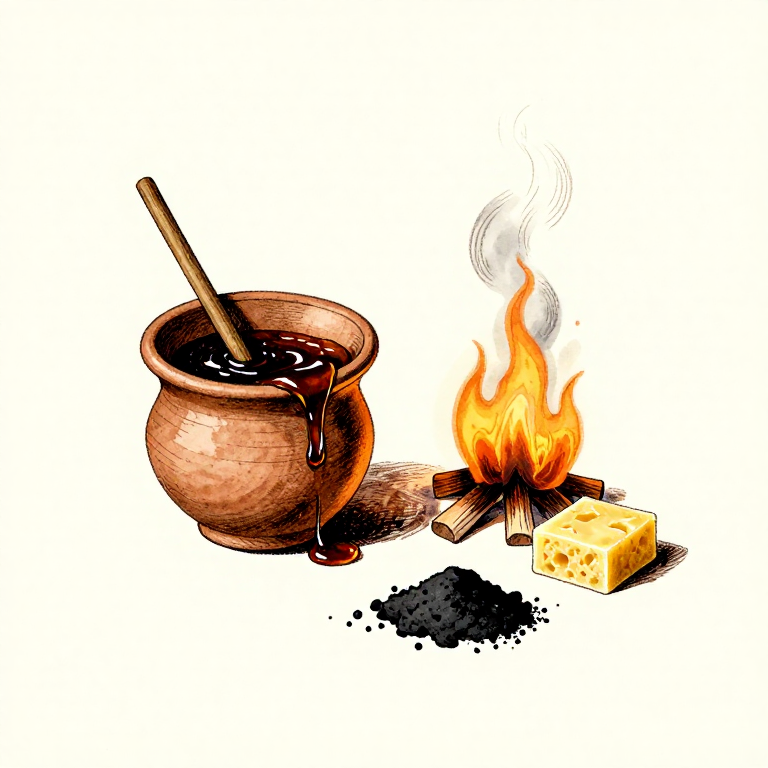
The adhesive that holds the bladelets in the groove is a thermoplastic mastic — a mixture of pine resin, beeswax, and charcoal powder. Heat pine resin near a fire until it becomes liquid (approximately 70-80 degrees C). Mix in finely ground charcoal powder (approximately 30% by volume) — the charcoal acts as a structural filler that prevents the resin from becoming brittle when cold. If available, add a small amount of beeswax (10-15% by volume) for flexibility. Stir until homogeneous. The finished mastic should be thick and sticky when warm, and hard but not glassy when cool. Natufian mastic residues analysed by gas chromatography-mass spectrometry consistently show pine/conifer resin as the base, often mixed with bitumen (naturally occurring asphalt) when available in the Jordan Valley.
Set the Bladelets in the Groove
Set the Bladelets in the Groove
Working quickly while the mastic is warm and sticky, fill the carved groove with a layer of mastic using a stick applicator. Press each bladelet into the groove edge-on, cutting edge outward, with the bladelets angled slightly forward (about 10-15 degrees from perpendicular to the handle) — this angle creates a slicing action rather than a chopping action, which is more efficient for cutting cereal stems. Space the bladelets with 1-2 mm gaps between them and pack additional mastic around each one, ensuring the adhesive fills all voids between the blade and the groove walls. Each bladelet should project 3-5 mm above the handle surface — enough to cut stems but not so much that the blade wobbles. Allow the mastic to cool and harden completely before use — approximately 30 minutes at room temperature.
Test and Develop Sickle Gloss
Test and Develop Sickle Gloss
Test the sickle by cutting a handful of grass or cereal stems with a sweeping motion, pulling the curved blade through the stems. The cutting action should be smooth, with the successive bladelets each slicing a portion of the stem bundle. If any bladelet is loose, re-warm the mastic locally with a heated stone and press the blade back into position. With use, the flint cutting edges develop a characteristic high-gloss polish called sickle gloss — a microscopically smooth, reflective surface caused by abrasion from phytoliths (silica bodies) embedded in cereal stems. Sickle gloss is one of the most reliable archaeological indicators of plant harvesting; its presence on Natufian tools at sites like Ain Mallaha and Abu Hureyra (c. 11,000 BCE) provided the first evidence that systematic grain harvesting preceded deliberate cultivation. A well-made composite sickle can harvest grain as efficiently as an iron sickle — experimental archaeology trials show rates of 1-2 kg of grain per hour.
مواد
5- 1, approx 30-40 cm pieceجایگزین
- 5-8 blades, 2-4 cm each pieceجایگزین
- 50-100 g pieceجایگزین
ابزارهای لازم
3- جایگزین
- جایگزین
Related blueprints
Other builds that share materials, tools, or techniques with this one.
CC0 مالکیت عمومی
این نقشه تحت مجوز CC0 منتشر شده است. شما آزاد هستید آن را کپی، ویرایش، توزیع و برای هر هدفی بدون نیاز به اجازه استفاده کنید.
با خرید محصولات از طریق نقشه از سازنده حمایت کنید و او کمیسیون سازنده تعیین شده توسط فروشندگان، دریافت میکند یا یک نسخه جدید از این نقشه ایجاد کنید و آن را به عنوان اتصال در نقشه خود قرار دهید تا درآمد به اشتراک گذاشته شود.