هنر
زیبایی و سلامت
صنایع دستی
فرهنگ و تاریخ
سرگرمی
محیط زیست
غذا و نوشیدنی
مهندسی معکوس
علوم
ورزش
فناوری
پوشیدنیها
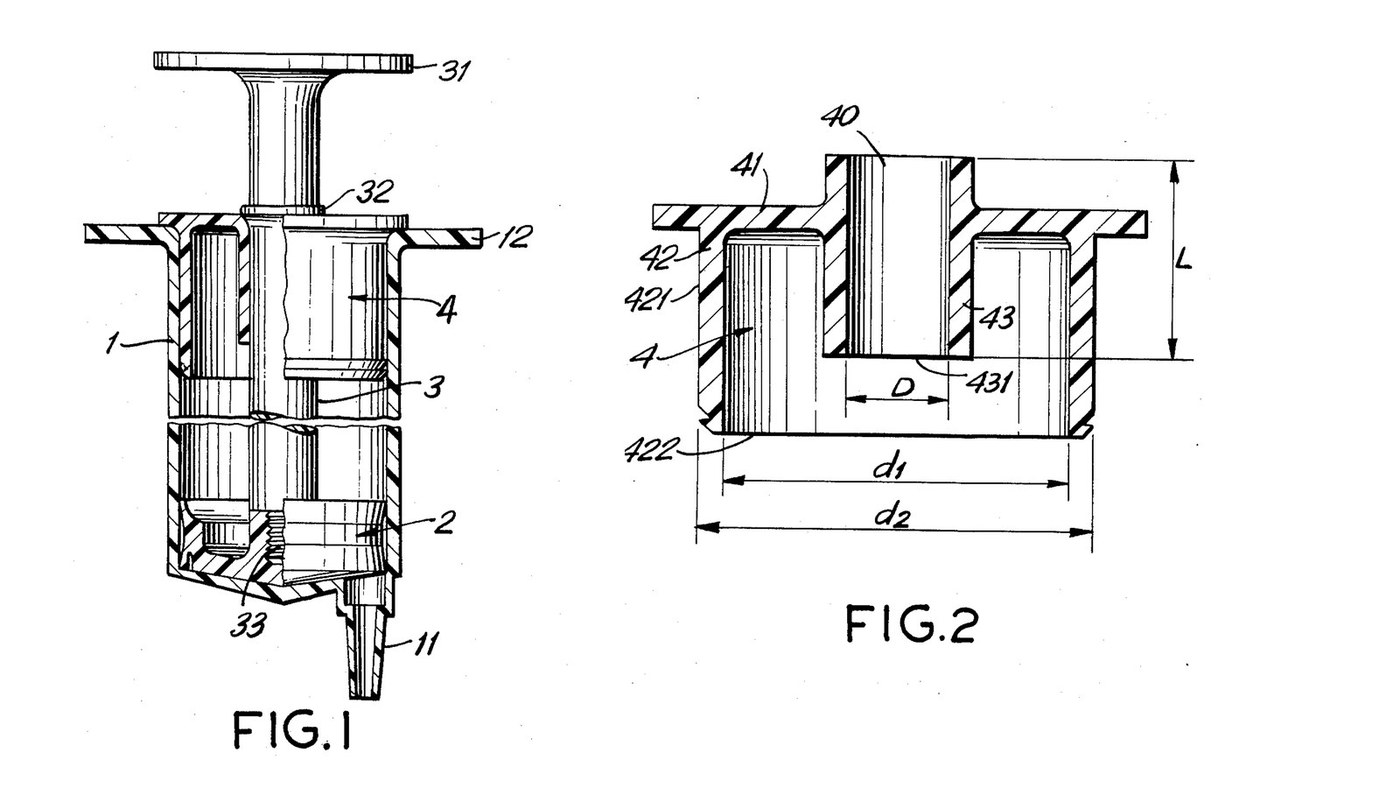


Plastic Syringe Set: Moulded Barrel and a Soft Polyethylene Piston
Four moulded parts make a plastic syringe with no rubber seal and no grease: a stiff barrel with a taper nozzle, a bell-shaped piston whose thin polyethylene lips seal against the wall, a slim plunger shaft, and a cap whose long sleeve guides the shaft so it cannot bend and tilt the piston (Adorján & Dávid, US 4,704,105, 1987). Mould one set of moulds per size for a set of syringes for hydraulic models.
The piston figures are the patent's. Polypropylene, LDPE, the sizes and the mould making are ours. Not for medical use. The picture: Figs. 1-2.
پیشرفته
3 days (moulds) + 1 hour per batch
دستورالعملها
1
1
The moulding process
The moulding process
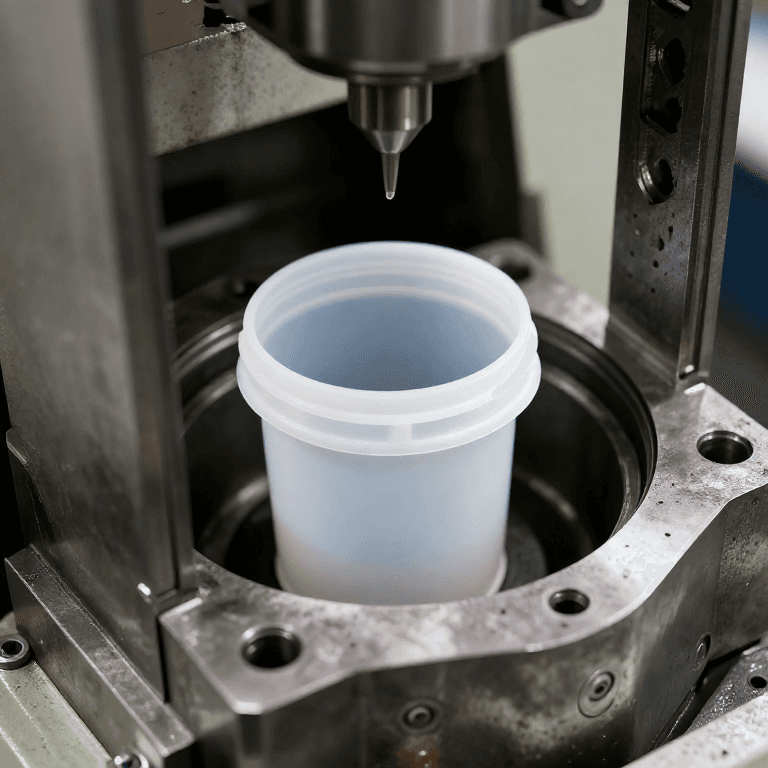
Drying, mould, injection, cooling and inspection all follow this blueprint. The steps below add only what the syringe needs.
2
2
Mill the barrel mould
Mill the barrel mould
Mill a two-plate mould for the barrel (1): a stiff-walled tube closed at one end by a nozzle (11) with a standard needle taper (ours: the Luer taper), and two finger grips (12) at the open end. One mould per syringe size you want, for example 5, 50 and 60 ml (ours).
ابزارهای مورد نیاز:
 دستگاه فرز
 قالبپایهٔ آلومینیومی قالب تزریق (۲ صفحه)
 قاب قالب تزریق
3
3
Mill the piston mould
Mill the piston mould
The piston (2) is a bell: a rim 5-7 mm high whose two edges flare out into lips 0.3-0.5 mm thick, a front groove 0.3-0.5 mm wide and 2-2.5 mm deep, and a central shank. The lips must come out 0.2-0.6 mm wider than the barrel bore; the rim between them no wider than the bore.
ابزارهای مورد نیاز:
دستگاه فرزقالبپایهٔ آلومینیومی قالب تزریق (۲ صفحه)قاب قالب تزریق کولیس دیجیتال ۶ اینچی
4
4
Mill the shaft and cap moulds
Mill the shaft and cap moulds
Shaft (3): thumb rest (31), a bead (32) and an end projection (33) a little larger than the piston's bore. Cap (4): a disc with an outer collar (42) that force-fits the barrel and an inner sleeve (43) at least as long as the shaft is thick.
ابزارهای مورد نیاز:
دستگاه فرزقالبپایهٔ آلومینیومی قالب تزریق (۲ صفحه)قاب قالب تزریق5
5
Mould the barrels
Mould the barrels
Mould the barrels from virgin plastic. The patent asks only for a rigid plastic; ours: polypropylene.
مواد مورد نیاز این مرحله:
 گرانول پلیپروپیلن1 batch
ابزارهای مورد نیاز:
 خشککن گرانول
 دستگاه تزریق پلاستیک
6
6
Mould the pistons
Mould the pistons
Mould the pistons from virgin polyethylene, which the patent wants at 65-90 degrees Shore (scale not stated). Ours: LDPE; check your grade's data sheet.
مواد مورد نیاز این مرحله:
 گرانول LDPE1 batch
ابزارهای مورد نیاز:
خشککن گرانولدستگاه تزریق پلاستیک7
7
Mould the shafts and caps
Mould the shafts and caps
Mould shafts and caps. These may be reprocessed plastic, as they never touch the liquid. Ours: polypropylene.
مواد مورد نیاز این مرحله:
گرانول پلیپروپیلن1 batchابزارهای مورد نیاز:
دستگاه تزریق پلاستیک8
8
Check the lip size
Check the lip size
Measure the barrel bore and a piston's lips. The lips must be 0.2-0.6 mm wider than the bore. Adjust the mould if not.
ابزارهای مورد نیاز:
کولیس دیجیتال ۶ اینچی9
9
Snap the shaft into the piston
Snap the shaft into the piston
Push the shaft's projection through the small bore at the back of the piston until it snaps into the wider cavity behind it.
10
10
Assemble
Assemble
Push the piston into the barrel. Thread the shaft through the cap's sleeve and force the cap's outer collar into the open end of the barrel. Its end face now stops the piston when you draw it fully back.
11
11
Lock the cap
Lock the cap
Press two dents, opposite each other, through the barrel wall into the cap collar with a hot tool so the cap cannot pull out. Ours: a soldering iron tip.
ابزارهای مورد نیاز:
 هویه برقی
12
12
Test the seal
Test the seal
Draw water and push it out, along the whole stroke, with no grease. It should move smoothly from the start and not leak past the lips. Note the size and file it into your set.
ابزارهای مورد نیاز:
 آب
 بشر شیشهای
مواد
2- 1 batchجایگزین
- 1 batchجایگزین
این نقشه میسازد

نقشههای مرتبط
این نقشهها دانش مشترکی دارند — تکنیکها، مواد یا اصول
CC0 مالکیت عمومی
این نقشه تحت مجوز CC0 منتشر شده است. شما آزاد هستید آن را کپی، ویرایش، توزیع و برای هر هدفی بدون نیاز به اجازه استفاده کنید.
با خرید محصولات از طریق نقشه از سازنده حمایت کنید و او کمیسیون سازنده تعیین شده توسط فروشندگان، دریافت میکند یا یک نسخه جدید از این نقشه ایجاد کنید و آن را به عنوان اتصال در نقشه خود قرار دهید تا درآمد به اشتراک گذاشته شود.