
Samvinna
LIST
FEGURÐ OG VELLÍÐAN
HANDVERK
MENNING OG SAGA
SKEMMTUN
UMHVERFI
MATUR OG DRYKKUR
ÖFUGVERKFRÆÐI
VÍSINDI
ÍÞRÓTTIR
TÆKNI
KLÆÐANLEG TÆKNI
Cattleman's Broad-Brimmed Hat: A Felt Body Stiffened With Shellac, Blocked and Set by Hand (Ermatinger, 1919)
Tex

Búin til af

Tex

13. nóvember 2026FO
0
0
0
0
0

Cattleman's Broad-Brimmed Hat: A Felt Body Stiffened With Shellac, Blocked and Set by Hand (Ermatinger, 1919)

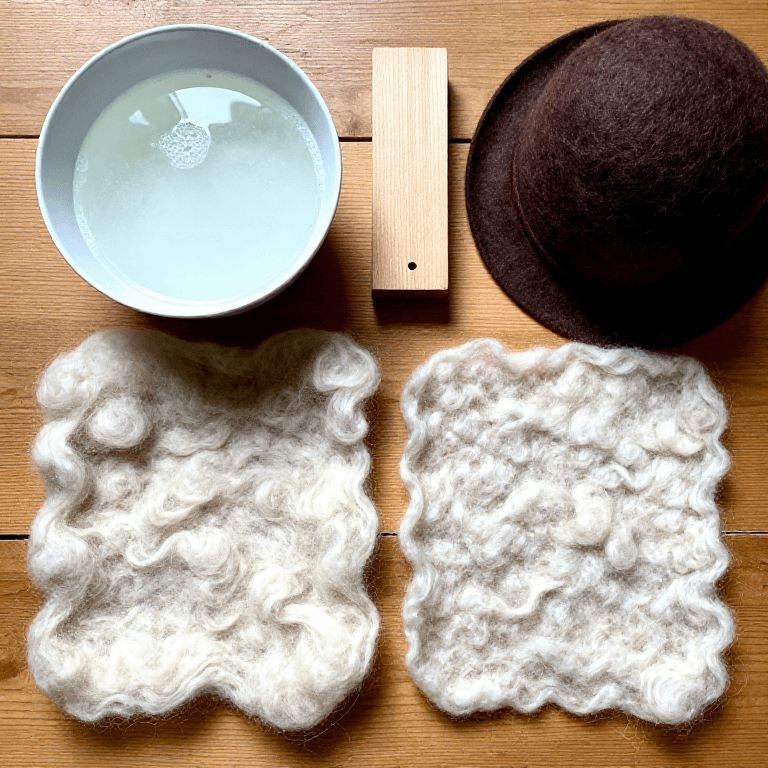
A cowboy hat is a soft felt hat with a broad, stout brim. In 1919 the hatter Henry L. Ermatinger wrote that shellac stiffening "should only be applied to hats requiring extra stout brims, such as the broad brimmed hats used by cattlemen and military men." His book Scientific Hat Finishing and Renovating also tells how a small shop finishes new hats from bodies bought in the rough. This blueprint follows him: stiffen a felt body with shellac, block it with steam and a cord, iron and pounce it, pare the brim, set the brim's roll by hand over steam, and sew in the sweatband. The brim width, the block size and a few hand tools are ours.
Lengra kominn
About 3 days (mostly drying)

Leiðbeiningar

1

Body width and the mix

Hleð Jupyter-vinnubók…
2

Read Ermatinger

"Shellac stiffening should only be applied to hats requiring extra stout brims, such as the broad brimmed hats used by cattlemen and military men. In the ordinary soft hat the thing desired is to turn out a hat that is soft and mellow." (Scientific Hat Finishing and Renovating, 1919, p. 47)
3

Make a notched board

Ermatinger rests the hat in a half circle cut in his bench while he works on the brim. Cut a half circle 20 cm across (our size: wide enough for the crown) in the edge of a plywood board and clamp the board to your table.

Efni fyrir þetta skref:

KrossviðarplataKrossviðarplata1 stykki

Nauðsynleg verkfæri:
LaufsögLaufsög
ReglustikaReglustika
4

Dissolve the shellac

Put orange shellac in a jar, cover it with denatured alcohol, close the lid and shake it now and then through the day until it has all dissolved. Pour some into a bowl and add an equal part of denatured alcohol, so it is like rich milk. Keep a new sponge only for this, stored in a closed jar of alcohol so it does not harden.

Efni fyrir þetta skref:

SkellakksflögurSkellakksflögur1 stykki
Aflitað etanólAflitað etanól1 stykki

Nauðsynleg verkfæri:

Glerkrukka með lokiGlerkrukka með loki
SkálSkál
Náttúrulegur sjávarsvampurNáttúrulegur sjávarsvampur
5

Stiffen the inside and upper brim

Ermatinger puts shellac on the inside and the upper brim only. Chalk the back of the body. Turn it inside out and pull it firmly onto the block. Soak the sponge in the mix. Starting at the bottom at the chalk mark, stroke it on with one long stroke, pressing gently and then harder, up to the centre of the crown. Work round the hat like this. Never go over the same spot twice, or it will come up stiffer there.

Efni fyrir þetta skref:

Hattkúpa úr ullarþófiHattkúpa úr ullarþófi1 stykki

Nauðsynleg verkfæri:

Hattamót - tré, kúpaHattamót - tré, kúpa
Náttúrulegur sjávarsvampurNáttúrulegur sjávarsvampur
KlæðskerakrítKlæðskerakrít
6

Stiffen the underbrim

Turn the hat right side out and lay the brim over the notch. Stiffen the underbrim the same way: it should be a little stiffer than the crown. Then pat it and brush it from the band-mark out to the edge to stretch the nap. Hang it to dry overnight. If it is not stiff enough when dry, do it again. When dry, brush it hard with a dry sponge to clear the surface.

Nauðsynleg verkfæri:

Náttúrulegur sjávarsvampurNáttúrulegur sjávarsvampur
FataburstiFatabursti
7

Block the crown

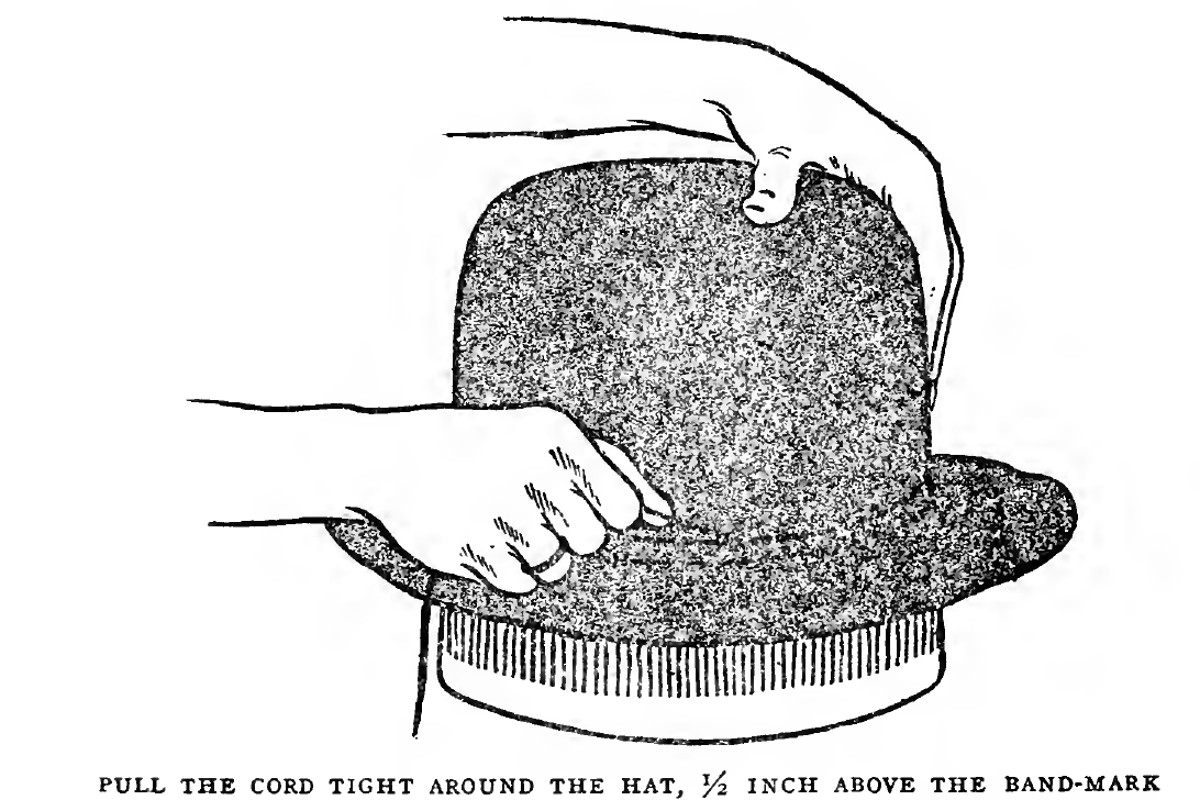
Put the dry hat on the block and work it down by hand. Tie the blocking cord round it with a tight slip-knot, half an inch (13 mm) above the band-mark (the line where crown meets brim), and wet the knot. Boil about two inches (5 cm) of water in the pot, lift the lid and hold the crown in the steam for 15 to 20 seconds, no longer: more makes the felt porous. Pull the brim down evenly until all wrinkles are gone, then push the cord down to the band-mark. For a full, flat-topped crown (his "Dakota"), palm the tip flat on the block and steam again, two or three times if needed.

Efni fyrir þetta skref:

MótunarsnúraMótunarsnúra1 stykki

Nauðsynleg verkfæri:

Hattamót - tré, kúpaHattamót - tré, kúpa
SoðpotturSoðpottur
HitaplataHitaplata
MálbandMálband
8

Iron the underbrim

Pull the brim out flat by hand and smooth it. Rest the hat upside down in the notch. Heat the flat iron on the hot plate, wipe its face clean, and cool its nose in the water bowl so it cannot scorch. Wet the sponge, squeeze it out, rub it over a part of the underbrim with the nap, and iron that part dry, always with the nap. Work round the whole underbrim.

Nauðsynleg verkfæri:

StraujárnStraujárn
HitaplataHitaplata
Náttúrulegur sjávarsvampurNáttúrulegur sjávarsvampur
SkálSkál
9

Iron the crown

Stand the block up. Sponge one side of the crown and iron it dry with the nap until the water marks go and a gloss comes up. Do the other side, the front, the back and last the top, ironing in one direction to spin a neat centre. Pull on the brim's edge all the time: ironing narrows the brim and raises the crown. Lay a cotton cloth (he used duck or Canton flannel) over light-coloured felt so the iron cannot soil it.

Nauðsynleg verkfæri:

StraujárnStraujárn
Náttúrulegur sjávarsvampurNáttúrulegur sjávarsvampur
BómullardúkurBómullardúkur
10

Pounce

Fold emery paper strips about 3 x 4 inches into a pad of three or four layers, with a fresh sheet on top. Hold the pad in your curved palm and rub the crown with the nap only, the same amount everywhere, to cut out the short hairs. Use 7-0 to 8-0 paper on fine felt, 5-0 to 6-0 on coarse. Finish with an old, dull sheet. Pounce both sides of the brim the same way. A fine hat gets no powders or grease.

Efni fyrir þetta skref:

SmergelpappírSmergelpappír2 plötur
11

Iron the upper brim

Take the hat off the block, set it brim down on a flat board with the block back inside the crown, and iron the upper brim with short strokes. While it is still steaming, press firmly along the band-mark again and again; a tight twine round the band-mark helps keep it sharp. Pounce the upper brim.

Nauðsynleg verkfæri:

StraujárnStraujárn
Náttúrulegur sjávarsvampurNáttúrulegur sjávarsvampur
BómullarsnæriBómullarsnæri
KrossviðarplataKrossviðarplata
12

Dry on the block

Put the hat back on the block, wipe the crown lightly with a damp (not wet) sponge, and leave it to dry slowly on the block. As it dries the felt tightens and the surface clears.

Nauðsynleg verkfæri:

Hattamót - tré, kúpaHattamót - tré, kúpa
Náttúrulegur sjávarsvampurNáttúrulegur sjávarsvampur
13

Pare the brim

Mark the back of the underbrim exactly at the centre with chalk. Measure 4 inches (10 cm, our width) out from the band-mark all round and mark it. Cut the brim to the line with scissors. Take off the cord and the hat, and carry the chalk mark about one inch into the crown so the back can be found later.

Nauðsynleg verkfæri:

KlæðskerakrítKlæðskerakrít
MálbandMálband
EfnisskæriEfnisskæri
14

Set the brim

A broad brim gets no curl at its edge. Boil the water, hold one side of the brim over the steam until it is soft, then roll it up slightly with your thumbs and fingers until it has the set you want. Rub your thumbs over the upper brim to shape it while it steams. Do the other side the same. Then steam the front and the back, dip them as you like, and let the brim cool in that shape.

Nauðsynleg verkfæri:

SoðpotturSoðpottur
HitaplataHitaplata
15

Shape the crown

Leave the full crown open, or crease it: run the forefingers of both hands from the centre of the crown to the back and to the front, pressing until the crease is as deep as you want.
16

Sew in the sweatband and band

Buy the leather sweatband with its reed already attached, as Ermatinger did. Sew it inside the hat at the band-mark with neat, short stitches, hidden as well as you can. Sew a grosgrain band round the outside of the crown at the band-mark (ours).

Efni fyrir þetta skref:

HattsvitabandHattsvitaband1 stykki
GróbandiGróbandi1 stykki

Nauðsynleg verkfæri:

Hattagerðarnála- og þráðasettHattagerðarnála- og þráðasett
17

Try it on

Put the hat on. It should sit snug at the sweatband, the brim should hold its roll when you take the hat off by the brim, and the crown should keep its shape.
18

Troubleshooting

Broad-brimmed felt hat troubleshooting.

Flow

Loading...
19

History and honest limits

**Henry L. Ermatinger**, *Scientific Hat Finishing and Renovating* (New York, Roberts, Cushman & Co., 1919), chapters VIII-XIII and XVIII-XIX. He wrote for small shops finishing hats bought "in the rough". He does not use the word "cowboy"; the broad brimmed hats of cattlemen are his. He says a shop finishing many rough bodies needs a flanging outfit (a hot sand bag on a flange); we use his hand method for setting the brim. We pull by hand instead of his puller-down and runner-down. A flat iron heated on a hot plate stands in for his gas-heated irons. The block size, the 4 inch brim, the wool capeline and the grosgrain band are ours. He gives no iron temperature: he cools the iron in water and learns by practice.

Efni

8

Nauðsynleg verkfæri

17

Þessi teikning býr til

Tengd Blueprint

Þessi blueprint deila þekkingu — tækni, efni eða meginreglur

CC0 opinbert ríki

Þessi teikning er gefin út undir CC0. Þér er frjálst að afrita, breyta, dreifa og nota þetta verk í hvaða tilgangi sem er, án þess að biðja um leyfi.

Studdu smiðinn með því að kaupa vörur í gegnum teikningu hans þar sem hann fær þóknun smiða sem seljendur ákvarða, eða búðu til nýja endurskoðun á þessari teikningu og tengdu hana sem tengingu í þinni eigin teikningu til að deila tekjum.

Umræða

(0)

Skrá inn til að taka þátt í umræðunni

Hleður athugasemdum...