Samvinna
LIST
FEGURÐ OG VELLÍÐAN
HANDVERK
MENNING OG SAGA
SKEMMTUN
UMHVERFI
MATUR OG DRYKKUR
ÖFUGVERKFRÆÐI
VÍSINDI
ÍÞRÓTTIR
TÆKNI
KLÆÐANLEG TÆKNI
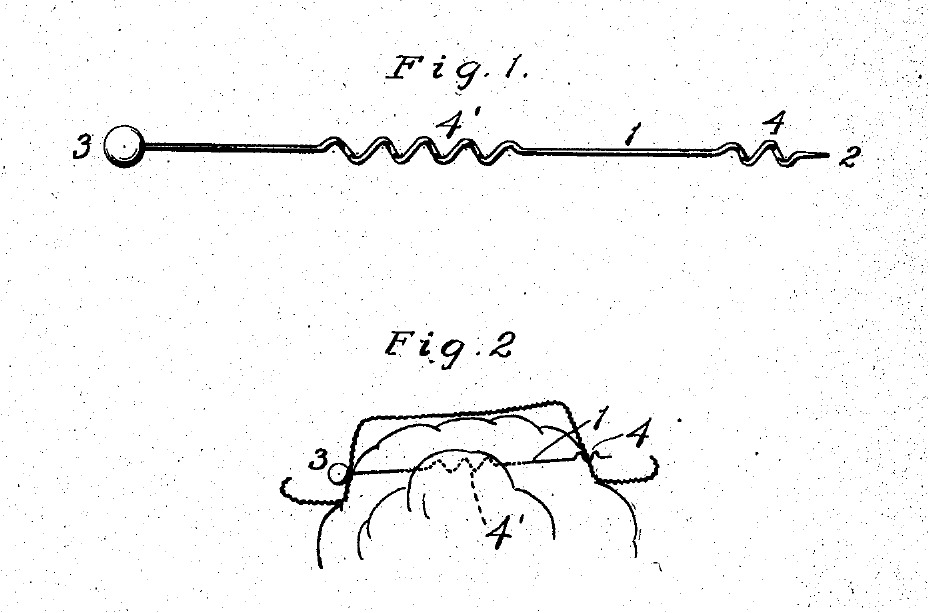


Hat Pin With a Hat-Coil and a Hair-Coil, Screwed In and Out (Condra, 1906)
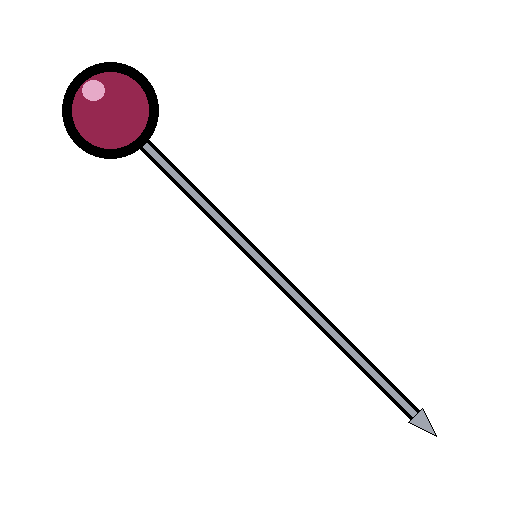
Elizabeth S. Condra of Corona, California, received US 814,833, dated 13 March 1906, for a hat pin that will not work itself out of the hat. Two small coils are bent into the pin: a short one at the point that screws through the hat, and a longer one in the middle that screws into the hair. Turned in, it holds; turned the other way, it comes out.
We bend it from steel wire with a glass bead for the head. All sizes are ours.
Byrjandi
About 1 hour
Leiðbeiningar
1
1
How much wire
How much wire
Hleð Jupyter-vinnubók…
2
2
Read US 814,833
Read US 814,833
"The insertion of the pin is accomplished with the least possible manipulation, as the hat-coil 4 is first passed through one side of the hat, then through the hair, and then through the other side of the hat."
3
3
Cut and straighten the wire
Cut and straighten the wire
Cut 1.6 mm steel wire to the length from the notebook. Draw it through a fold of cloth between your fingers, or roll it under a flat board, until it is straight.
Efni fyrir þetta skref:
 Stálvír1 stykki
Nauðsynleg verkfæri:
 Hliðarbítur
 Málband
4
4
Sharpen the point
Sharpen the point
Hold the wire in the vice and file one end to a long, even point, turning it as you go. Finish on a sharpening stone so it slips through felt and straw without tearing them.
Nauðsynleg verkfæri:
 Nálaþjalasett
 Skrúfstykki
 Brýni
5
5
Bend the hat-coil
Bend the hat-coil
About 6 mm from the point, wind the wire two turns round a 3 mm rod, spacing them about 3 mm apart, like a small corkscrew. Bend the wire on each side back so the point and the rest of the pin run straight along the coil's middle: her "axis in line with the rod".
Nauðsynleg verkfæri:
 Kringlótt stöng úr deigu stáli
 Kringlunefjatöng
 Flatkjaftatöng
6
6
Bend the hair-coil
Bend the hair-coil
At the place the notebook gives, wind five turns the same way round the same rod, in the same direction as the hat-coil, so one turn of the pin drives both. Bend the ends back in line again. Sight along the pin: the straight parts should all lie on one line.
Nauðsynleg verkfæri:
Kringlótt stöng úr deigu stáliKringlunefjatöngFlatkjaftatöng7
7
Fit the head
Fit the head
Cut the end square at the finished length and roughen it with sandpaper. Fill the hole of a glass bead with epoxy and push it on, her head or knob 3. It turns the pin and stops it going too far. Leave it to set as the epoxy's label says.
Efni fyrir þetta skref:
 Glerperlur1 stykki
 Tveggja þátta epoxý1 stykki
Nauðsynleg verkfæri:
Hliðarbítur Sandpappír
8
8
Put it in
Put it in
Turn the hat-coil through one side of the hat. Push the pin straight across, without turning, until the hat-coil reaches the far side. Then turn it again: one coil goes through the hat and the other into the hair, and the head comes against the hat. To take it out, turn it back the other way and draw it out.
9
9
Troubleshooting
Troubleshooting
Coiled hat pin troubleshooting.
Flow
Loading...
10
10
History and honest limits
History and honest limits
**Elizabeth S. Condra** of Corona, California, US 814,833, dated 13 March 1906, filed 22 August 1904. She claimed "a hat-pin comprising a metal rod having one end sharpened to form a tip or point, a head at the other end, the rod being provided with a hat-coil and a hair-coil". She wrote that it will be impossible for it to work itself out of the hat "as so frequently happens with a straight pin". She gives no sizes: the steel wire, the 230 mm length, the coil size and number of turns, the glass bead and the epoxy are ours.
Efni
3- 1 stykkiStaðgengill
- 1 stykkiStaðgengill
- 1 stykkiStaðgengill
Nauðsynleg verkfæri
9- Staðgengill
- Staðgengill
- Staðgengill
- Staðgengill
- Staðgengill
- Staðgengill
- Staðgengill
- Staðgengill
Þessi teikning býr til
Tengd Blueprint
Þessi blueprint deila þekkingu — tækni, efni eða meginreglur


CC0 opinbert ríki
Þessi teikning er gefin út undir CC0. Þér er frjálst að afrita, breyta, dreifa og nota þetta verk í hvaða tilgangi sem er, án þess að biðja um leyfi.
Studdu smiðinn með því að kaupa vörur í gegnum teikningu hans þar sem hann fær þóknun smiða sem seljendur ákvarða, eða búðu til nýja endurskoðun á þessari teikningu og tengdu hana sem tengingu í þinni eigin teikningu til að deila tekjum.