Samvinna
LIST
FEGURÐ OG VELLÍÐAN
HANDVERK
MENNING OG SAGA
SKEMMTUN
UMHVERFI
MATUR OG DRYKKUR
ÖFUGVERKFRÆÐI
VÍSINDI
ÍÞRÓTTIR
TÆKNI
KLÆÐANLEG TÆKNI
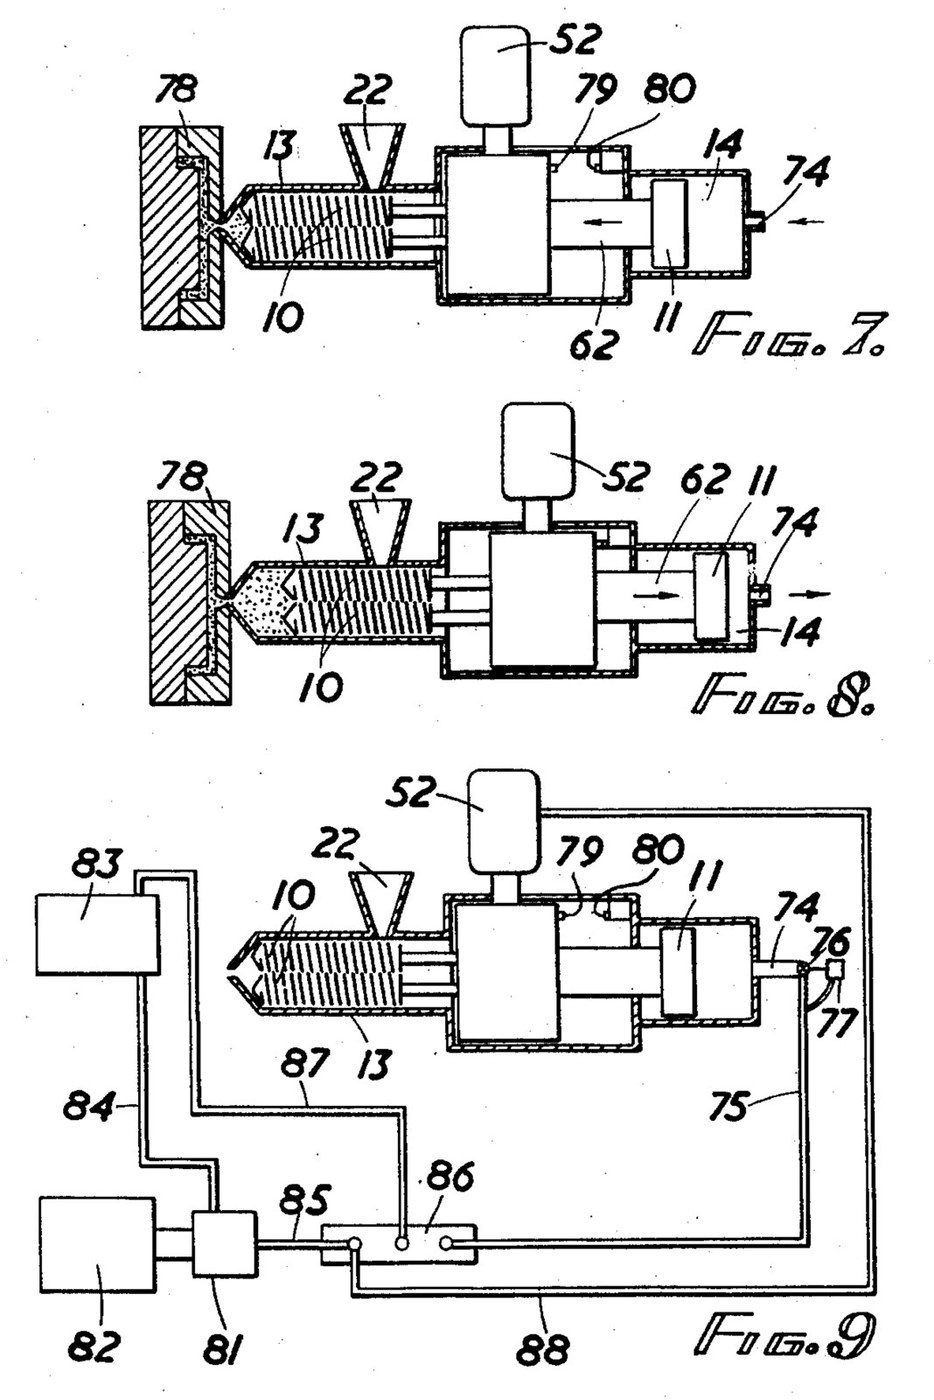


Injection Moulding Machine: Twin Intermeshing Screws as Plasticiser and Ram (Baigent, US 2,916,769)
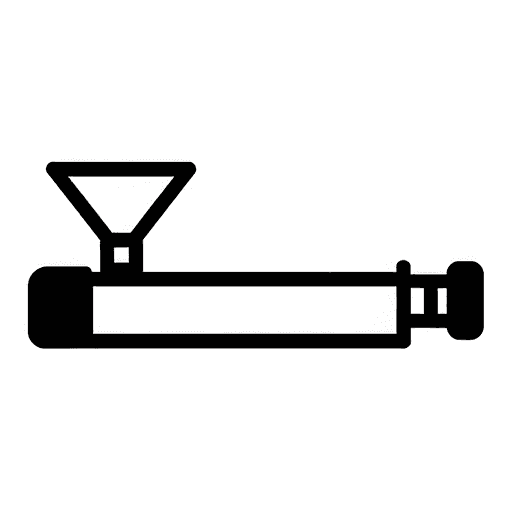
An injection moulding machine melts plastic granules in a heated barrel and forces the melt into a mould. K. H. Baigent (US 2,916,769, 1959) does both jobs with one pair of intermeshing screws: turning, they melt, mix and pack the plastic at the nozzle; pushed forward by a hydraulic piston, they act as the ram.
Two screws are used because a single screw pushed as a ram lets too much melt flow back along its thread. At the outlet end each of his screws' threads nearly fills the gap in the other's, which seals against backflow.
Source: K. H. Baigent, "Injection Moulding Machines", US Patent 2,916,769 (filed 1957, granted 1959). Picture: its Figs. 7-9.
Lengra kominn
Unknown
Leiðbeiningar
1
1
Read Baigent
Read Baigent
"It has proven, as a practical matter, impossible to use a single screw as both an injection ram and a mixer or plasticiser, since when a single screw is translated forward to force the plastic material through the nozzle, a substantial portion thereof tends to flow backward between the threads of the screw."
2
2
Cut the twin screws
Cut the twin screws
Cut two intermeshing screws of the same outside diameter all along, so they can slide as a ram. Baigent's example: root diameter about 2.05 in., outside diameter about 3.06 in., pitch 1 in. In the outlet section the thread's outer face is about 0.30 in. deep axially with the leading face sloping 13° to the root, so each thread nearly fills the gap in the other screw. In the inlet section cut the leading face back to 31°, leaving 0.15 in., which gives about 1 1/2 times the swept volume of the outlet. Give each screw a splined end with a tapped bore. Screw length and metal are not given.
Efni fyrir þetta skref:
 Óþekktur málmur2 screws
Nauðsynleg verkfæri:
 Málmrennibekkur
 Fræsivél
 Snittsett
 Óþekkt mál
3
3
Make the barrel
Make the barrel
Bore a barrel (injection chamber) to take both screws side by side. Bolt a nozzle head on its outer end and screw in the injection nozzle. Cut a feed inlet near the other end under a hopper whose throat has a water-cooling jacket, so the granules do not melt before they enter. Wrap the barrel in closely spaced electric resistance heaters, with one more round the nozzle head. Clamp the barrel to its supports on the base. Bore, metal and heater ratings are not given.
Efni fyrir þetta skref:
Óþekktur málmur1 barrel, nozzle head and nozzleÓþekktur málmur1 hopper and water jacket Hitaelement2 barrel and nozzle heaters
Nauðsynleg verkfæri:
Málmrennibekkur Súlubor
 BorasettSnittsettÓþekkt mál
4
4
Build the sliding drive
Build the sliding drive
Build a gear box that slides on guide rails on a slide bed in line with the barrel. Run a hollow drive shaft for each screw in roller bearings, coupled to its screw by a splined sleeve and a tie rod through the shaft. Key a pinion on each shaft; both mesh inside opposite sides of one ring gear with internal teeth, so the screws turn at the same speed in the same direction. Cut worm teeth round the outside of the ring and drive it with a worm on the upright shaft of a hydraulic motor, in ball bearings.
Efni fyrir þetta skref:
Óþekktur málmur1 gear box, shafts, pinions, ring and worm Keflalega4 stykki
 Kúlulega2 stykki
Nauðsynleg verkfæri:
MálmrennibekkurFræsivél Tannhjólaskurðarvél með snigilfræsi
 Skiptilykill
5
5
Fit the ram cylinder and hydraulics
Fit the ram cylinder and hydraulics
Bolt a hydraulic cylinder to the frame behind the gear box and bolt its piston rod to the gear box's thrust plate, so screws, gear box and piston slide as one. Feed the cylinder through a spring-loaded check valve, with a second, adjustable check valve on a branch that restricts the return flow: this sets the back pressure the melt must build before the screws are pushed back. An electric motor drives a hydraulic pump from a reservoir, through a solenoid-worked multiway pilot valve that sends oil either to the hydraulic motor or to the cylinder. Put a stop on the gear box and a limit switch where it ends its return stroke, and a time switch for the cooling period. Pressures are not given.
Efni fyrir þetta skref:
 Vökvaþrýstistrokkur1 stykki
 Bakstreymisloki2 stykki
 Segulstýrður loki1 multiway pilot valve
 Rafmótor1 pump drive
 Vökvarör1 stykki
 Vökvaolía1 stykki
Nauðsynleg verkfæri:
Skiptilykill6
6
Run a cycle
Run a cycle
Close the nozzle with the mould, fill the hopper with granules or powder and switch on the heaters to bring the barrel up to temperature. Start the hydraulic motor: the turning screws melt the plastic and pack it at the nozzle, and are forced back against the counter pressure until the stop trips the limit switch. The pilot valve then stops the motor and drives the piston forward, so the screws ram the melt into the mould. Everything stands still while the article cools; the time switch then restarts the motor for the next shot. How the mould is clamped and opened is not given.
Efni
10- 1 gear box, shafts, pinions, ring and wormStaðgengill
- 2 barrel and nozzle heatersStaðgengill
- 4 stykkiStaðgengill
- 1 stykkiStaðgengill
- 2 stykkiStaðgengill
- frá$7.47
- 1 pump driveStaðgengill
- 1 stykkiStaðgengill
- 1 stykkiStaðgengill
Þessi teikning býr til
CC0 opinbert ríki
Þessi teikning er gefin út undir CC0. Þér er frjálst að afrita, breyta, dreifa og nota þetta verk í hvaða tilgangi sem er, án þess að biðja um leyfi.
Studdu smiðinn með því að kaupa vörur í gegnum teikningu hans þar sem hann fær þóknun smiða sem seljendur ákvarða, eða búðu til nýja endurskoðun á þessari teikningu og tengdu hana sem tengingu í þinni eigin teikningu til að deila tekjum.