
Ṣíṣe Èso Orí — Bíbá Èso Orí Kórè Láti Igi dé Eso Gbígbẹ́
Leiðbeiningar
Dá igi orí mọ̀
Dá igi orí mọ̀
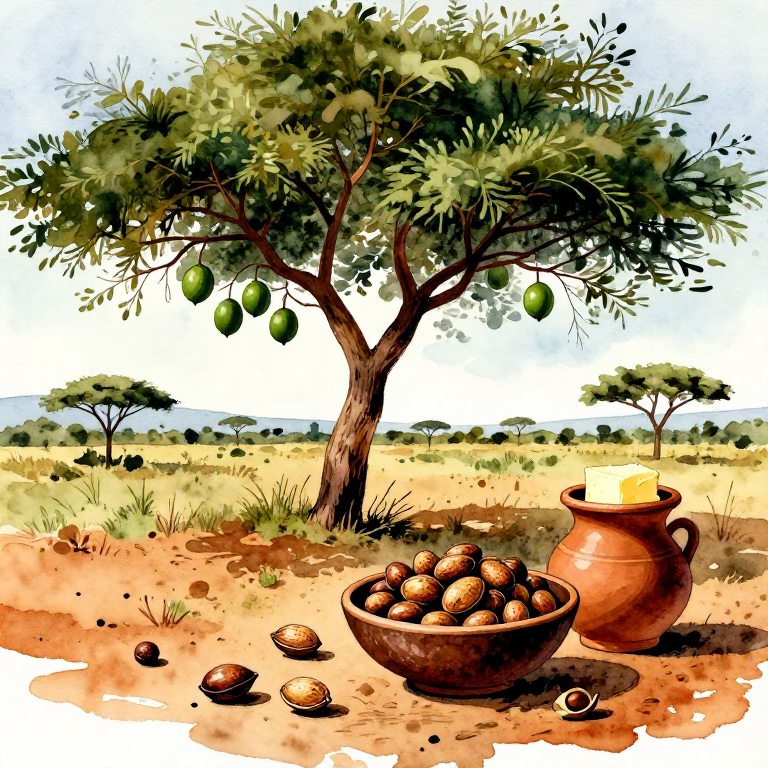
Igi orí (Vitellaria paradoxa) ga ní mítà 10-15, ewé rẹ̀ tóbi, alágbára, ó sì máa ń dàgbà ní àgbègbè savanna. Èso rẹ̀ dà bí àgbọn kékeré, àwọ̀ ewé rẹ̀ jẹ́ aláwọ̀ ewé dúdú. Igi kan lè so èso fún ọdún 200.
Dúró dè àkókò èso
Dúró dè àkókò èso
Àwọn èso orí máa ń pọ́n láàárín oṣù kẹ́fà sí kẹ́sànán (Okudu-Ọwẹwẹ) ní gúúsù Nàìjíríà. Èso tó ti pọ́n yóò ṣubú fúnra rẹ̀ láti orí igi. Má ṣe gba èso láti orí igi — èso tó ṣubú ni ó ti pọ́n dáadáa.
Kó àwọn èso tó ti ṣubú jọ
Kó àwọn èso tó ti ṣubú jọ
Ní kùtùkùtù òwúrọ̀, tẹ̀ lé àwọn èso tó ti ṣubú sí ilẹ̀ lábẹ́ igi orí. Kó wọn sínú agbọ̀n tàbí àpò. Igi kan lè so kìlógíráàmù 15-20 ti èso ní ọdún kan.
Efni fyrir þetta skref:
 Fallin sheaaldin5 kilogram
Nauðsynleg verkfæri:
 Fléttuð söfnunarkarfa
Yọ ẹran èso kúrò
Yọ ẹran èso kúrò
Èso orí ní ẹ̀wù àwọ̀ ewé kan àti ẹran dídùn nínú. Fọ́ ẹran náà kúrò láti ara aró orí. Ẹran èso orí jẹun — ó dùn, ó sì ní vitamin C. Àwọn ọmọdé máa ń jẹ ẹ́.
Nauðsynleg verkfæri:
 Lítill hnífur
Fọ àwọn aró orí
Fọ àwọn aró orí
Fi omi tútù fọ àwọn aró orí dáadáa láti yọ ẹran tó kù àti erùpẹ̀ kúrò. Omi tó mọ́ ṣe pàtàkì fún dídènà ohun alààrùn.
Efni fyrir þetta skref:
 Eimað vatn10 lítrar
Nauðsynleg verkfæri:
 Þvottabali
Sè aró orí nínú omi gbígboná
Sè aró orí nínú omi gbígboná
Fi àwọn aró orí sínú omi gbígboná fún ìṣẹ́jú 20-30. Gbígboná yìí yóò pa àwọn ohun tó lè mú aró hù kúrò, yóò sì mú ẹ̀wù aró rọ̀ fún títọ́.
Efni fyrir þetta skref:
 Vatn15 lítrar
Nauðsynleg verkfæri:
 Stór pottur
 Eldiviður
Tú àwọn aró orí sílẹ̀ láti tutù
Tú àwọn aró orí sílẹ̀ láti tutù
Gbé àwọn aró orí jáde lọ́wọ́ omi gbígboná, kí o sì tú wọn sílẹ̀ lórí ẹ̀rẹ̀kẹ́ tàbí àgọ́ tí afẹ́fẹ́ lè gbà. Jẹ́ kí wọ́n tutù fún wákàtí 1-2.
Nauðsynleg verkfæri:
 Þurrkmotta
Fọ́ ìkarahun aró orí
Fọ́ ìkarahun aró orí
Ìkarahun aró orí le. Fi òkúta tàbí ọ̀gá lù ìkarahun lọ́kọ̀ọ̀kan láti fọ́. Ṣọ́ra má ṣe fọ́ kernel tó wà nínú — kernel náà ni ohun tí a fẹ́. Ṣe é lọ́rọ̀ lọ́rọ̀.
Nauðsynleg verkfæri:
 Flatur brotsteinn
 Barsteinn
Yọ kernel orí kúrò nínú ìkarahun
Yọ kernel orí kúrò nínú ìkarahun
Yọ kernel funfun-àwọ̀-brawn kúrò nínú ìkarahun tó ti fọ́. Kernel orí kan ní ìwọ̀n gíráàmù 5-8. Gbé àwọn ìkarahun sí apá kan — wọ́n lè jẹ́ epo ìdáná.
Ṣàyẹ̀wò kernel fún dídara
Ṣàyẹ̀wò kernel fún dídara
Kernel tó dára ní àwọ̀ funfun-cream sí brown fẹ́ẹ́rẹ́. Kernel tó ní àwọ̀ dúdú tàbí tó ní oorun búburú ti bàjẹ́ — sọ ọ́ nù. Gé kernel sí méjì — inú rẹ̀ gbọ́dọ̀ jẹ́ aláwọ̀ cream.
Nauðsynleg verkfæri:
Lítill hnífurTú kernel sí oòrùn láti gbẹ
Tú kernel sí oòrùn láti gbẹ
Tú àwọn kernel sórí ẹ̀rẹ̀kẹ́ tàbí àtẹ́ labẹ́ oòrùn. Má ṣe jẹ́ kí wọ́n rò lé ara wọn. Yí wọn padà lẹ́ẹ̀mejì-mẹ́ta lójoojúmọ́ láti gbẹ dáadáa ní gbogbo apá.
Nauðsynleg verkfæri:
Þurrkmotta Uppþvottagrind
Gbẹ fún ọjọ́ 5-7
Gbẹ fún ọjọ́ 5-7
Àwọn kernel nílò ọjọ́ 5-7 láti gbẹ dáadáa lábẹ́ oòrùn. Ní alẹ́ tàbí nígbà tó bá ń rọ̀, kó wọn sínú àyè tó gbẹ. Kernel tó ti gbẹ kò gbọ́dọ̀ ní omi ju 7% lọ.
Dán kernel tó ti gbẹ wò
Dán kernel tó ti gbẹ wò
Kernel tó ti gbẹ dáadáa jẹ́ líle, ó sì ń ṣe ariwo tó bá bá ilẹ̀. Tí o bá fọ́ ọ̀kan, inú rẹ̀ gbọ́dọ̀ jẹ́ gbígbẹ àti dídì — kì í ṣe tútù tàbí rírọ̀. Ìwọ̀n rẹ̀ yóò dín kù ní nǹkan bí ìdá mẹ́ta nínú mẹ́rin.
Kó kernel tó ti gbẹ sínú àpò
Kó kernel tó ti gbẹ sínú àpò
Fi àwọn kernel tó ti gbẹ sínú àpò burlap tàbí jute tó máa ń gbà afẹ́fẹ́. Má ṣe lò àpò ṣíṣú — ó máa ń dí ọ̀rinrin mú, tí ó sì máa ń mú kernel bàjẹ́. Sọ àpò kọ̀ọ̀kan àti ọjọ́ ìgbẹ̀.
Efni fyrir þetta skref:
 Strigapoki2 stykki
Tọ́jú kernel ní àyè tó gbẹ
Tọ́jú kernel ní àyè tó gbẹ
Fi àwọn àpò sí àyè tó gbẹ, tó tutù, tí afẹ́fẹ́ sì ń gbà nínú. Gbé àpò sókè kúrò ní ilẹ̀ lórí pálẹ́ẹ́tì tàbí ìtìlẹ̀. Kernel orí tó ti gbẹ dáadáa lè pẹ́ títí dé oṣù 12 láìbàjẹ́.
Nauðsynleg verkfæri:
 Trébretti
Efni
5- 5 kilogramStaðgengill
- 10 lítrarStaðgengill
- 15 lítrarStaðgengill
- 2 stykkiStaðgengill
- 1 stykkiStaðgengill
Nauðsynleg verkfæri
10- Staðgengill
- Staðgengill
- Staðgengill
- Staðgengill
- Staðgengill
- Staðgengill
- Staðgengill
- Staðgengill
- Staðgengill
- Staðgengill
Þessi teikning býr til
CC0 opinbert ríki
Þessi teikning er gefin út undir CC0. Þér er frjálst að afrita, breyta, dreifa og nota þetta verk í hvaða tilgangi sem er, án þess að biðja um leyfi.
Studdu smiðinn með því að kaupa vörur í gegnum teikningu hans þar sem hann fær þóknun smiða sem seljendur ákvarða, eða búðu til nýja endurskoðun á þessari teikningu og tengdu hana sem tengingu í þinni eigin teikningu til að deila tekjum.