LIST
FEGURÐ OG VELLÍÐAN
HANDVERK
MENNING OG SAGA
SKEMMTUN
UMHVERFI
MATUR OG DRYKKUR
ÖFUGVERKFRÆÐI
VÍSINDI
ÍÞRÓTTIR
TÆKNI
KLÆÐANLEG TÆKNI
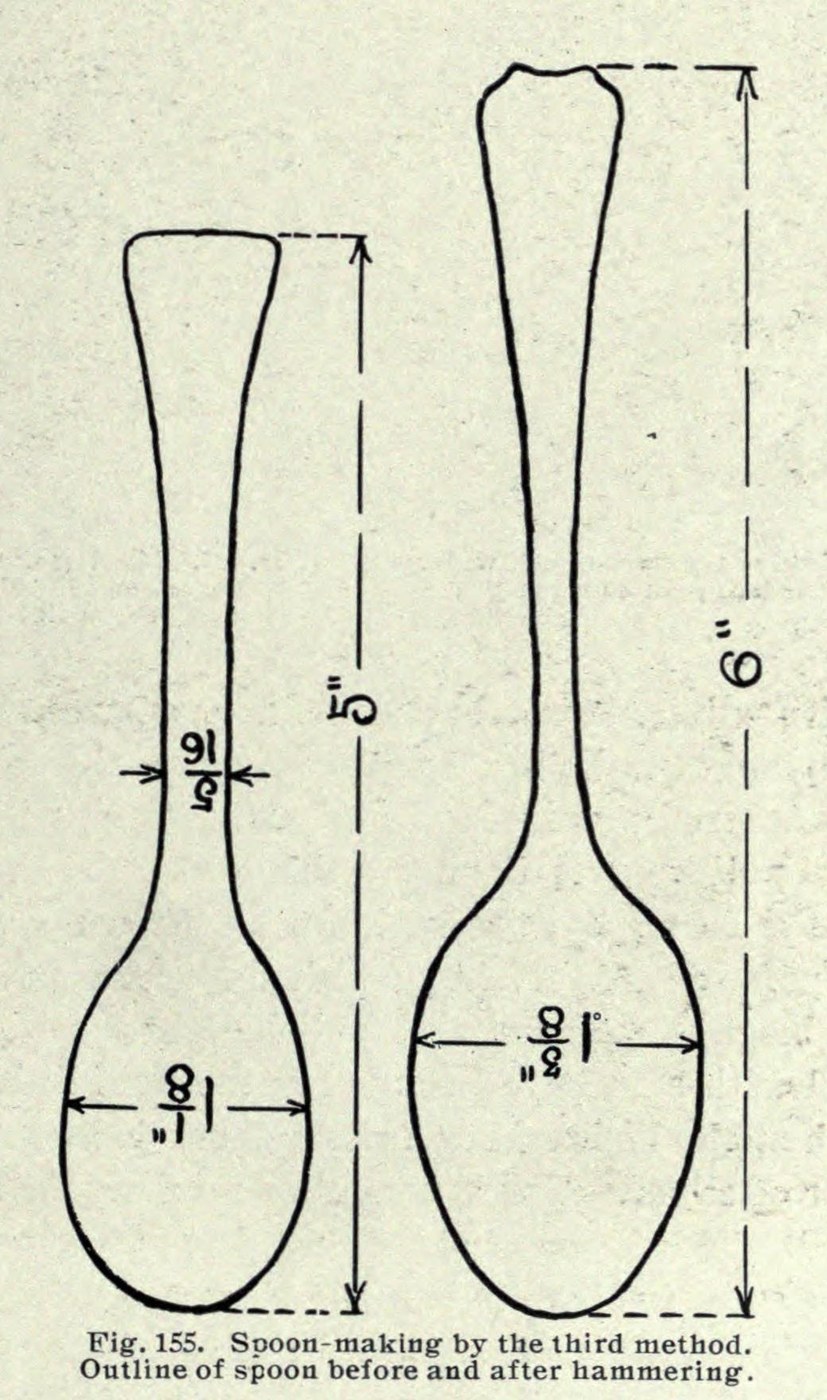
Arthur F. Payne · Public domain (1914)


Teaspoon Sawn Short from Silver Sheet, Then Hammered Out (Payne 1914)
Saw the spoon out of flat silver smaller than it will end up: shorter, narrower in the bowl and thicker in the shank. Hammering then stretches it to full size. Arthur Payne said this method was used largely for silver teaspoons.
Source: A. F. Payne, Art Metalwork with Inexpensive Equipment (1914), pp. 180–184; annealing from his chapter XI. The millimetre figure is ours. Picture: Payne's Fig. 155, the blank and the finished spoon.
Miðlungs
1 day
Leiðbeiningar
1
1
Saw out the short blank
Saw out the short blank
Mark out and saw the blank from 15-gauge sterling silver (about 1.45 mm; our conversion): 5 in long, the bowl 1⅛ in wide and the shank 5⁄16 in wide. The finished spoon will be 6 in long with a bowl 1⅝ in wide.
Efni fyrir þetta skref:
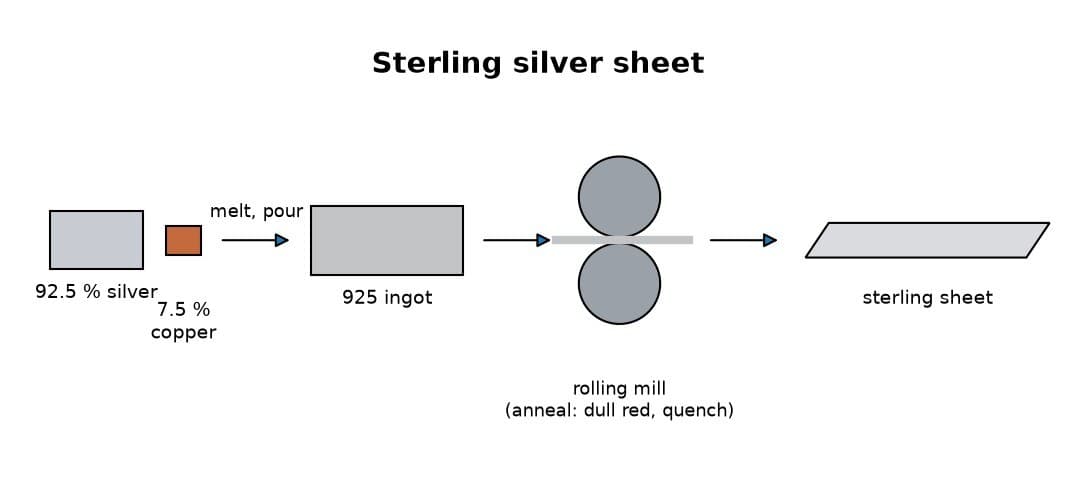
 Plata úr sterlingsilfri1 piece 15 gauge, enough for the 5 in blank
Nauðsynleg verkfæri:
 Rissnál
 Gullsmíðasög
2
2
Stretch the bowl wider
Stretch the bowl wider
Hammer the bowl on a flat anvil with the ball-pein hammer, held at a slight angle towards the side you want it to grow. This makes the bowl thinner and wider.
Nauðsynleg verkfæri:
 Steðji
 Kúluhamar
3
3
Narrow the shank with the neck hammer
Narrow the shank with the neck hammer
Hold the spoon on edge on a rounded convex stake and hammer the shank narrower with the neck hammer. This lengthens the spoon and makes the shank narrower and thicker. Widen the tip of the handle the same way as the bowl.
Nauðsynleg verkfæri:
 Hæll
 HálshamarKúluhamar
4
4
Anneal and repeat
Anneal and repeat
When the silver gets hard, heat it to a dull red and plunge it into water, or let it cool. Repeat the hammering and annealing until the spoon is roughly to shape.
Efni fyrir þetta skref:
 Vatn1 as required
Nauðsynleg verkfæri:
 Bunsenbrennari
 Töng
 Glerílát
5
5
File and planish
File and planish
File the rough edges smooth, then planish the whole spoon carefully.
Nauðsynleg verkfæri:
 Þjalir (handþjöl)
 SléttihamarHæll
6
6
Polish out the file marks
Polish out the file marks
Rub out all the scratches and file marks with emery cloth.
Nauðsynleg verkfæri:
 Smergildúkur
7
7
Anneal to even the fire scale
Anneal to even the fire scale
Anneal the spoon thoroughly once more. Heated silver grows a thin white skin, the fire scale, and this brings it back over the spots where filing and polishing took it off, so the colour is even.
Efni fyrir þetta skref:
Vatn1 as requiredNauðsynleg verkfæri:
BunsenbrennariTöngGlerílát8
8
Planish with smooth hammers
Planish with smooth hammers
Planish the spoon on smooth tools with smooth, bright hammers. This makes it stiff again after the annealing.
Nauðsynleg verkfæri:
SléttihamarSteðjiHæll9
9
Final polish with rouge
Final polish with rouge
Polish it lightly with a soft cotton flannel and a little red rouge.
Nauðsynleg verkfæri:
 Fægiklútur fyrir skartgripi
 Gullsmiðarautt
Efni
2- 1 piece 15 gauge, enough for the 5 in blankStaðgengill
- 2 as requiredStaðgengill
Nauðsynleg verkfæri
14- Staðgengill
- Staðgengill
- Staðgengill
- Staðgengill
- Staðgengill
- Staðgengill
- Staðgengill
- Staðgengill
- Staðgengill
- Staðgengill
- Staðgengill
- Staðgengill
- Staðgengill
- Staðgengill
Þessi teikning býr til
Tengd Blueprint
Þessi blueprint deila þekkingu — tækni, efni eða meginreglur
CC0 opinbert ríki
Þessi teikning er gefin út undir CC0. Þér er frjálst að afrita, breyta, dreifa og nota þetta verk í hvaða tilgangi sem er, án þess að biðja um leyfi.
Studdu smiðinn með því að kaupa vörur í gegnum teikningu hans þar sem hann fær þóknun smiða sem seljendur ákvarða, eða búðu til nýja endurskoðun á þessari teikningu og tengdu hana sem tengingu í þinni eigin teikningu til að deila tekjum.