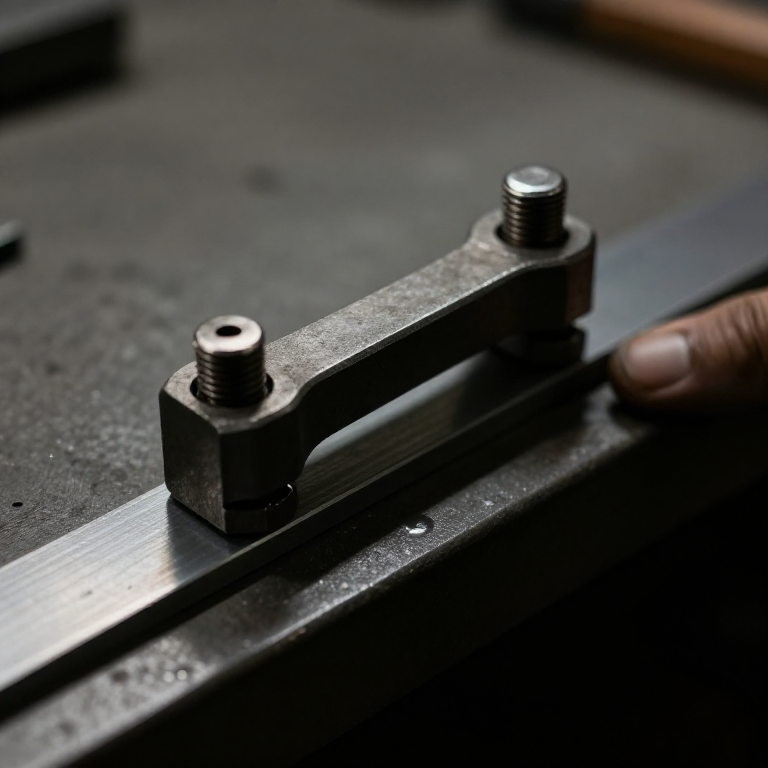


Toolmaker's Parallel Clamp
Leiðbeiningar
Cut two identical jaws
Cut two identical jaws
Two bars that must match, so make them as a pair.
- Cut two bars 120 × 20 mm from 6 mm aluminium flat bar.
- Clamp them together and file both ends square in one operation.
- Still clamped, drill both holes through the stack: one at 30 mm from the front end, one at 100 mm.
- Drill both at 6.5 mm.
Efni fyrir þetta skref:
 Flatt álstykki1 stykki
Nauðsynleg verkfæri:
 Járnsagarbogi með blöðum
 Skrúfstykki
 Þjalasett
 Hleðslubor
 Borasett
 Stafrænn skífmælir 6 tommur
Fit the two opposing screws
Fit the two opposing screws
One screw closes the jaws, the other sets the angle. That is the entire mechanism.
- At the FRONT hole, fit an M6 × 60 hex bolt passing through a clearance hole in the top jaw into an M6 hex nut captured in the bottom jaw. This is the clamping screw.
- At the REAR hole, fit a second M6 × 40 hex bolt the same way. This is the adjusting screw.
- Add M6 flat washers × 4 under both heads.
- Fit a knurled knob or a cross-bar to each head so they can be turned by hand.
What a real toolmaker's clamp uses: hardened steel jaws with the screws running in threaded bosses, knurled thumb collars, the whole thing case-hardened. Modern build spec (derived): captured M6 nuts in aluminium jaws give the same two-screw geometry with hand tools, at the cost of thread life in the softer material.
The rear screw does NOT clamp anything. Its only job is to act as a fulcrum at a chosen height, and understanding that is the difference between using this clamp correctly and fighting it.Efni fyrir þetta skref:
 Flöt skinna4 stykki
 Kringlótt álstöng1 stykki
Nauðsynleg verkfæri:
HleðsluborBorasett SexkantlyklasettÞjalasettSkrúfstykki
Learn the sequence — rear screw first
Learn the sequence — rear screw first
Using it in the wrong order is why people think these clamps are fiddly.
- Open both screws and place the work between the jaws at the front.
- Set the REAR screw so the jaws sit roughly parallel around the work.
- Now tighten the FRONT screw onto the work.
- If the jaws pinch at the front edge, back the rear screw off slightly; if at the back edge, tighten it.
Nauðsynleg verkfæri:
SexkantlyklasettProve the jaws really are parallel
Prove the jaws really are parallel
A simple test that also shows why a G-clamp fails it.
- Cut two identical shims from thin card or use two feeler gauge leaves of the same size.
- Place one at each END of the jaw opening, nothing in between.
- Tighten the clamp. Try to pull each shim out.
- Both should be gripped equally. Adjust the rear screw until they are.
- Now repeat the whole test with an ordinary G-clamp.
Efni fyrir þetta skref:
 Kartonpappír1 pakki
Nauðsynleg verkfæri:
Stafrænn skífmælir 6 tommurWhere the force goes, and history
Where the force goes, and history
The two screws form a lever. The rear screw is the fulcrum, the front screw applies effort, and the work sits between them — so moving the rear screw changes the leverage as well as the angle. Set the fulcrum far back and you get more clamping force and less sensitivity; set it close and the reverse. That is a design freedom the clamp gives you for free and almost nobody uses deliberately.
History. Toolmaker's clamps, sometimes called machinist's parallel clamps, are standard shop equipment from the nineteenth century onward and are associated with the precision trades rather than with any one inventor. They belong to the same world as gauge blocks, surface plates and the angle plate — the equipment that exists so that OTHER things can be made accurately.
Among its siblings: a G-clamp gives high force through a single screw and does not care about geometry. A toggle clamp gives repeatable force and instant release but a fixed opening. This clamp gives parallel jaws and even pressure but is slow to set. Three clamps, three different priorities — force, speed, precision — and a workshop that only owns one of them will eventually damage a workpiece with it.
Honest limit: aluminium jaws will bruise steel work less than steel jaws bruise aluminium, but they also wear and pick up burrs. Keep the jaw faces clean and dressed with a file, because a burr on a jaw face transfers its shape into everything the clamp subsequently holds.
Nauðsynleg verkfæri:
ÞjalasettEfni
4- 1 stykkiStaðgengill
- 4 stykkiStaðgengill
- 1 stykkiStaðgengill
- 1 pakkiStaðgengill
Þessi teikning býr til
Tengd Blueprint
Þessi blueprint deila þekkingu — tækni, efni eða meginreglur
CC0 opinbert ríki
Þessi teikning er gefin út undir CC0. Þér er frjálst að afrita, breyta, dreifa og nota þetta verk í hvaða tilgangi sem er, án þess að biðja um leyfi.
Studdu smiðinn með því að kaupa vörur í gegnum teikningu hans þar sem hann fær þóknun smiða sem seljendur ákvarða, eða búðu til nýja endurskoðun á þessari teikningu og tengdu hana sem tengingu í þinni eigin teikningu til að deila tekjum.