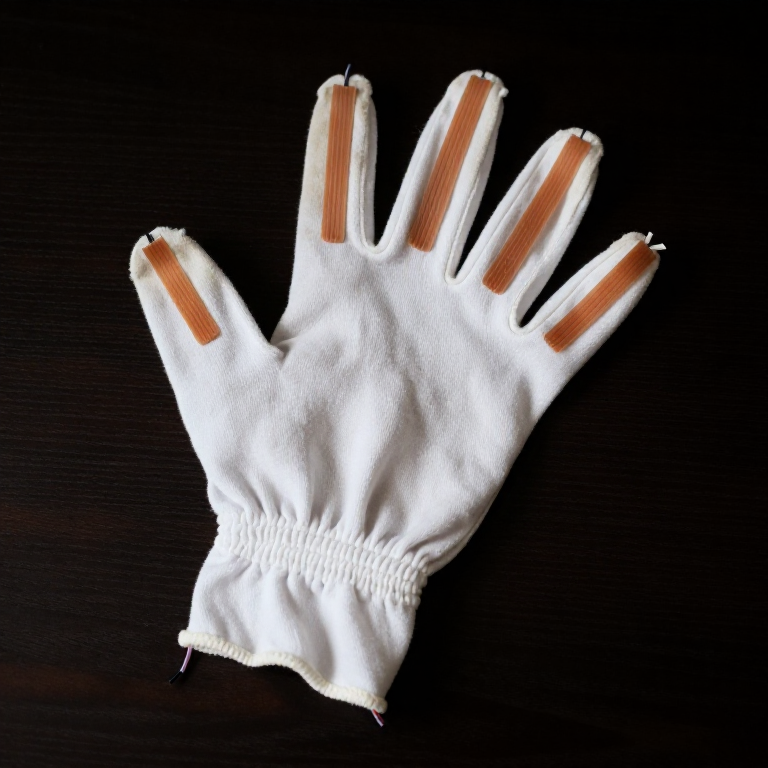


Flex Sensor Glove — Control 5 Servo Motors with Hand Gestures
Istruzioni
Parts & Introduction
Parts & Introduction
This project extends the SIK Circuit 9 (flex sensor + servo) concept to five fingers. Instead of holding a flex sensor in your hand, you'll glue one onto each finger of a cloth glove, creating a wearable gesture controller that drives five independent servo motors.
Parts Needed (from the SparkFun Inventor's Kit + extras)
- 1x SparkFun RedBoard (Arduino Uno compatible) + USB cable
- 1x Solderless Breadboard
- 5x Flex Sensors (2.2 inch) — kit includes 1, you need 4 more
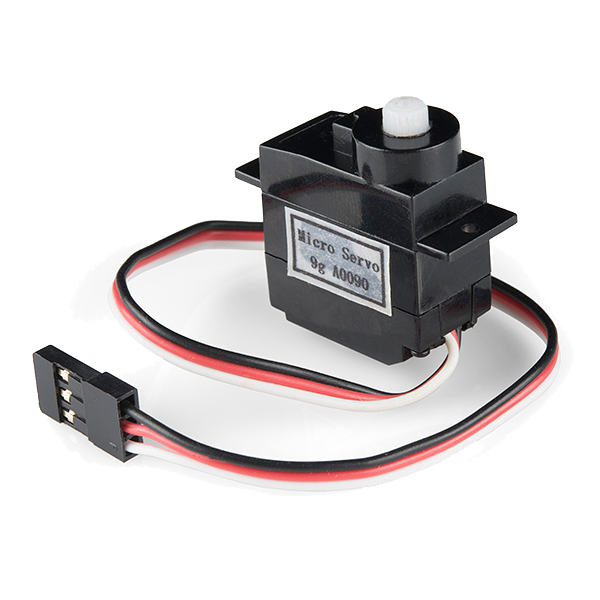
- 5x SG90 Micro Servo Motors
- 5x 10KΩ Resistors (for voltage dividers)
- ~30x Jumper Wires (M-M and M-F mix)
- 1x Cloth or cotton glove (tight-fitting)
- Super glue (cyanoacrylate)
Concept: Each flex sensor forms a voltage divider with a 10K resistor. Bending a finger changes the sensor's resistance (flat ≈ 10KΩ, bent ≈ 30KΩ), which shifts the voltage at the analog pin. The Arduino reads all 5 analog inputs and maps each to a servo angle (0°–180°).
Materiali per questo passaggio:
 SparkFun Inventor's Kit - V3.21 kit
 Sensore di flessione da 56 mm4 pezzi
 SG90 Micro Servo Motor (5-Pack)1 confezione
 Resistore da 10 kiloohm1 confezione
 Cavetti ponticello1 kit
 Attaccatutto1 bottiglia
 Guanto di stoffa (cotone)1 pezzo
Strumenti necessari:
 Computer con l'IDE Arduino
 Cavo USB-B
Prepare the Glove
Prepare the Glove
Use a tight-fitting cotton or jersey glove — it needs to follow your finger movements precisely.
Attaching the Flex Sensors
- Put the glove on your hand and mark the center line of each finger (top side, from knuckle to fingertip).
- Remove the glove and lay it flat.
- Apply a thin line of super glue along each finger's center line.
- Press a flex sensor onto each finger, component side (striped side) facing outward. The sensor should sit along the top of each finger so it bends when you curl your fingers.
- Let the glue cure for 5 minutes. The sensor leads should extend past the wrist area of the glove.
Tip: Leave 2-3 cm of sensor lead free at the base (near the wrist) — you'll attach jumper wires here.
Materiali per questo passaggio:
Sensore di flessione da 56 mm4 pezziCavetti ponticello1 kitAttaccatutto1 bottigliaGuanto di stoffa (cotone)1 pezzoWire the Voltage Dividers
Wire the Voltage Dividers
Breadboard Layout — 5 Voltage Dividers
Each flex sensor needs a voltage divider circuit. Repeat this for all 5 fingers:
- Connect one lead of the flex sensor to the 5V rail on the breadboard.
- Connect the other lead to a row on the breadboard — this is the signal node.
- From that same signal node, connect a 10KΩ resistor to GND.
- From that same signal node, run a jumper wire to an Arduino analog pin.
Pin Assignments
| Finger | Analog Pin | Servo Pin |
|---|---|---|
| Thumb | A0 | D3 |
| Index | A1 | D5 |
| Middle | A2 | D6 |
| Ring | A3 | D9 |
| Pinky | A4 | D10 |
Important: Use the PWM-capable digital pins (marked with ~) for the servos. Pins 3, 5, 6, 9, 10 are all PWM on the Arduino Uno.
Materiali per questo passaggio:
SparkFun Inventor's Kit - V3.21 kitSensore di flessione da 56 mm4 pezziSG90 Micro Servo Motor (5-Pack)1 confezioneResistore da 10 kiloohm1 confezioneCavetti ponticello1 kitAttaccatutto1 bottigliaGuanto di stoffa (cotone)1 pezzoWire the Servo Motors
Wire the Servo Motors
Servo Connections
Each SG90 servo has 3 wires:
- Red → 5V rail (shared power)
- Brown/Black → GND rail (shared ground)
- Orange/White → Digital PWM pin (see table in Step 3)
Arrange all 5 servos in a row next to the breadboard. You can tape or hot-glue them to a piece of cardboard to keep them stable.
Power Considerations
5 servos drawing current simultaneously can overload the Arduino's USB power. If you notice erratic servo behavior:
- Use an external 5V power supply (e.g., a phone charger with stripped USB cable) connected to the breadboard's power rail
- Connect the external supply's GND to the Arduino's GND (common ground)
- Keep the Arduino powered via USB for programming and serial communication
Materiali per questo passaggio:
SparkFun Inventor's Kit - V3.21 kitSensore di flessione da 56 mm4 pezziSG90 Micro Servo Motor (5-Pack)1 confezioneResistore da 10 kiloohm1 confezioneCavetti ponticello1 kitAttaccatutto1 bottigliaGuanto di stoffa (cotone)1 pezzoUpload the Arduino Code
Upload the Arduino Code
Open the Arduino IDE, paste the code below, and upload it to your board.
Strumenti necessari:
Computer con l'IDE ArduinoCalibrate & Test
Calibrate & Test
Initial Calibration
- Upload the code and open Serial Monitor (9600 baud).
- With the glove on, hold your hand flat and open. Note the analog values for each finger (F0–F4). These are your
FLEX_FLATvalues. - Make a tight fist. Note the new values. These are your
FLEX_BENTvalues. - Update the constants in the code and re-upload.
Each finger may have slightly different ranges — for precision, you can use per-finger calibration arrays instead of shared constants.
What You Should See
Each servo responds independently to its corresponding finger. Open your hand → servos at 0°. Close your fist → servos at 180°. Individual finger movements control individual servos.
Troubleshooting
- Servo jitters: Add a small capacitor (100µF) across the servo power rails, or use external power.
- Sensor reads don't change: Check the voltage divider — the 10K resistor must go to GND, not 5V.
- Wrong finger maps to wrong servo: Verify your pin assignments match the table in Step 3.
- Servos move erratically: USB power may be insufficient for 5 servos. Use an external 5V supply.
Ideas for Next Steps
- Build a robotic hand where each servo pulls a tendon (string) connected to a 3D-printed finger.
- Add an LCD display showing each finger's angle in real-time.
- Use the glove to control a robot arm over Bluetooth or WiFi.
- Map finger gestures to keyboard shortcuts for accessibility input.
Materiali
7- SparkFun Inventor's Kit - V3.210% commissione1 kit€95.06
- Segnaposto
- Servo - Generic (Sub-Micro Size)10% commissione1 confezione€7.46
- Segnaposto
- Segnaposto
- 1 bottigliaSegnaposto
- 1 pezzoSegnaposto
Strumenti richiesti
3- Segnaposto
- 1 vendor sell this, none ship to you yetSegnaposto
- USB Cable (Type A to B)
CC0 Pubblico dominio
Questo progetto è rilasciato sotto CC0. Sei libero di copiare, modificare, distribuire e utilizzare quest'opera per qualsiasi scopo, senza chiedere permesso.
Supporta il Maker acquistando prodotti tramite il suo progetto dove guadagna una Commissione Maker stabilita dai venditori, oppure crea una nuova iterazione di questo progetto e includilo come collegamento nel tuo progetto per condividere i ricavi.