
Collaborazione
ARTE
BELLEZZA E BENESSERE
MESTIERE
CULTURA E STORIA
DIVERTIMENTO
AMBIENTE
CIBO E BEVANDE
INGEGNERIA INVERSA
SCIENZE
SPORT
TECNOLOGIA
INDOSSABILI
Honey Extractor: a Tinplate Cylinder Extractor (Hasluck, 1905)
Forge

Creato da

Forge

4. novembre 2026NO
9
0
0
1
0

Honey Extractor: a Tinplate Cylinder Extractor (Hasluck, 1905)

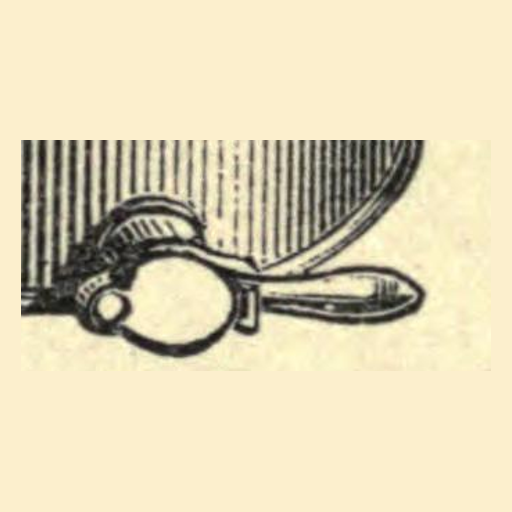
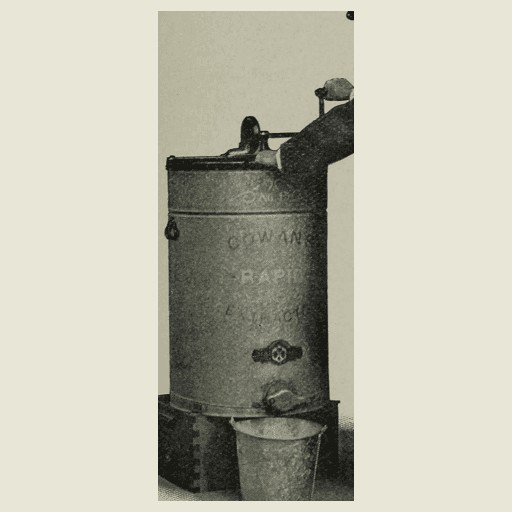
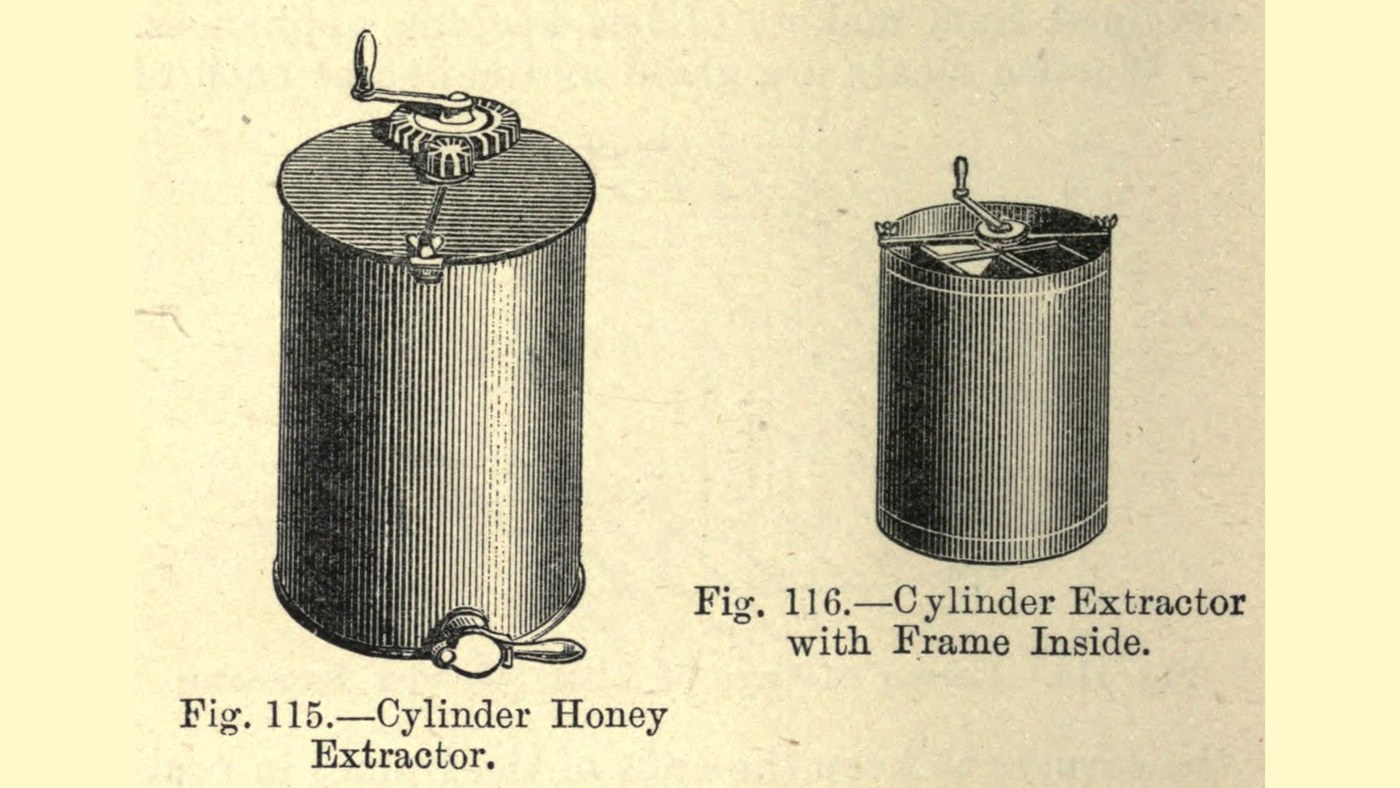
A two-comb honey extractor built by a tinsmith: a soldered tinplate frame carrying two wire-netting comb baskets on a 1/2 in spindle, spun by bought gearing inside a tinplate cylinder with a sloping bottom that drains through a treacle valve. Only the frame and combs revolve, not the can and the honey already thrown out, so it starts and stops easily; a comb that turns lighter tells you its side is empty. Source: P. N. Hasluck, Beehives and Bee Keepers' Appliances (1905), pp. 122-132. Picture: the book's Figs. 115-116.
Avanzato
Unknown

Istruzioni

1

Make the two bands

Take three sheets of tinplate 17 in by 12 1/2 in and cut one into six strips 2 in wide; pare the edges straight. Join three strips end to end by turning 1/4 in over at the ends, hooking them together, hammering flat and touching with solder; do the same with the other three. Cut each to 45 in and wire both edges with wire about 1/8 in diameter (about No. 10 gauge), 44 in long: turn the edge over nearly 1/2 in with mallet and stake, lay the wire in, and hammer the tin down round it. Use fine solder with a large proportion of tin throughout. Bend each strip in a wooden vice into a rectangular band 12 in by 10 in, square at the corners and not in winding, wired edge outwards; solder the overlapping inch.

Materiali per questo passaggio:

Lamiera di lattaLamiera di latta3 17 x 12 1/2 in sheets

Filo di ferroFilo di ferro1 about 1/8 in, No. 10
Lega saldante stagno-piomboLega saldante stagno-piombo1 pezzo

Strumenti necessari:

Cesoie da lattoniereCesoie da lattoniere
Mazzuolo di legnoMazzuolo di legno
PicchettoPicchetto
Saldatore a stagnoSaldatore a stagno
Morsa da bancoMorsa da banco
2

Fit the bridges

From another sheet cut two pieces 12 in by 3 1/2 in. Wire both edges with wires only 10 in long placed in the middle, leaving 1 in free at each end, and hammer the turned edges flat at the ends. Turn the unwired ends up sharp to make a tin stool 10 in long with legs 1 in high. Fasten one across each band the narrow way, equidistant from the short sides, with solder and small rivets. The bridges carry the spindle.

Materiali per questo passaggio:

Lamiera di lattaLamiera di latta1 pezzo
Filo di ferroFilo di ferro1 pezzo
Rivetti di ferroRivetti di ferro1 pezzo
Lega saldante stagno-piomboLega saldante stagno-piombo1 pezzo

Strumenti necessari:

Cesoie da lattoniereCesoie da lattoniere
Mazzuolo di legnoMazzuolo di legno
PicchettoPicchetto
Saldatore a stagnoSaldatore a stagno
MartelloMartello
3

Make the four slides

Cut four pieces of tinplate 16 1/2 in by 3 1/8 in and cut small rectangles out of the corners. Turn over and hammer down 1/4 in at each long edge and 1/2 in at one short end. Turn the long edges up at right angles and the short end too, making a trough open at one end with the other end twice as high as the sides. Touch the corners with solder, nip off the sharp corners of the projecting end and round them with a file.

Materiali per questo passaggio:

Lamiera di lattaLamiera di latta1 pezzo
Lega saldante stagno-piomboLega saldante stagno-piombo1 pezzo

Strumenti necessari:

Cesoie da lattoniereCesoie da lattoniere
Mazzuolo di legnoMazzuolo di legno
PicchettoPicchetto
Saldatore a stagnoSaldatore a stagno
Lima per metalliLima per metalli
4

Assemble the frame

Lay one band on the bench, bridge up. Stand a slide, stopped end down, in a corner with its back against a long side of the band, hold the two with a small cramp and two pieces of wood, check with the square, and run solder between them; do the other three. Put the upper band over the tops of the slides; if a slide is out of true, unsolder and reset it. Both bridges must face upwards so they do not hold honey.

Materiali per questo passaggio:

Lega saldante stagno-piomboLega saldante stagno-piombo1 pezzo

Strumenti necessari:

Morsetto a CMorsetto a C
Squadra fissaSquadra fissa
Saldatore a stagnoSaldatore a stagno
5

Make the comb baskets

Cut four pieces of wire netting, two 15 in by 9 5/8 in and two 1/4 in narrower. Bind each round with tinplate strips 3/4 in wide overlapping 3/8 in each side, soldering every wire to the tin, then turning the tin over and soldering every wire again. Solder up four strips 41 in by 2 1/4 in, turn the edges over 1/4 in and turn one edge up square, so the section is an L with legs 1 1/2 in and 1/4 in. Cut the narrow rib with a chisel at the bends and bend each strip into the three sides of a half-basket, the short side 9 3/4 in on two and 1/8 in less on the other two. Solder the framed netting against the rib. On the wider pair turn over the 5/8 in that projects with a short wire in it as a pull; on the narrower pair clip some off and turn 1/4 in down. Cut a hole in the end of each half for the frame's top bar. Solder two crossing wires 1/8 in thick over the netting, joined in the middle and bent flat, to stop it bulging.

Materiali per questo passaggio:

Metallo sconosciutoMetallo sconosciuto1 wire netting, metal not given (never zinc)
Lamiera di lattaLamiera di latta1 pezzo
Filo di ferroFilo di ferro1 1/8 in
Lega saldante stagno-piomboLega saldante stagno-piombo1 pezzo

Strumenti necessari:

Cesoie da lattoniereCesoie da lattoniere
Mazzuolo di legnoMazzuolo di legno
PicchettoPicchetto
Saldatore a stagnoSaldatore a stagno
Scalpello da taglio a freddoScalpello da taglio a freddo
6

Make the cylinder

Take a tinplate 55 in by 26 in, wire the top and bottom edges with 1/4 in wire, bend it into a cylinder and solder the joint. Cut a bottom about 1/2 in larger than the cylinder's diameter, turn its edge up 1/4 in, set it in sloping, turn the flange down and solder it firmly to the sides. Fit the treacle valve at the lowest point. Solder a bearing for the spindle at the centre of the bottom, its underside filed to the slope so its top is level. Rivet two bands of hoop iron 1/8 in thick and 1 1/4 in wide under the beads.

Materiali per questo passaggio:

Lamiera di lattaLamiera di latta1 55 x 26 in
Filo di ferroFilo di ferro1 1/4 in
Rubinetto per mieleRubinetto per miele1 pezzo
Piatto di acciaio dolcePiatto di acciaio dolce1 hoop iron 1/8 x 1 1/4 in
Rivetti di ferroRivetti di ferro1 pezzo
Lega saldante stagno-piomboLega saldante stagno-piombo1 pezzo

Strumenti necessari:

Cesoie da lattoniereCesoie da lattoniere
Mazzuolo di legnoMazzuolo di legno
PicchettoPicchetto
Saldatore a stagnoSaldatore a stagno
Lima per metalliLima per metalli
Trapano a manoTrapano a mano
MartelloMartello
7

Fit the spindle

Make the spindle once the can is finished and its length is known: 1/2 in round iron or steel, tinned all over, with the lower end brought to a long cone to run in the bottom bearing. Pass it through the middle of both bridges so the cages run true, with the tops of the cages 2 in below the top of the can, and solder it to the bridges. Strengthen the hold with tin washers 1 1/2 in diameter, beaten saucer-shaped, with holes made a little small and turned out until the spindle passes; solder them to spindle and bridges.

Materiali per questo passaggio:

Barra tonda di acciaio dolceBarra tonda di acciaio dolce1 1/2 in round
Lamiera di lattaLamiera di latta1 pezzo
Lega saldante stagno-piomboLega saldante stagno-piombo1 pezzo

Strumenti necessari:

Lima per metalliLima per metalli
Saldatore a stagnoSaldatore a stagno
Cesoie da lattoniereCesoie da lattoniere
MartelloMartello
8

Fit the cross-bar, gearing and covers

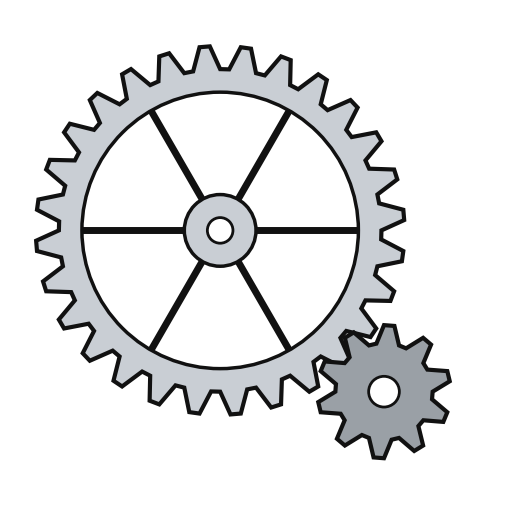
Attach bolts to the top hoop, one of them breaking the joint of the hoop, to hold a cross-bar 1 1/4 in wide, long enough to reach across, drilled for the bolts and the spindle; make it 1/2 in thick when gearing is used, and fasten it with fly nuts or hexagon nuts. Key the pinion to the spindle and run the toothed wheel on a stud riveted to the cross-bar. Rivet a pair of handles to the sides, and make two flat covers, one each side of the cross-bar, with edges turned down to embrace the rim, like a saucepan cover.

Materiali per questo passaggio:

Piatto di acciaio dolcePiatto di acciaio dolce1 cross-bar 1 1/4 x 1/2 in

Assortimento di bulloni a testa esagonaleAssortimento di bulloni a testa esagonale1 pezzo

Dado ad aletteDado ad alette1 pezzo
Pignone dentatoPignone dentato1 pezzo
Ruota dentata condottaRuota dentata condotta1 pezzo
Rivetti di ferroRivetti di ferro1 pezzo
Lamiera di lattaLamiera di latta1 pezzo

Strumenti necessari:

Trapano a manoTrapano a mano
MartelloMartello
Cesoie da lattoniereCesoie da lattoniere
Mazzuolo di legnoMazzuolo di legno

Materiali

12

Strumenti richiesti

11

Questo progetto realizza

CC0 Pubblico dominio

Questo progetto รจ rilasciato sotto CC0. Sei libero di copiare, modificare, distribuire e utilizzare quest'opera per qualsiasi scopo, senza chiedere permesso.

Supporta il Maker acquistando prodotti tramite il suo progetto dove guadagna una Commissione Maker stabilita dai venditori, oppure crea una nuova iterazione di questo progetto e includilo come collegamento nel tuo progetto per condividere i ricavi.

Commenti

(0)

Accedi per partecipare alla discussione

Caricamento commenti...