Collaborazione
ARTE
BELLEZZA E BENESSERE
MESTIERE
CULTURA E STORIA
DIVERTIMENTO
AMBIENTE
CIBO E BEVANDE
INGEGNERIA INVERSA
SCIENZE
SPORT
TECNOLOGIA
INDOSSABILI
Rinsing-Ring Churn: Lid, Gearing, Dasher and Breaker Bars Lift Out as One, a Perforated Ring Under the Lid Washes Them
Buttercup

Creato da

Buttercup

11. novembre 2026IE
0
0
0
0
0

Rinsing-Ring Churn: Lid, Gearing, Dasher and Breaker Bars Lift Out as One, a Perforated Ring Under the Lid Washes Them

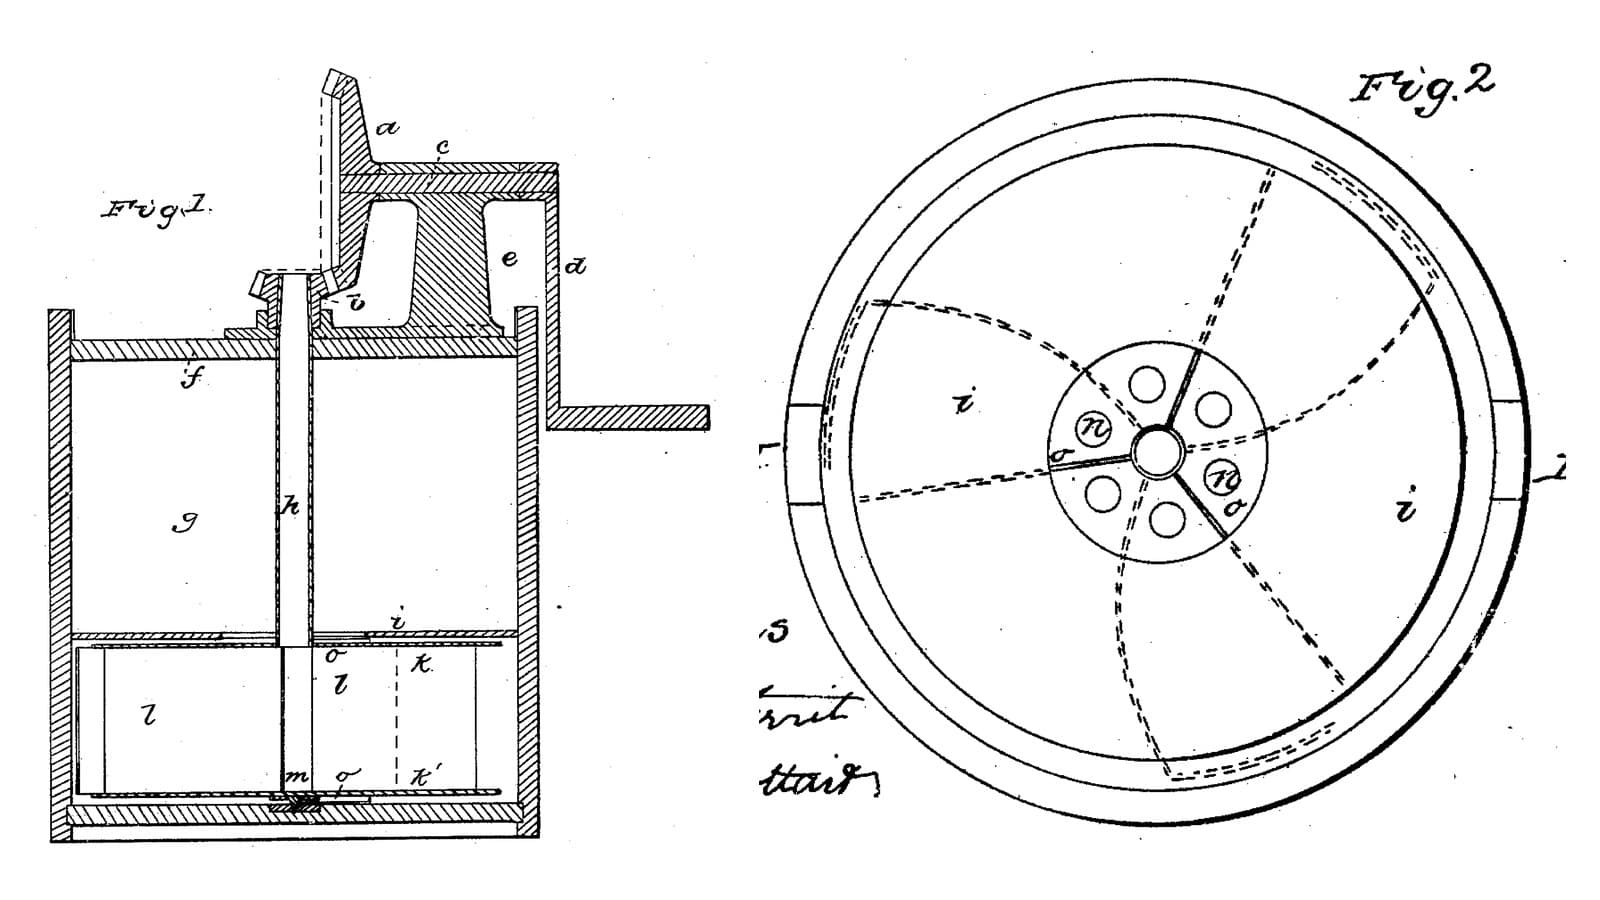
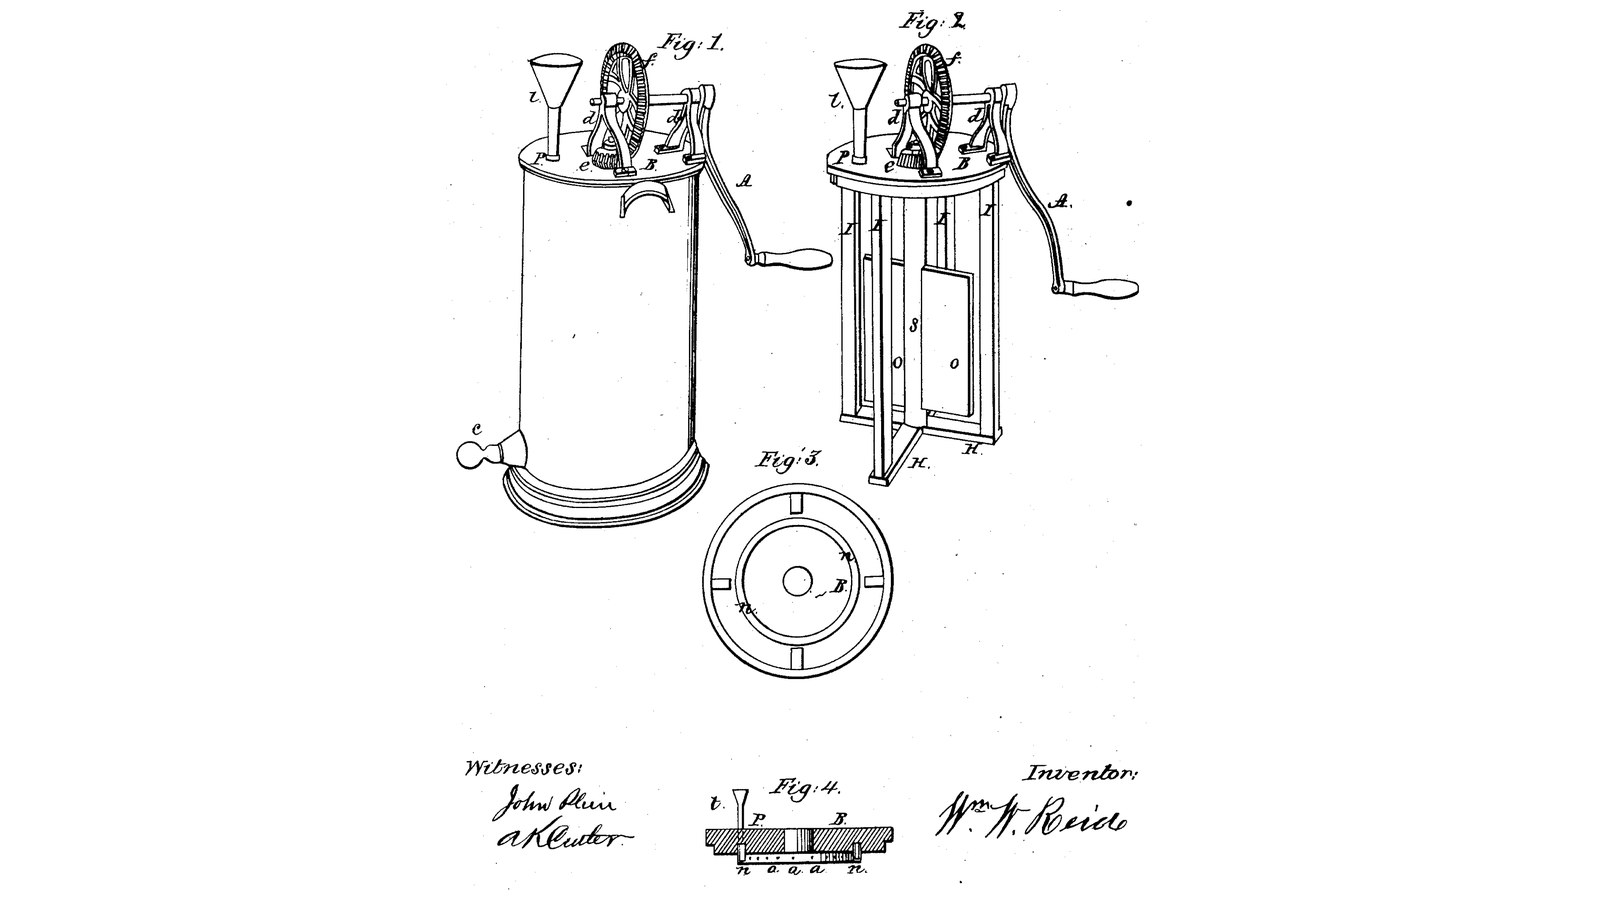
William W. Reid of Rochester, New York, received US 30,424, dated 16 October 1860, for a geared churn whose lid, gearing, two-slat dasher and four upright breaker bars are joined into one frame that lifts out of the body together. Under the lid runs a ring-shaped tube with small holes on both faces: water poured into a funnel on the lid sprays inward onto the dasher and outward onto the bars and wall, rinsing them, or tempering the cream, without lifting the lid. The patent's only size is the holes about an inch apart; every other size here is ours.
Intermedio
About 2 days

Istruzioni

1

The rinsing ring

Caricamento del notebook Jupyter…
2

A geared frame that sits on the churn, four months before

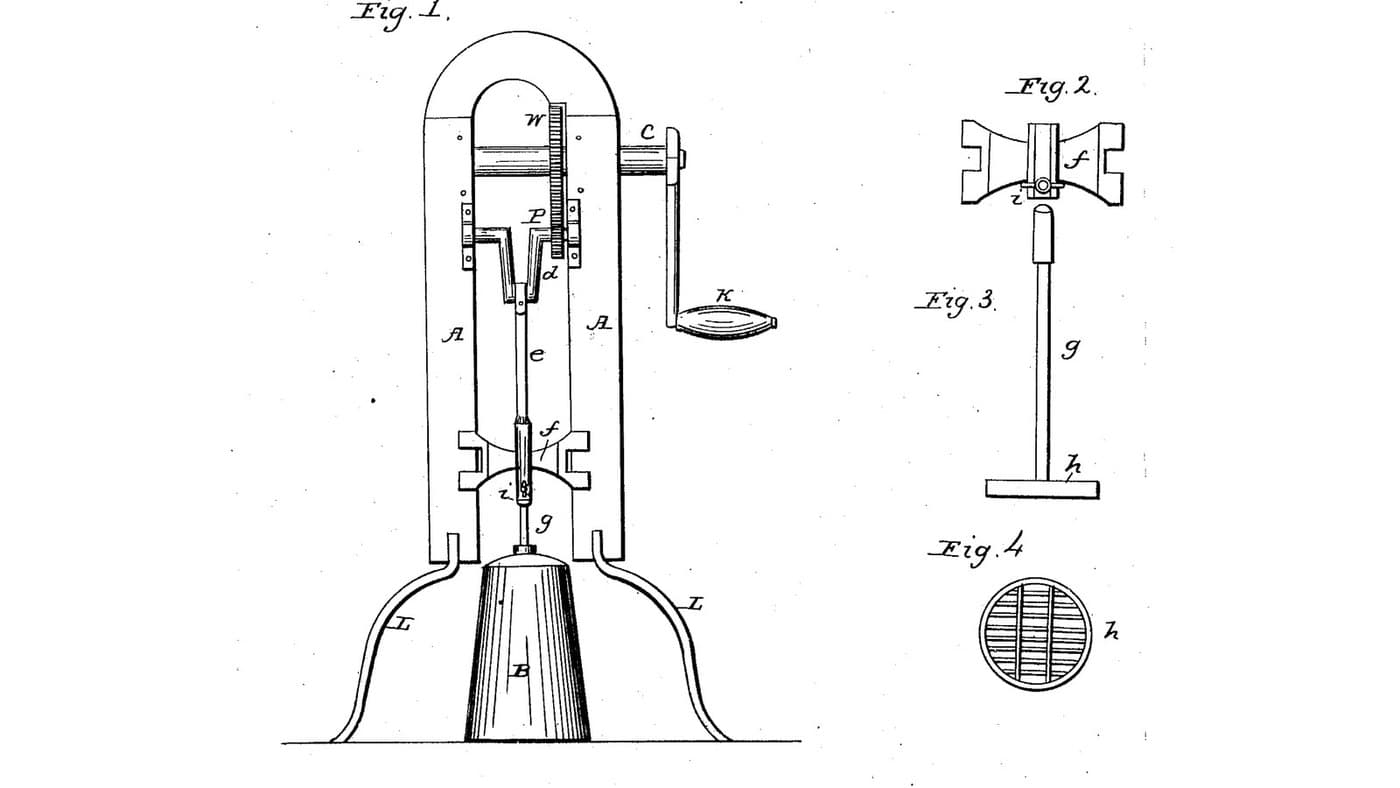
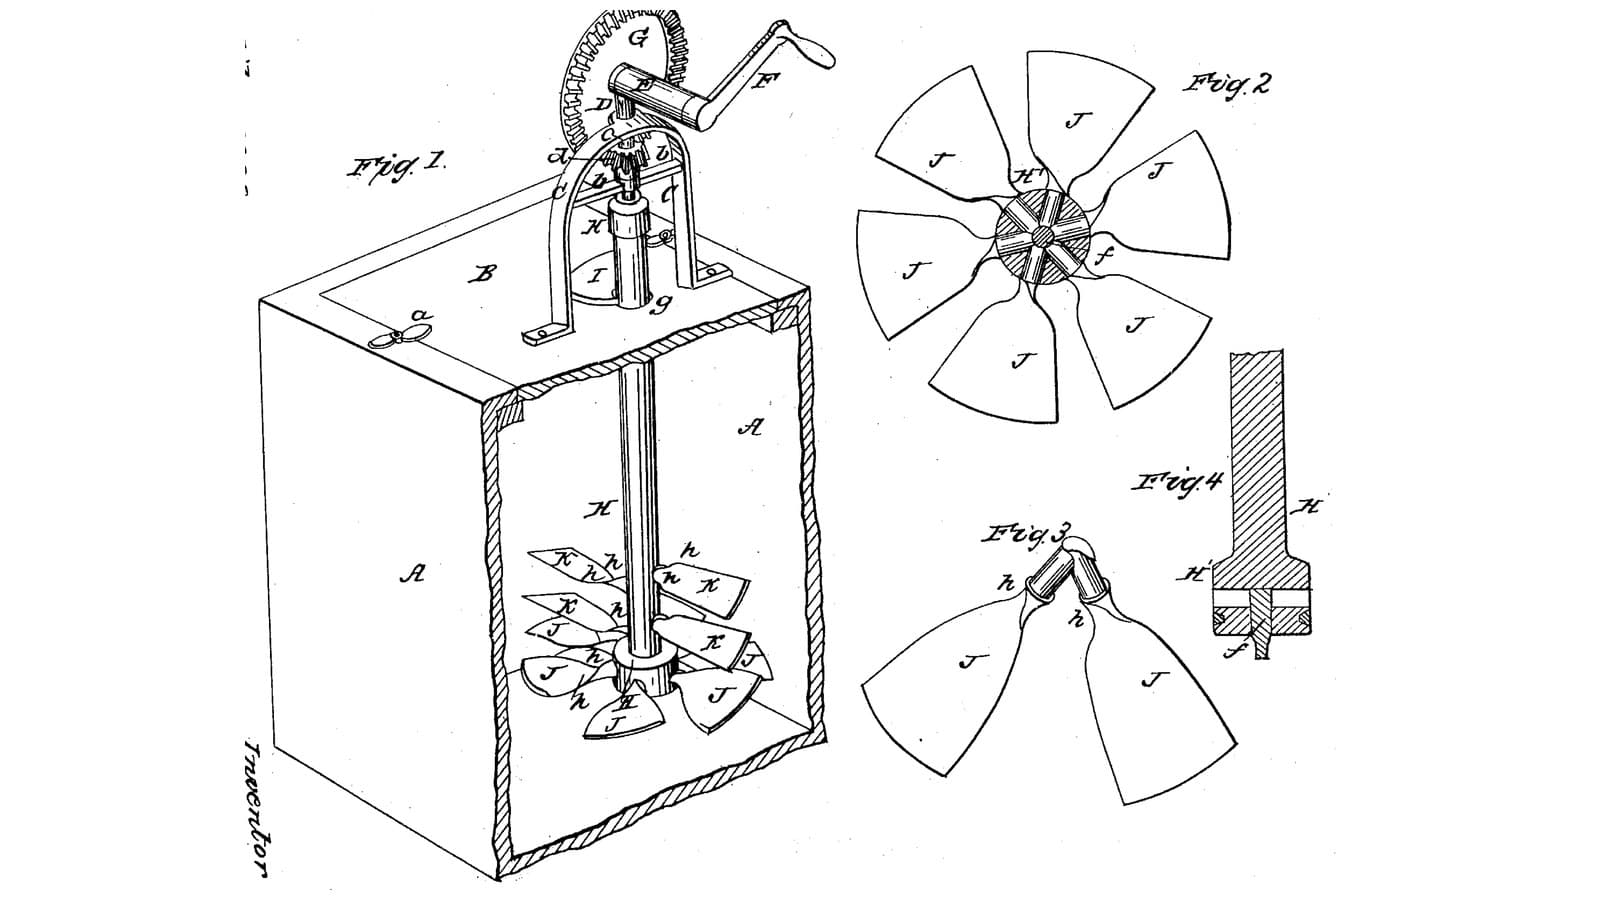
Evans sets his gearing on a frame over the churn. Reid joins gearing, dasher and breakers to the lid so all come out together.
3

Read US 30,424

"The tunnel t, fits into a short tube P, which passes through the lid B, and is inserted into the annular tube n, so that when water is poured into the tunnel t, it is projected in numerous small jets both inwardly upon the dasher and also outwardly against the upright bars I, I, I, I, and sides of the churn, and thus washes off the milk and small particles of butter."
4

Body and faucet C

Use a 20-litre food-grade bucket as the body. Bore a 21 mm hole 40 mm above its floor and fit a brass spigot C with its washers and nut. Screw two hardwood stop blocks 22 x 24 x 25 mm inside the rim, one above the spigot and one opposite, from outside through the wall, so the lid cannot turn.

Materiali per questo passaggio:

Secchio da 20 litriSecchio da 20 litri1 pezzo
Rubinetto di ottoneRubinetto di ottone1 pezzo
Tavola di legno duroTavola di legno duro1 pezzo
Viti da legnoViti da legno4 pezzi

Strumenti necessari:

Set di punte a lanciaSet di punte a lancia
Trapano a batteriaTrapano a batteria
Chiave regolabile a rullinoChiave regolabile a rullino
Set di cacciavitiSet di cacciaviti
5

Print the ring tube n

The annular tube n: hollow, 16 x 16 mm in section with 2 mm walls, 196 mm across outside and 164 inside, with 23 holes of 2 mm on its inner face and 23 on its outer face, about an inch apart, and an inlet on top for the tube P. Needs a 200 mm bed. PETG, 0.2 mm layers, 30 % infill, 4 walls.
File di designSTLCC0 - Free
6

Lid B, ring n, tube P and funnel t

Cut a 12 mm HDPE lid B to the bucket's top, 304 mm across, bore it 16.6 mm at the centre as the shaft's top bearing, and cut two notches at its edge to drop over the stop blocks. Rout a groove 17 mm wide and 8 mm deep under it, 180 mm across its middle, and seal the ring tube n into it so half the ring stands below. Bore 12.2 mm through the lid over the ring's inlet, 90 mm out from the centre, and seal in a 12 mm stainless tube P 40 mm long standing 30 mm proud; set a small kitchen funnel t in it.

Materiali per questo passaggio:

Lastra di HDPELastra di HDPE1 pezzo
Filamento PETGFilamento PETG1 pezzo
Sigillante siliconicoSigillante siliconico1 pezzo
Tubo di acciaio inossidabileTubo di acciaio inossidabile1 pezzo
Imbuto da cucinaImbuto da cucina1 pezzo

Strumenti necessari:

Stampante 3D a filamento (FDM)Stampante 3D a filamento (FDM)
BussolaBussola
Seghetto alternativoSeghetto alternativo
Fresatrice verticaleFresatrice verticale
Set di punte a lanciaSet di punte a lancia
Trapano a batteriaTrapano a batteria
Serie di punte da trapanoSerie di punte da trapano
Seghetto per metalliSeghetto per metalli
Lime (lima a mano)Lime (lima a mano)
7

Bars H and I, shaft S and dasher O

Halve two hardwood bars H 260 x 40 x 20 mm across each other and glue them; bore a 10.6 mm socket 20 mm deep at the middle. Screw four hardwood bars I 20 mm square and 351 mm long upright on their ends, 120 mm from the centre, and their tops to the lid's underside. Cut a hardwood shaft S 32 mm square and 325 mm long, set a 10 mm stainless pin 15 mm out of its foot and a 16 mm stainless rod 108 mm long 20 mm into its top. Screw two hardwood slats O 95 x 12 x 290 mm on opposite faces of S, reaching out opposite ways, 15 mm above its foot. Stand S in the socket and up through the lid's bearing.

Materiali per questo passaggio:

Tavola di legno duroTavola di legno duro2 pezzi
Colla da legnoColla da legno1 pezzo
Viti da legnoViti da legno16 pezzi
Barra di acciaio inossidabileBarra di acciaio inossidabile2 pezzi

Strumenti necessari:

Sega circolare da bancoSega circolare da banco
Serie di scalpelli da legnoSerie di scalpelli da legno
Trapano a batteriaTrapano a batteria
Serie di punte da trapanoSerie di punte da trapano
Seghetto per metalliSeghetto per metalli
Morsetto a barraMorsetto a barra
Set di cacciavitiSet di cacciaviti
Metro a nastroMetro a nastro
8

Print the wheel f

The wheel f on the crank shaft: a crown wheel of 42 teeth, module 2.5, 16.2 mm bore. PETG, 0.2 mm layers, 30 % infill, 4 walls.
File di designSTLCC0 - Free
9

Print the pinion e

The pinion e on the top of S: 14 teeth, module 2.5, 16.2 mm bore. PETG, 0.2 mm layers, 30 % infill, 4 walls.
File di designSTLCC0 - Free
10

Supports d, wheel f, pinion e and crank A

Pin the pinion e on the rod of S with its teeth centred 40 mm above the lid. Screw two hardwood supports d 50 x 25 x 118 mm to the lid either side of it, one 60 to 85 mm in front and one 25 to 50 mm behind, bored 16.6 mm across 92 mm up. Run a 16 mm stainless crank shaft 180 mm long through them, pin the wheel f on it meshing e, hold it with a shaft collar, and pin on a crank A of mild steel flat bar, 100 mm throw, with a hardwood handle.

Materiali per questo passaggio:

Barra di acciaio inossidabileBarra di acciaio inossidabile1 pezzo
Tavola di legno duroTavola di legno duro1 pezzo
Shaft CollarShaft Collar1 pezzo
CoppigliaCoppiglia3 pezzi
Piatto di acciaio dolcePiatto di acciaio dolce1 pezzo
Tasselli di legno duroTasselli di legno duro1 pezzo
Viti da legnoViti da legno4 pezzi
Filamento PETGFilamento PETG1 pezzo

Strumenti necessari:

Stampante 3D a filamento (FDM)Stampante 3D a filamento (FDM)
Sega circolare da bancoSega circolare da banco
Trapano a batteriaTrapano a batteria
Serie di punte da trapanoSerie di punte da trapano
Seghetto per metalliSeghetto per metalli
Lime (lima a mano)Lime (lima a mano)
Morsa da bancoMorsa da banco
Set di cacciavitiSet di cacciaviti
11

The build in 3D

FreeCAD model of this build, the bucket and lid cut open: the crossed bars and four upright bars, the shaft with its two slats, the ring tube under the lid with its holes, the tube and funnel, the spigot and stop blocks, and the gearing and crank on the lid.
File di designBLENDCC0 - Free
12

Churn and rinse

Pour about 12 litres of heavy cream at about 15 °C, checked with the thermometer, into the bucket and lower the whole frame in, the lid's notches over the stop blocks. Turn the crank steadily, timing it; to warm or cool the cream, pour a little warm or cold water into the funnel. When the butter comes, draw the buttermilk off at the spigot into a bowl, then pour cold water into the funnel to rinse the dasher, bars and walls, turning slowly, and draw it off. Lift the frame out, take out the butter, wash it in cold water until it runs clear, salt and weigh it.

Materiali per questo passaggio:

Panna da montarePanna da montare12 l
AcquaAcqua1 pezzo
Sale marino grossoSale marino grosso1 pezzo

Strumenti necessari:

Termometro a sonda permanenteTermometro a sonda permanente
CronometroCronometro
Bilancia digitale da cucinaBilancia digitale da cucina
Grande ciotola da impasto in acciaio inossidabileGrande ciotola da impasto in acciaio inossidabile
13

Troubleshooting

Rinsing-ring churn troubleshooting.

Flow

Loading...
14

History and honest limits

**William W. Reid** of Rochester, Monroe County, New York, US 30,424, 16 October 1860, "Churn". He claimed "the annular perforated tube n in combination with the bars I I and dasher O". His tube was rectangular tin; ours is printed. His wheel and pinion were bevel gears on cast supports; ours are a printed crown wheel and pinion on wooden supports. The holes about an inch apart are his; every other size here is ours.

Materiali

18

Strumenti richiesti

20

File di progetto

4

CC0 Pubblico dominio

Questo progetto è rilasciato sotto CC0. Sei libero di copiare, modificare, distribuire e utilizzare quest'opera per qualsiasi scopo, senza chiedere permesso.

Supporta il Maker acquistando prodotti tramite il suo progetto dove guadagna una Commissione Maker stabilita dai venditori, oppure crea una nuova iterazione di questo progetto e includilo come collegamento nel tuo progetto per condividere i ricavi.

Commenti

(0)

Accedi per partecipare alla discussione

Caricamento commenti...