ARTE
BELLEZZA E BENESSERE
MESTIERE
CULTURA E STORIA
DIVERTIMENTO
AMBIENTE
CIBO E BEVANDE
INGEGNERIA INVERSA
SCIENZE
SPORT
TECNOLOGIA
INDOSSABILI
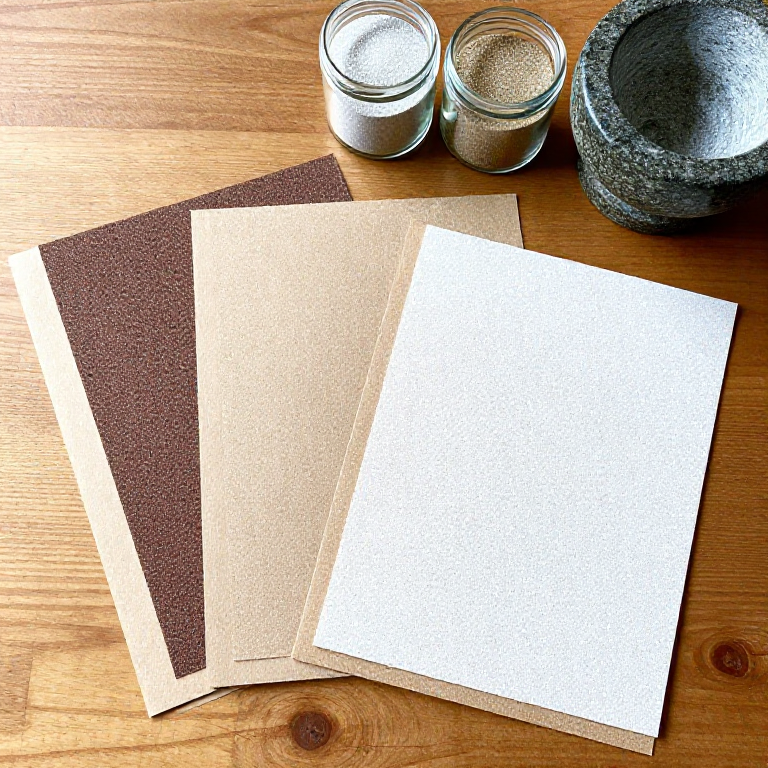


Sandpaper from Sand, Hide Glue and Paper
A coated abrasive is grit glued to a backing. The first recorded one, in 13th-century China, bonded crushed shells, seeds and sand to parchment with natural gum. Here clean quartz sand is crushed, sieved into grades and scattered on paper brushed with warm hide glue.
Sieve mesh only roughly matches a shop grit number: real P grades are set by ISO 6344. Quartz grit on hide glue wears faster than garnet or aluminium oxide paper, and water softens the glue, so use it dry.
Principiante
1 hour, plus a day drying
Istruzioni
1
1
Crush the sand
Crush the sand
With a dust mask on, crush clean quartz sand in the mortar, a few spoonfuls at a time.
Materiali per questo passaggio:
 Sabbia di quarzo300 g
Strumenti necessari:
 Mortaio e pestello
 Mascherina antipolvere
2
2
Sieve into grades
Sieve into grades
Sieve through the 60, 80 and 120 mesh sieves stacked coarse on top. Keep what each sieve holds in its own labelled jar: coarse, medium and fine.
Strumenti necessari:
 Setaccio da 60 mesh
 Setaccio a maglia 80
 Setaccio da 120 maglie
 Barattoli di vetro con coperchioMascherina antipolvere
3
3
Warm the glue
Warm the glue
Soak hide glue granules in water, then warm them in a double boiler to about 60 °C until runny. Do not let it boil.
Materiali per questo passaggio:
 Colla di pelle50 g
 Acqua0.1 litro
Strumenti necessari:
 Bagnomaria
 Piastra riscaldante
 Termometro a sonda permanente
4
4
Glue the paper
Glue the paper
Brush a thin, even coat of glue over one face of a sheet of strong paper, edge to edge.
Materiali per questo passaggio:
 Carta3 fogli
Strumenti necessari:
 Pennello per colla
5
5
Scatter the grit
Scatter the grit
While the glue is wet, sprinkle one grade of grit thickly over it, press it in with a rolling pin over a clean sheet, and let it set for a minute.
Strumenti necessari:
 Matterello
6
6
Shake off and dry
Shake off and dry
Tip the sheet on edge and tap off the loose grit back into its jar. Dry it flat for a day, then label the back with its grade.
Strumenti necessari:
Barattoli di vetro con coperchio7
7
Test it
Test it
Sand a scrap of softwood ten strokes and look at the scratches. Cut sheets to size.
Strumenti necessari:
 Forbici
8
8
Troubleshooting
Troubleshooting
Home-made sandpaper troubleshooting.
Flow
Loading...
Materiali
4- 300 gSegnaposto
- 50 gSegnaposto
- 0.1 litroSegnaposto
- 3 fogliSegnaposto
Strumenti richiesti
12- Segnaposto
- Segnaposto
- Segnaposto
- Segnaposto
- Segnaposto
- Segnaposto
- Segnaposto
- Segnaposto
- Segnaposto
- Segnaposto
- Segnaposto
- Segnaposto
Questo progetto realizza


Blueprint correlati
Questi blueprint condividono conoscenze — tecniche, materiali o principi

CC0 Pubblico dominio
Questo progetto è rilasciato sotto CC0. Sei libero di copiare, modificare, distribuire e utilizzare quest'opera per qualsiasi scopo, senza chiedere permesso.
Supporta il Maker acquistando prodotti tramite il suo progetto dove guadagna una Commissione Maker stabilita dai venditori, oppure crea una nuova iterazione di questo progetto e includilo come collegamento nel tuo progetto per condividere i ricavi.