ARTE
BELLEZZA E BENESSERE
MESTIERE
CULTURA E STORIA
DIVERTIMENTO
AMBIENTE
CIBO E BEVANDE
INGEGNERIA INVERSA
SCIENZE
SPORT
TECNOLOGIA
INDOSSABILI


The Synchronous Clock: Telling Time by the Power Station's Cycles
Every electric clock needs something regular to count. Henry E. Warren of Ashland, Massachusetts, saw that an alternating-current supply already carries one: the alternations of the generators. A small motor that turns exactly in step with them, geared down to hands, keeps time — provided the power station keeps its total count of alternations right.
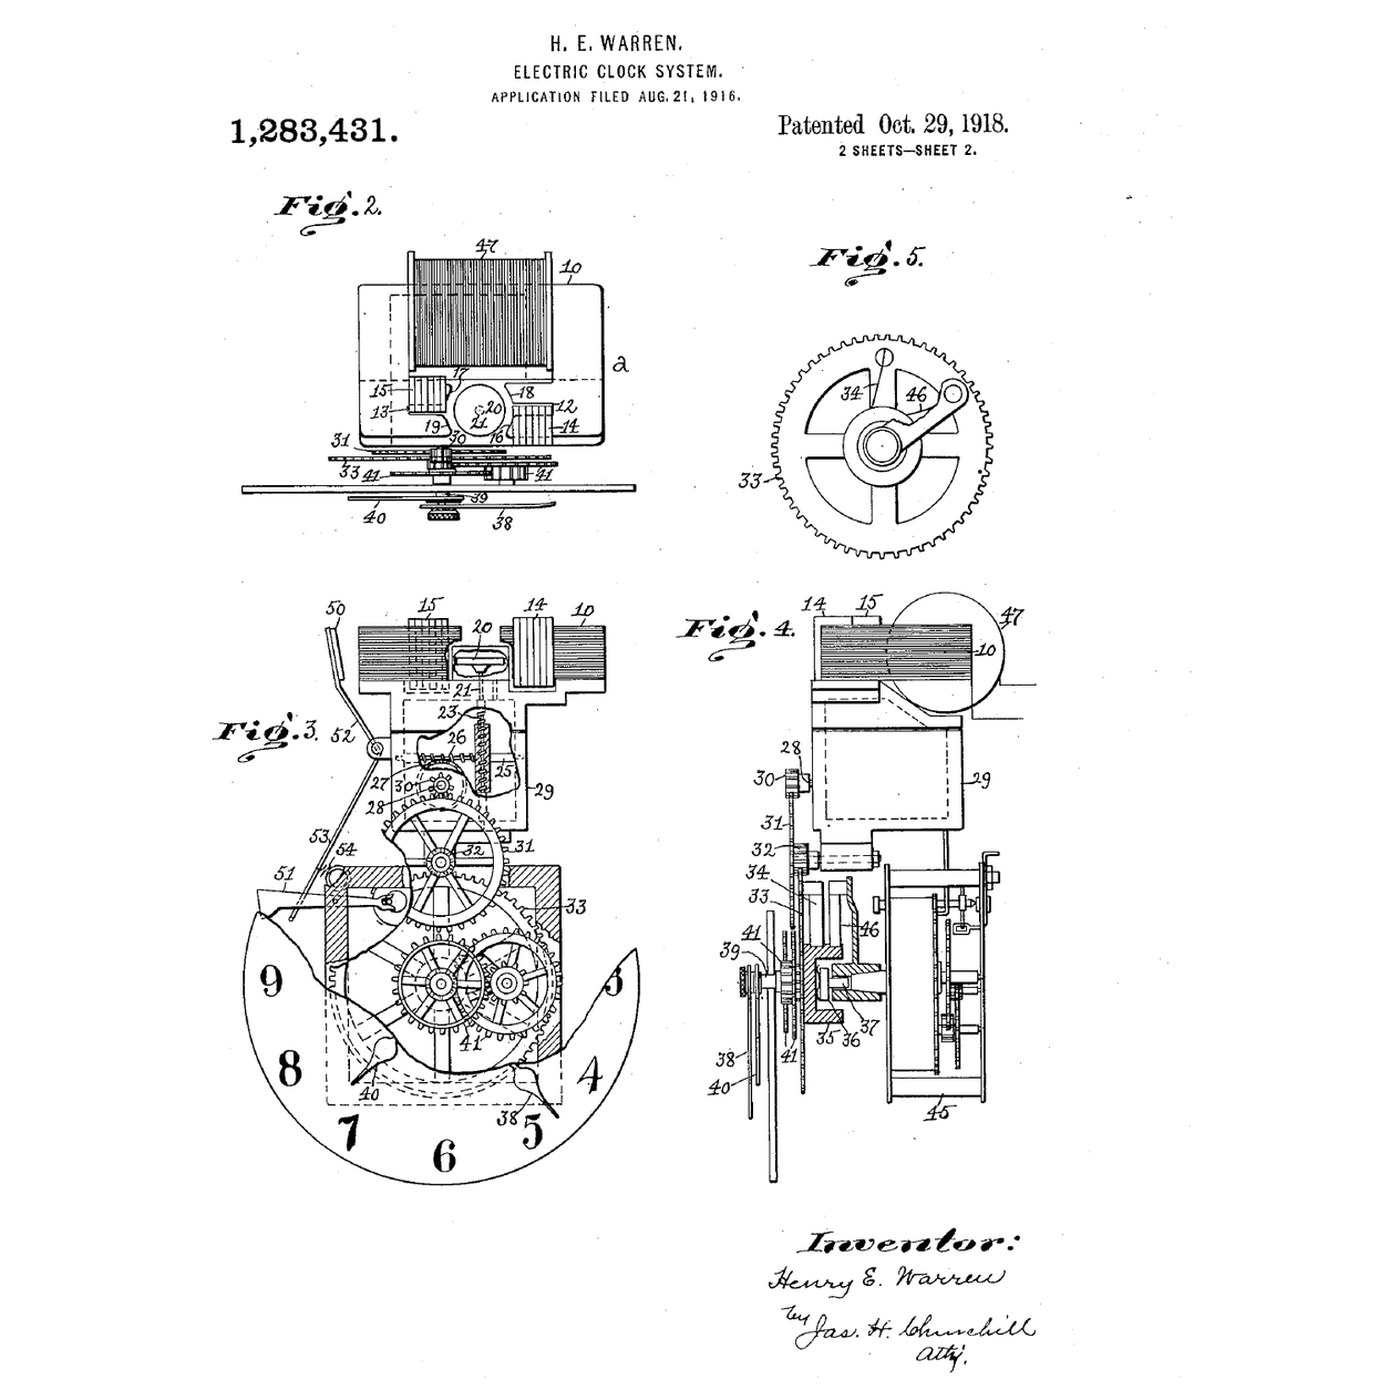
US 1,283,431, *Electric-Clock System*, filed 21 August 1916 and granted 29 October 1918, claims both halves: the self-starting synchronous motor, whose rotor is a plain hardened steel disc; and the system — a standard clock at the station, compared with a clock run from the supply, and the prime mover's speed adjusted to wipe out any excess or deficiency. Grids still correct their time error in the same way.
This rung simulates a wandering frequency with and without correction, and builds an Arduino clock that counts mains cycles through a low-voltage AC adapter.
Intermedio
About 4 hours
Istruzioni
1
1
Synchronous speed and time error
Synchronous speed and time error
Caricamento del notebook Jupyter…
2
2
Read Warren's motor and system
Read Warren's motor and system
Figs. 2 to 5 of US 1,283,431 show the clock: a coil on a laminated field with two poles 12 and 13, each pole face split by **shading coils** 14 and 15 so the field sweeps round; in the space between the poles, the rotor 20 — "a disk of hardened steel and without windings or slots". It hangs a little below the middle of the pole faces so that, running, it rises and lifts the rotor and shaft off their bearings. A worm on a shaft of the train drives the hands; at 60 cycles the rotor turns 3600 times a minute.
A spring-driven auxiliary movement is held stopped by a lever while current flows, and released to run the clock if the current fails. Fig. 1 shows the system: an alternating-current generator, a standard clock at the station regulated daily by time signals, a comparison clock run from the supply, and the operator adjusting the prime mover until the two agree.
3
3
The sketch that counts the cycles
The sketch that counts the cycles
Counts one pulse per mains cycle through an opto-isolator and prints the grid's time every ten seconds.
grid_clock.inoarduino
Materiali per questo passaggio:
 Arduino Uno R31 pezzo
 Alimentatore a spina con uscita alternata a bassa tensione1 pezzo
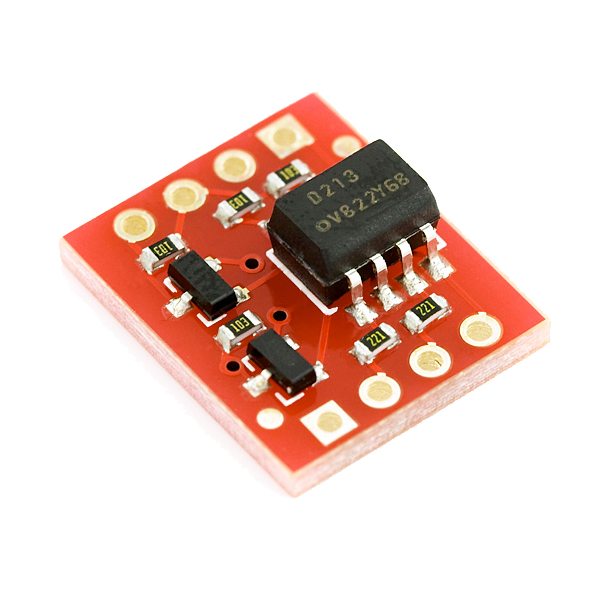 Opto-isolator Breakout1 pezzo
 Diodo1 pezzo
 Kit di resistenze1 pezzo
 Breadboard1 pezzo
 Cavetti ponticello1 pezzo
Strumenti necessari:
 Computer con l'IDE Arduino
 Multimetro
4
4
Run it for a day against a network clock
Run it for a day against a network clock
Check the adapter's label says **AC output** and measure it with the multimeter on AC volts before connecting anything. Wire the opto-isolator as the sketch's comment shows, set MAINS_HZ, and upload.
Start the Arduino exactly when a network-synced clock (a phone) reaches a whole minute, and note the time. Leave it running. Every few hours compare the sketch's elapsed time with the phone's: the difference is the grid's accumulated time error since you started. Over a day it moves by seconds and is pulled back — the correction Warren described.
Do not compare against the Arduino's own millis(): its ceramic resonator can drift much more than the grid does.
Strumenti necessari:
 Cronometro
5
5
A synchronous clock showing the wrong time
A synchronous clock showing the wrong time
Synchronous clock faults.
Flow
Loading...
6
6
History and honest limits
History and honest limits
**Henry E. Warren** filed **US 1,283,431** on 21 August 1916, assigned to the Warren Clock Company of Ashland; it was granted 29 October 1918. His company's clocks were sold as Telechron, and for synchronous clocks to keep time the power stations had to control their frequency — which Warren's master clocks helped them do.
**Honest limits.** The simulation's frequency wander and correction rate are illustrative. A synchronous clock is only as good as the grid's time-error correction, which differs between grids and has at times been relaxed. Never work on mains voltage: the sketch is designed for a low-voltage AC adapter only.
Materiali
7- Segnaposto
- Segnaposto
- Opto-isolator Breakout10% commissione1 pezzo€4.50
- 1 pezzoSegnaposto
- Segnaposto
- Segnaposto
- Segnaposto
Strumenti richiesti
3- Segnaposto
- Segnaposto
- Segnaposto
Totale stimato
Ciò che il maker ha acquistato. I materiali senza prezzo si trovano dove li compri tu.
Blueprint correlati
Questi blueprint condividono conoscenze — tecniche, materiali o principi


CC0 Pubblico dominio
Questo progetto è rilasciato sotto CC0. Sei libero di copiare, modificare, distribuire e utilizzare quest'opera per qualsiasi scopo, senza chiedere permesso.
Supporta il Maker acquistando prodotti tramite il suo progetto dove guadagna una Commissione Maker stabilita dai venditori, oppure crea una nuova iterazione di questo progetto e includilo come collegamento nel tuo progetto per condividere i ricavi.