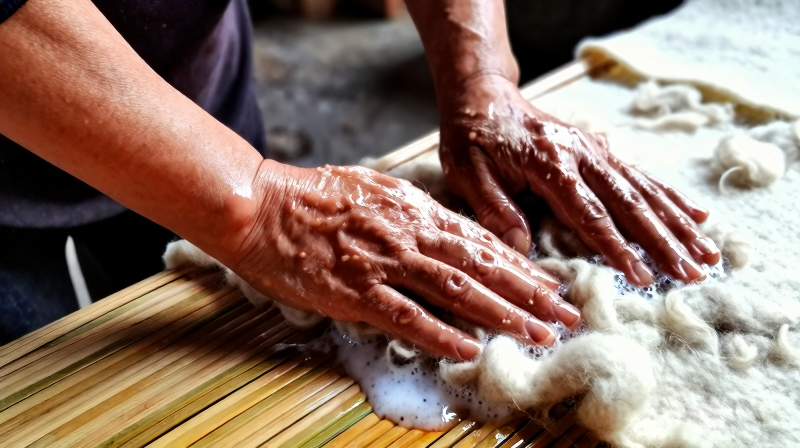
Wet Felting — Matting Raw Wool into Fabric Without Spinning or Weaving
Felting is the oldest method of making fabric from animal fiber — older than spinning, older than weaving, older than knitting. The technique is simple: take a mass of loose wool fibers, get them wet with hot soapy water, and agitate them with sustained pressure and friction. The microscopic scales on each wool fiber — overlapping barbs that point toward the tip of the fiber, like the scales on a pine cone — open in hot alkaline water and lock into one another when rubbed. Once locked, they cannot unlock. The process is irreversible. The result is felt: a dense, non-woven fabric that does not fray, does not unravel, and can be shaped into any form.
Archaeological evidence places the earliest felted textiles in Central Asia around 6500 BCE, predating the oldest known woven cloth by at least a thousand years. Nomadic peoples of the Eurasian steppe — ancestors of the Scythians, Mongols, and Turkic peoples — used felt for everything: tent walls (the yurt is a felt building), floor coverings, saddle blankets, boots, hats, and cloaks. Felt does not require a loom, a spindle, or any tool more complex than human hands and hot water. A herder with a flock and a campfire could make fabric in an afternoon.
The felting process works because wool is the only common natural fiber with surface scales. Cotton, linen, silk, and plant fibers do not felt — they lack the directional barbs that interlock under agitation. This makes felting uniquely tied to pastoral cultures that kept sheep, goats, or camels. The quality of the felt depends on the fiber: fine Merino wool with tight, frequent scales felts faster and denser than coarse carpet wool with wide, flat scales.
Istruzioni
Select the wool
Select the wool
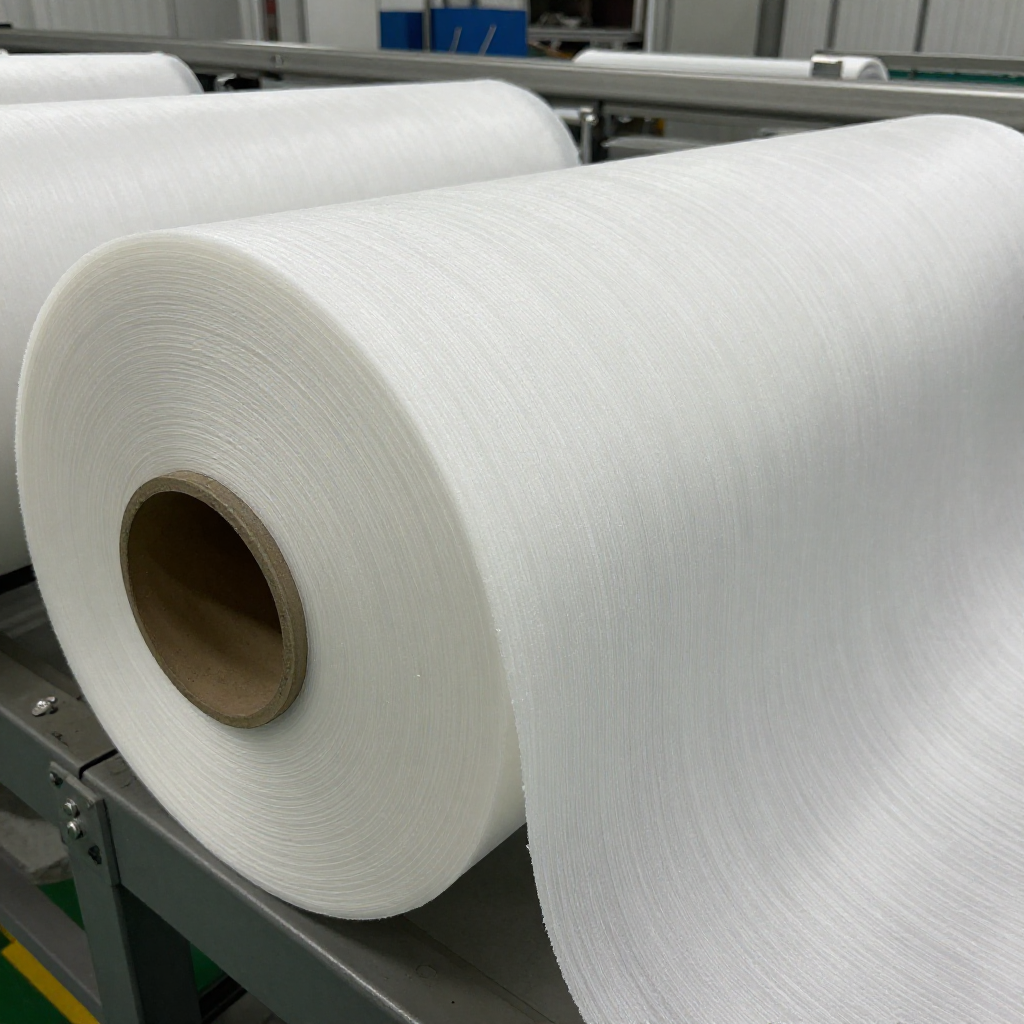
Choose carded wool — fiber that has been washed, dried, and combed into a fluffy mass with all fibers running roughly the same direction. Fine Merino (18-22 micron) felts fastest and produces the densest fabric. Medium wools like Corriedale and Romney felt well but produce a coarser texture. Avoid superwash wool — it has been chemically treated to remove the surface scales, which means it cannot felt at all. You need about 100-150 grams of carded wool for a flat piece roughly 30 x 30 cm. The finished felt will shrink 30-40% from the laid-out size.
Materiali per questo passaggio:
 Raw Wool Fleece150 g
Lay out the first layer of fiber
Lay out the first layer of fiber
Place a bamboo mat or piece of bubble wrap on a flat work surface — this provides texture that helps the felting process and prevents the wool from sticking to the table. Pull thin, even tufts of wool from the carded mass and lay them side by side in one direction, slightly overlapping each tuft by about 1 cm. Cover the entire area you want the finished piece to occupy. Thin, even layers felt better than thick clumps — if you can see through the layer when you hold it up to the light, it is about right.
Materiali per questo passaggio:
 Bamboo Mat1 pezzo
Add the second layer perpendicular to the first
Add the second layer perpendicular to the first
Lay a second layer of wool tufts on top of the first, this time running perpendicular — if the first layer runs left to right, the second runs top to bottom. This cross-hatching is essential: fibers that run in different directions interlock more thoroughly during felting, producing fabric with equal strength in all directions. Without cross-hatching, the felt will be weak along the direction the fibers run and strong across it. Most flat felt uses 3-4 layers, alternating direction each time. For a sturdy fabric suitable for a bag or hat, use 4-5 layers.
Add the third and fourth layers
Add the third and fourth layers
Continue adding layers, alternating direction each time. The third layer runs the same direction as the first, the fourth the same as the second. Check that each layer is even — hold the whole stack up to the light and look for thin spots or holes. Add small tufts to fill any gaps. Four layers of fine Merino will produce felt about 3-4 mm thick after shrinkage. For thicker felt (boot soles, rug pads), use 6-8 layers.
Prepare the hot soapy water
Prepare the hot soapy water
Heat water to about 50-60°C — hot enough that you can keep your hands in it but not comfortably. Add a few drops of liquid soap or grate a small amount of olive soap into the water and stir until dissolved. The soap serves two purposes: it lubricates the fibers so they slide past each other during agitation (which allows them to migrate and entangle), and the alkaline pH causes the wool scales to swell open wider, which makes them lock together more aggressively. Traditional felters used lye water from wood ash; olive soap achieves the same alkaline environment without the skin burns.
Materiali per questo passaggio:
 Bar Soap1 pezzo
Wet the wool layers
Wet the wool layers
Sprinkle the hot soapy water over the layered wool, starting from the center and working outward. Press gently with flat hands to push the water through all layers — do not rub yet. The wool will collapse from a fluffy stack into a flat, wet mat. Add water gradually until the entire piece is saturated but not swimming in a puddle. If you pour too much at once, the fibers float and shift out of position. The goal is to wet every fiber without disturbing the careful layering.
Begin gentle rubbing
Begin gentle rubbing
Place a sheet of bubble wrap or netting over the wet wool to prevent your hands from catching and pulling the fibers. Begin rubbing very gently in small circles with flat hands, applying almost no downward pressure — just enough to move the fibers without displacing them. Work across the entire surface systematically. In the first five minutes, the fibers are barely connected and can be pulled apart easily. This initial stage is called pre-felting: the scales are beginning to catch but have not yet locked. If you press too hard at this stage, you will push holes through the layers or create thin spots.
Increase pressure gradually
Increase pressure gradually
After 5-10 minutes of gentle rubbing, test the felt by pinching a small area and lifting — if the fibers hold together as a sheet rather than pulling apart in tufts, the pre-felt stage is complete. Remove the netting or bubble wrap cover. Now increase pressure and rub more vigorously, using the heels of your hands in longer strokes. Add more hot soapy water if the surface feels dry or sticky. The felt will begin to shrink noticeably as the fibers draw closer together. Flip the piece over periodically and rub both sides equally — otherwise one side felts tighter than the other and the piece curls.
Roll and full the felt
Roll and full the felt
Once the felt holds together firmly and has shrunk 10-15%, roll it up inside the bamboo mat like a burrito. Roll the bundle back and forth on the table 50-100 times, pressing firmly with your forearms. Unroll, rotate the felt 90 degrees, roll it up again, and repeat. This rolling — called fulling — compresses the fibers from all angles and accelerates shrinkage. The felt will shrink another 15-25% during fulling. Continue until the felt reaches the size and density you want. Dense felt resists further shrinkage; when rolling stops producing visible change, the piece is fully fulled.
Rinse and dry
Rinse and dry
Rinse the finished felt in clean warm water to remove the soap. Do not wring or twist — press the water out gently or roll in a dry towel and press. Lay flat on a clean surface or hang to dry away from direct heat. Felt dries slowly because it is dense; a thick piece may take 24-48 hours to dry completely at room temperature. Once dry, the felt is finished — it will not unravel, will not fray at cut edges, and can be cut with scissors into any shape without hemming. This is one of felt's great advantages over woven or knitted fabric: every cut edge is a finished edge.
Understand why only wool felts
Understand why only wool felts
The felting mechanism depends entirely on the surface structure of the fiber. Wool fibers are covered in overlapping cuticle scales — like roof tiles or fish scales — that point from root to tip. When wet with hot alkaline water, these scales swell and lift open. When rubbed, fibers move in the direction the scales point (toward the tip) but cannot move backward (the raised scales catch and resist). This directional friction is called the Differential Friction Effect. As thousands of fibers move in different directions simultaneously, they migrate past each other, entangle, and the raised scales interlock permanently. Cotton has no scales (smooth surface). Silk has no scales. Linen has no scales. Only animal fibers from sheep, goats, rabbits, and camelids have the scaly cuticle structure required for felting.
Recognize felt's role in human history
Recognize felt's role in human history
Felt was the primary fabric of the Central Asian steppe for at least 8,000 years. The Pazyryk burials (5th century BCE, Altai Mountains) contained elaborately decorated felt saddle covers, wall hangings, and stockings — proving that felt was not a crude substitute for woven cloth but a sophisticated material with its own artistic tradition. The Mongolian ger (yurt) uses 2-5 layers of felt as its primary insulation — a technology unchanged from the Bronze Age to the present. Turkish, Persian, and Afghan felted rugs (namda, kepenek) are still made by hand. In Europe, felt survived mainly in hatmaking — the beaver felt hat and later the wool felt bowler and fedora. Industrial felt is used today in piano hammers, polishing wheels, gaskets, and acoustic insulation — applications where a dense, resilient, non-woven material outperforms any spun-and-woven alternative.
Materiali
3- 150 gSegnaposto
- 1 pezzoSegnaposto
- 1 pezzoSegnaposto
Materiali dei progetti collegati
Blueprint correlati
Questi blueprint condividono conoscenze — tecniche, materiali o principi
Related blueprints
Other builds that share materials, tools, or techniques with this one.

CC0 Pubblico dominio
Questo progetto è rilasciato sotto CC0. Sei libero di copiare, modificare, distribuire e utilizzare quest'opera per qualsiasi scopo, senza chiedere permesso.
Supporta il Maker acquistando prodotti tramite il suo progetto dove guadagna una Commissione Maker stabilita dai venditori, oppure crea una nuova iterazione di questo progetto e includilo come collegamento nel tuo progetto per condividere i ricavi.