コラボレーション
アート
美容とウェルネス
工芸
文化と歴史
エンターテインメント
環境
食品と飲料
リバースエンジニアリング
科学
スポーツ
テクノロジー
ウェアラブル
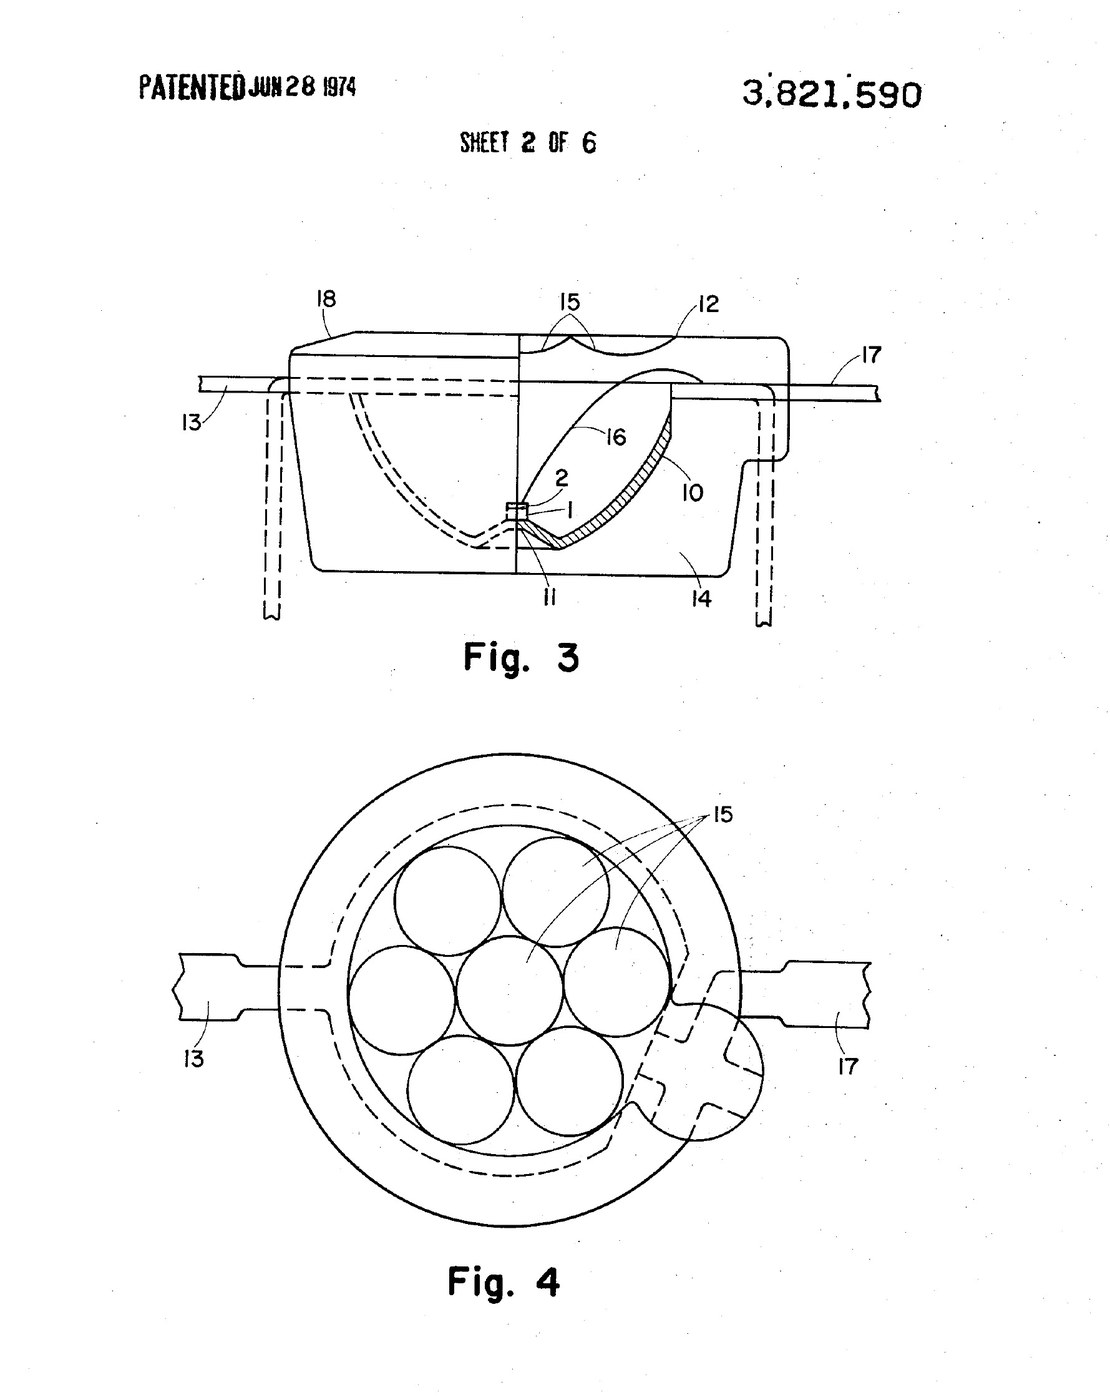


5mm LED: Epoxy Lamp with a Reflector-Cup Lead Frame (Kosman, US 3,821,590, 1974)
A round LED indicator lamp about 0.200 in (5 mm) across. A red GaP chip sits on a small pedestal at the focus of a paraboloid reflector cup that is part of the lead frame. A fine wire runs from the chip to the other lead. The whole is moulded in clear or tinted epoxy, with small lenses moulded into the front face to spread the light.
Result: an encapsulated LED lamp visible within about ±45°, moulded many at a time on one lead frame.
Source: K. J. W. Kosman and L.-P. Boivin (Northern Electric), US 3,821,590 (1974). Unknown: lead and wire metals, die attach and cure. Picture: the patent drawing.
エキスパート
Unknown
手順
1
1
Make the lead frame with its reflector
Make the lead frame with its reflector
Make a lead frame carrying many lamps. In each, the negative lead ends in a paraboloid reflector cup with a small pedestal at its focus, and the positive lead ends nearby. Not given: the metal, sizes beyond the lamp's 0.200 in diameter.
このステップの材料:
 不明な金属1 lead frame
必要な工具:
 不明な寸法
2
2
Mount and bond the chip
Mount and bond the chip
Mount a light-emitting chip with a P-N junction, for example red GaP:Zn,O, on the pedestal, so the cup makes contact with one side of the junction. Connect the other side by a fine wire to the positive lead. About 0.015 in square is the junction size Kosman gives for best efficiency. Not given: the die attach, the wire metal.
このステップの材料:
 LEDチップ1 light-emitting chip不明な金属1 bond wire
必要な工具:
不明な寸法3
3
Transfer-mould the lamps
Transfer-mould the lamps
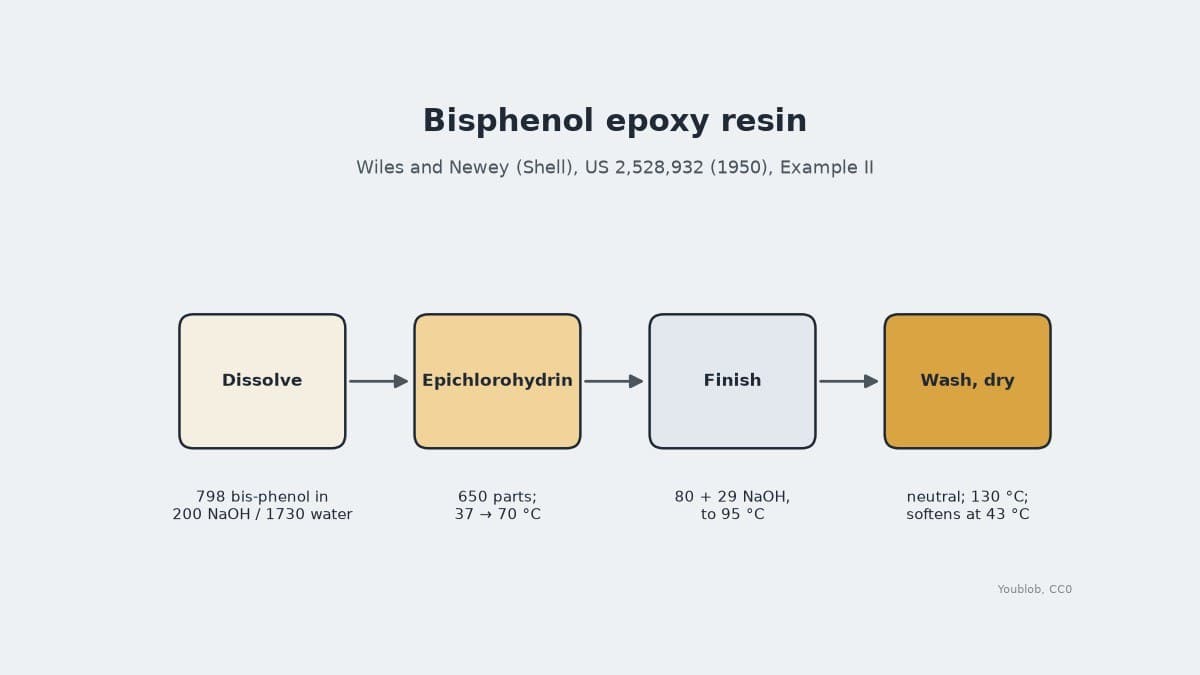
Set the bonded lead frame in a mould and transfer-mould clear or tinted thermosetting resin round all the lamps at once, front face down so any flaws fall at the back. The front face carries seven spherical lenses, six in a ring round one, each 0.045 in across with a radius about 0.8 times its width; an inclined edge sends some light out sideways. Ours: bisphenol epoxy (the patent lists epoxy, silicone, polyester or diallyl phthalate). Not given: the mould, the cure.
このステップの材料:
 ビスフェノール系エポキシ樹脂1 capsule resin
必要な工具:
 トランスファー成形機
 不明な成形方法
4
4
Cut apart and test
Cut apart and test
Cut the lamps from the lead frame and light each one with current forward through the junction: the face shows seven bright spots in a 0.100 in image, visible up to about 45° off axis. Not given: the current.
必要な工具:
 直流電源
材料
3- 1 bond wireプレースホルダー
- 1 light-emitting chipプレースホルダー
- 1 capsule resinプレースホルダー

この設計図で作るもの
CC0 パブリックドメイン
このブループリントはCC0で公開されています。許可を求めずに、自由にコピー、修正、配布、あらゆる目的で使用できます。
メイカーを応援するには、ブループリント経由で製品を購入してください。メイカーには メイカーコミッション がベンダーにより設定されています。または、このブループリントの新しいイテレーションを作成し、自分のブループリントにコネクションとして含めて収益を共有できます。