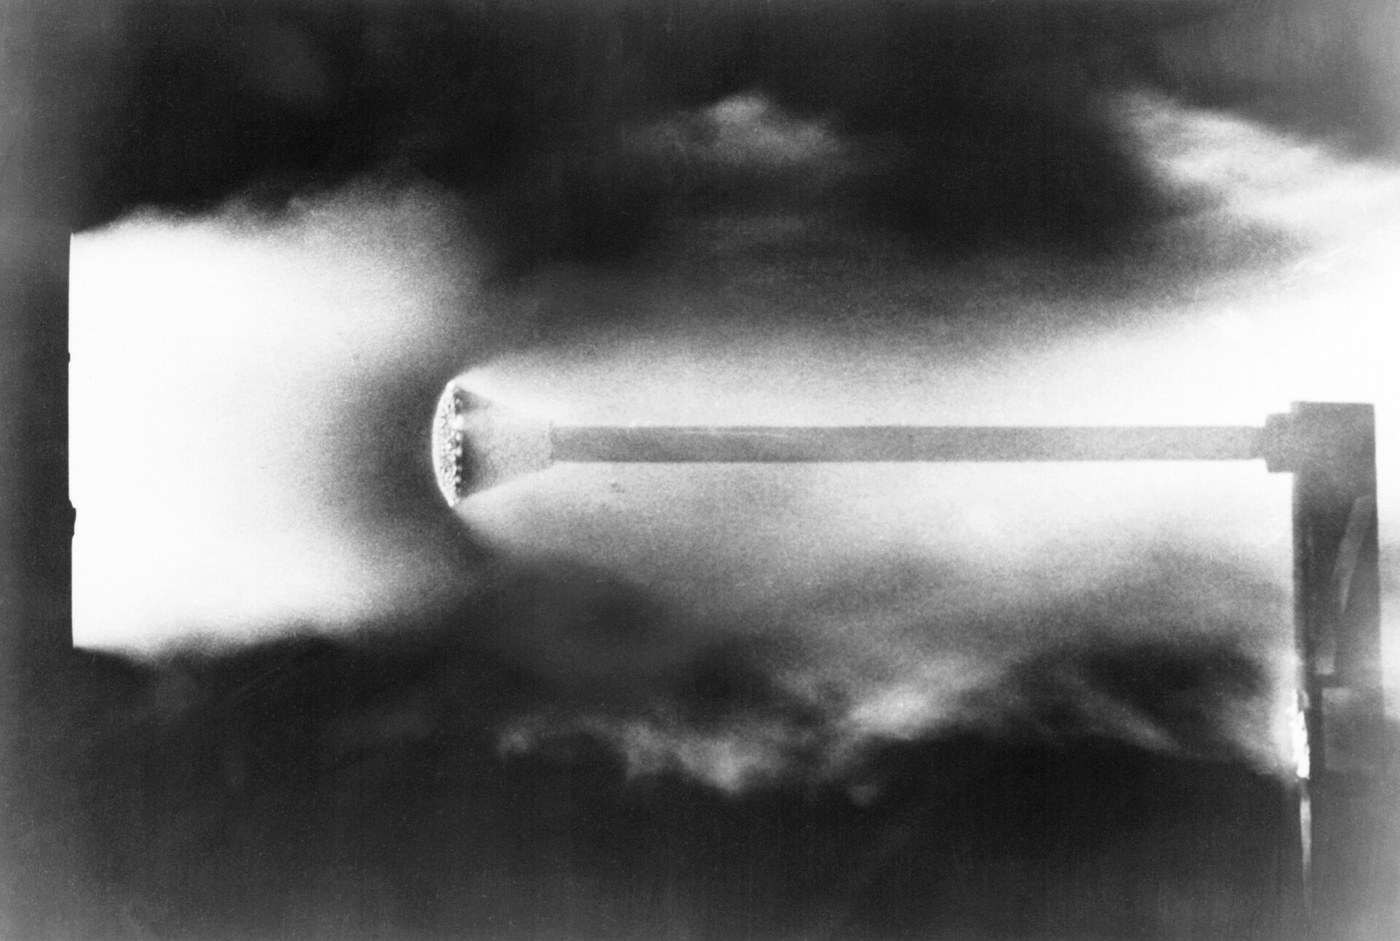


The Ablative Heat Shield
手順
Compute the energy that has to go somewhere
Compute the energy that has to go somewhere
Put a number on the problem before choosing a material.
- Take a 1000 kg capsule returning from low Earth orbit at 7.8 km/s.
- Compute its kinetic energy.
- Convert to a more familiar unit — compare it with the energy released by an equal mass of TNT, about 4.2 MJ/kg.
- Divide by a typical re-entry duration of a few minutes to get an average power.
The capsule carries roughly 30 gigajoules, comparable to several tonnes of TNT, and must dispose of it in about five minutes — an average of around 100 megawatts.
No material can absorb that as sensible heat. The whole game is to ensure most of it never enters the vehicle at all, and to spend the small remainder destroying a sacrificial layer rather than the structure.
Notice the symmetry with the rest of the batch: on the way up, energy is precious and every joule is fought for. On the way down, the same energy is the enemy. The vehicle that worked so hard to acquire velocity must now throw it away as fast as it safely can.このステップの材料:
 方眼紙1 pad
必要な工具:
 デジタルノギス 6インチ
 デジタルスケール
Prove that blunt beats sharp
Prove that blunt beats sharp
Test the counter-intuitive claim in the wind tunnel from the aviation batch.
- Make two test bodies of equal frontal area: one sharply pointed, one hemispherical.
- Run each in the tunnel with a smoke line and photograph the flow ahead of the nose.
- Note where the flow is disturbed relative to the body surface.
- Measure the stagnation temperature rise on each nose with a fine thermocouple.
The sharp body has flow hugging its surface, so the compression heating happens AT the skin; the blunt body pushes a detached shock well ahead of itself, and the hottest gas sits in the standoff region rather than against the material.
At orbital speeds the effect is dramatic. A blunt shape delivers only a few percent of the total energy into the vehicle; a slender one delivers a large fraction directly into a small area of structure. Allen’s insight inverted an entire design tradition, and it is why every re-entry capsule ever flown is a shallow bowl rather than a dart.
The trade is drag, which for a returning vehicle is not a cost but the point — you WANT to decelerate high in the thin atmosphere rather than low in the thick. A blunt shape sheds velocity at altitude, which reduces peak heating as well.このステップの材料:
 バスウッド板1 枚
 バルサ材の板1 枚
必要な工具:
 煙を見るための線香
 スローモーション撮影ができるスマートフォン
 表示器付き熱電対
 手持ち風速計
 ばねばかり
ばねばかり 替刃付きホビーナイフデジタルノギス 6インチ
 透明保護メガネ
Char a phenolic sample and watch the mechanism work
Char a phenolic sample and watch the mechanism work
Ablation is controlled destruction. Observe each stage of it.
- Take a phenolic resin sample with a fibre reinforcement — a cured composite offcut is ideal.
- Apply a propane torch to one face, holding it steady.
- Measure the BACK-face temperature with a thermocouple throughout.
- Stop, let it cool, then section the sample and examine the layers.
The back face stays remarkably cool while the front is destroyed, and the section shows three distinct zones: virgin material, a charred layer, and a surface that has receded.
Three mechanisms are working together. The resin PYROLYSES, absorbing heat as it decomposes. The gases produced flow outward through the char and blow into the boundary layer, pushing hot gas away from the surface — transpiration cooling for free. And the char layer itself is a poor conductor and a good radiator, re-radiating a substantial fraction straight back out.
Compare with regenerative cooling from part 1: that carried heat away in a fluid and returned it as thrust, and was reusable. Ablation carries heat away in the material itself and is strictly single-use. Neither is better — a rocket chamber runs for minutes repeatedly, a heat shield runs once for minutes and must never fail.必要な工具:
 プロパントーチ表示器付き熱電対
 赤外線温度計
 サーモグラフィーカメラスローモーション撮影ができるスマートフォン替刃付きホビーナイフ
 消火器
消火器 フェイスシールド透明保護メガネ
 P100 防じんマスク
 ニトリルゴム手袋
 プロパン
プロパン フェノール樹脂複合板
Measure recession rate and size the thickness
Measure recession rate and size the thickness
The shield is consumed at a rate, and thickness is that rate multiplied by the time you must survive.
- Apply a known, steady heat flux to samples for measured durations — 30, 60 and 120 seconds.
- Measure the depth of material lost each time with a caliper.
- Plot recession against time and find the rate.
- Multiply by your required duration and add a margin.
Recession is roughly linear once the char layer has established, and the required thickness follows directly. Too thin and the structure is exposed before the job is done; too thick and you are carrying mass that the rocket equation made expensive.
Note that heating is not uniform. The stagnation point takes the highest flux, the shoulder takes the most shear, and the shield is therefore thickest at the centre and contoured elsewhere. Shear matters as much as heat — a char layer that is thermally adequate but mechanically weak is scrubbed off by the flow, and then the fresh material behind it is exposed at full flux.
Apollo used Avcoat, an epoxy novolac filled into a fibreglass honeycomb — and each of the roughly 370,000 honeycomb cells was filled individually with a gun and inspected by X-ray. That is the honest cost of a component that gets exactly one attempt.このステップの材料:
 コルクシート1 枚方眼紙1 pad
必要な工具:
プロパントーチデジタルノギス 6インチ表示器付き熱電対赤外線温度計デジタルスケールスローモーション撮影ができるスマートフォン消火器フェイスシールド透明保護メガネP100 防じんマスクフェノール樹脂複合板Find the re-entry corridor, and see why it is narrow
Find the re-entry corridor, and see why it is narrow
The shield only has to work if you arrive at the right angle. Compute how right.
- Consider a capsule entering too shallow: it meets thin air, decelerates gently and may not lose enough speed.
- Consider too steep: it meets dense air quickly, decelerating hard.
- For each, reason about peak deceleration in g, peak heating rate, and total heat load.
- Sketch the acceptable region on axes of entry angle against velocity.
Too shallow and you skip off the atmosphere entirely like a stone on water, back into an orbit you may not have the propellant to correct. Too steep and deceleration and heating rate both spike — the crew is crushed and the shield is overwhelmed. The acceptable corridor for Apollo returning from the Moon was roughly two degrees wide.
Notice the trade between the two failure modes: a shallow entry gives a lower peak heating RATE but a much longer duration, so the TOTAL heat load is higher. A steep entry is violent but brief. A shield sized for peak flux and one sized for total load are different shields.
This is where the whole batch converges. The rocket equation said what velocity costs; the nozzle, injector, cooling and turbopump bought that velocity as efficiently as chemistry allows; staging beat the logarithm; the gimbal and the guidance platform pointed it. And every joule of it comes back as heat at the end, into a component that must work perfectly, once, having never been tested in the condition that matters.このステップの材料:
方眼紙1 pad必要な工具:
デジタルノギス 6インチ 分度器
分度器 デジタル角度計デジタルスケール
必要な工具
20- プレースホルダー
- プレースホルダー
- プレースホルダー
- プレースホルダー
- プレースホルダー
- プレースホルダー
- プレースホルダー
- プレースホルダー
- プレースホルダー
- プレースホルダー
- プレースホルダー
- プレースホルダー
- プレースホルダー
- プレースホルダー
- プレースホルダー
- プレースホルダー
- プレースホルダー
- プレースホルダー
- プレースホルダー
- プレースホルダー
関連ブループリント
これらのブループリントは知識を共有しています — 技術、材料、原理



CC0 パブリックドメイン
このブループリントはCC0で公開されています。許可を求めずに、自由にコピー、修正、配布、あらゆる目的で使用できます。
メイカーを応援するには、ブループリント経由で製品を購入してください。メイカーには メイカーコミッション がベンダーにより設定されています。または、このブループリントの新しいイテレーションを作成し、自分のブループリントにコネクションとして含めて収益を共有できます。