コラボレーション
アート
美容とウェルネス
工芸
文化と歴史
エンターテインメント
環境
食品と飲料
リバースエンジニアリング
科学
スポーツ
テクノロジー
ウェアラブル
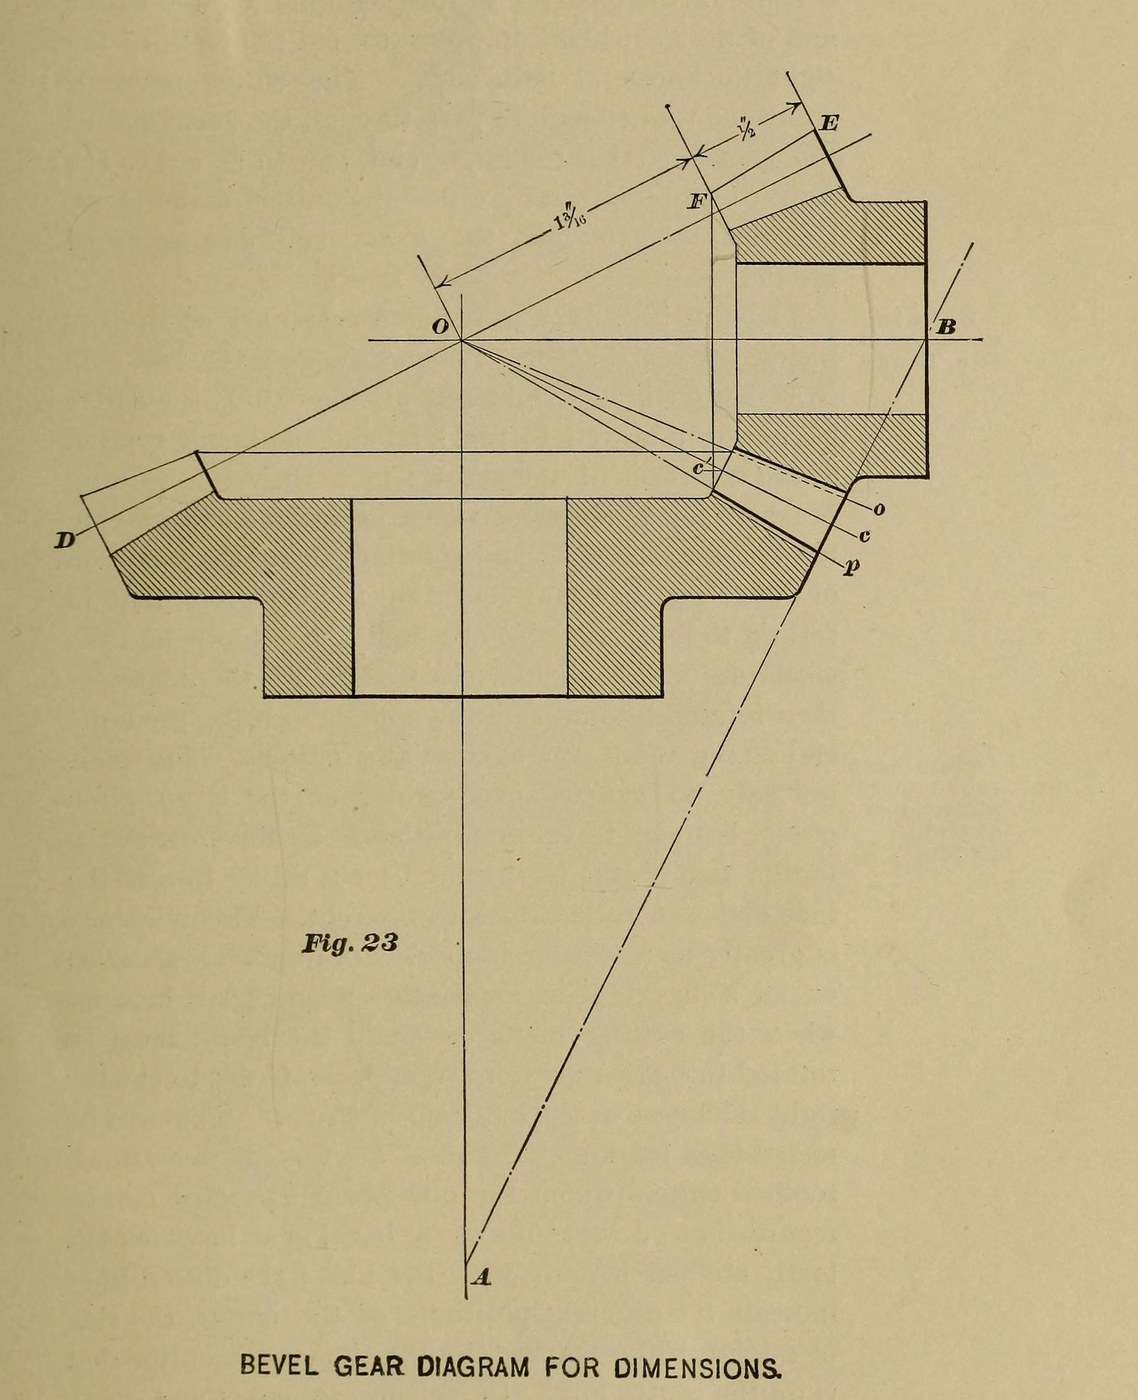


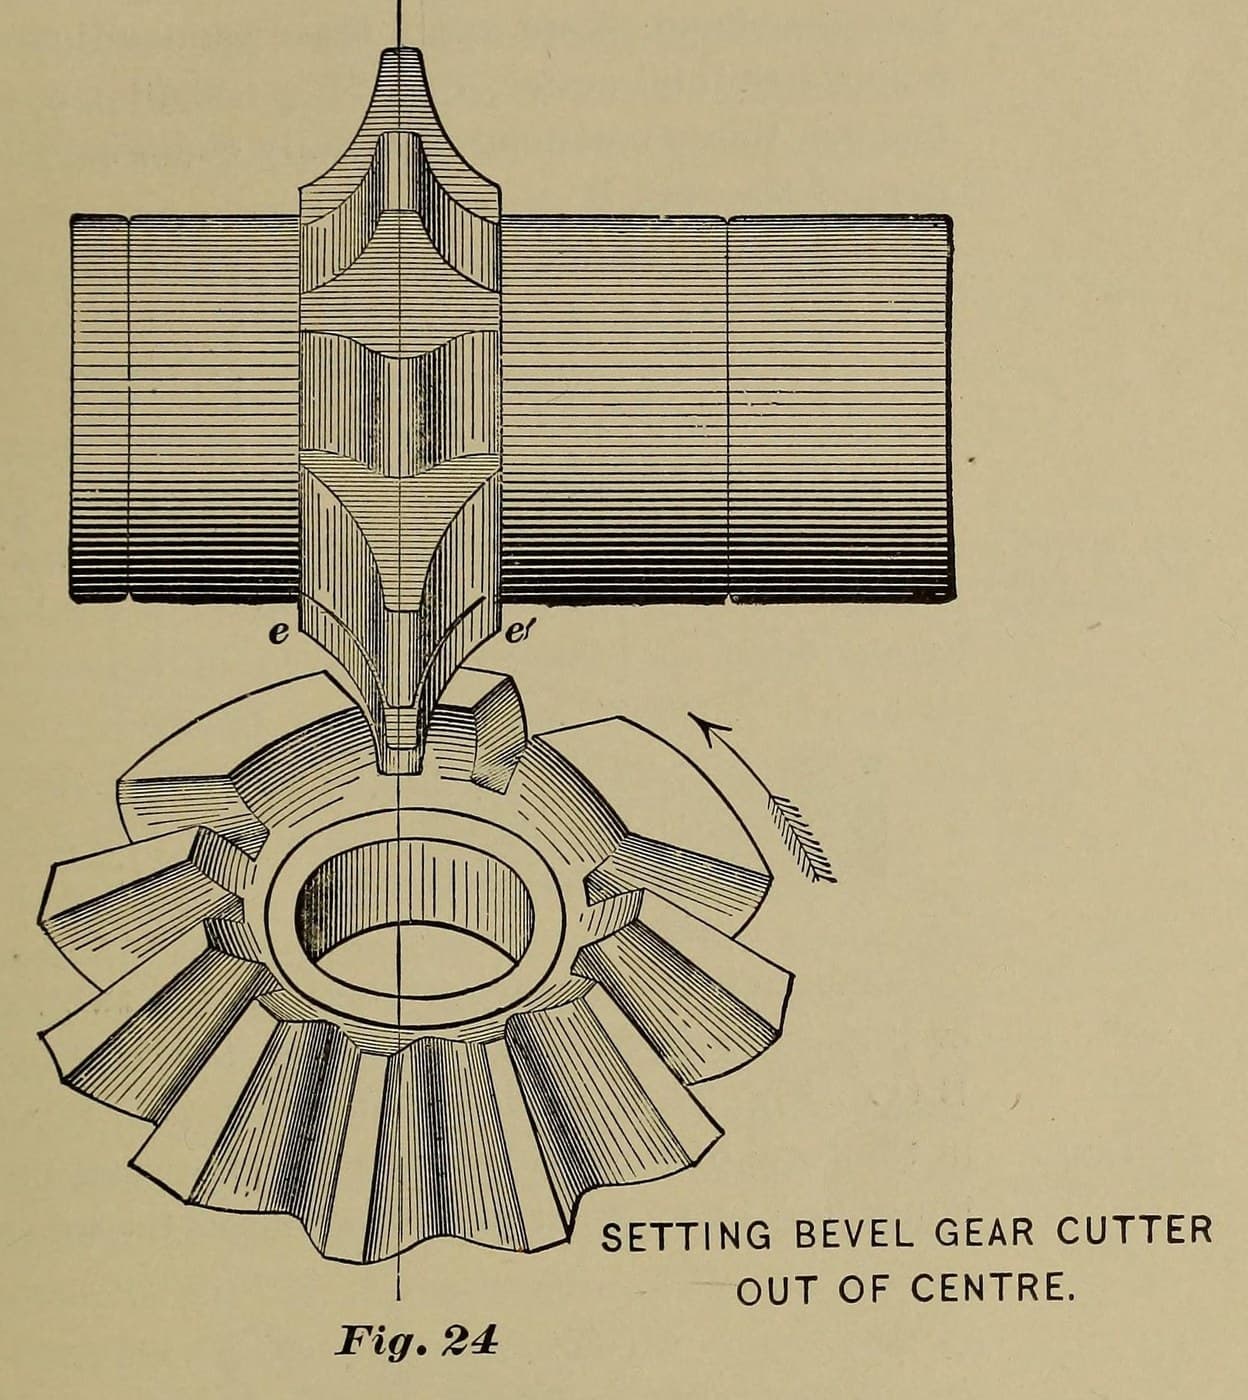
Bevel Pinion with a No. 6 Cutter, Filed at the Small End (Brown & Sharpe 1911)
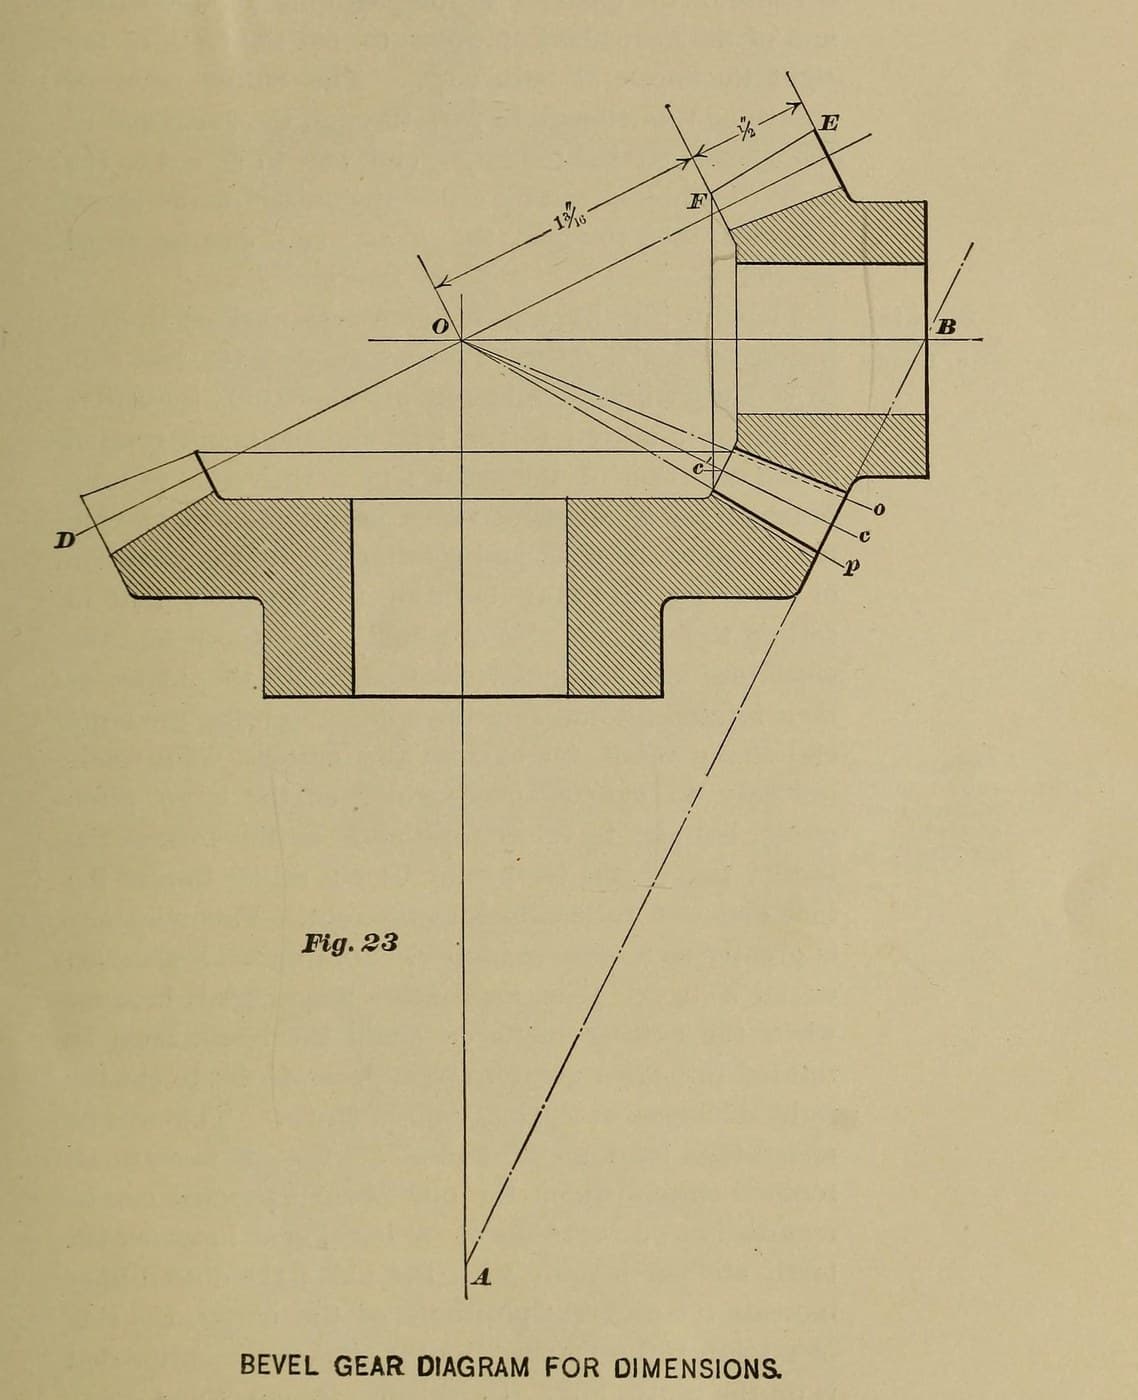
The same 12-tooth, 8-pitch pinion as Brown & Sharpe's worked example, but cut the way their own shop did it: with a No. 6 cutter instead of the No. 8 they sell for it, cut to the right thickness at the large end, then filed well round at the small end. They did this only for a 12-tooth pinion running with a gear two or three times its size.
Source: Brown & Sharpe, Practical Treatise on Gearing (1911), Fig. 23 example, Part I ch. IX–X, Part II ch. III and the set-over table p. 58. The blank sizes are our arithmetic with their rules; the steel and bore are ours. Picture: their Fig. 23.
上級者
1 day
手順
1
1
Work out and turn the blank
Work out and turn the blank
Pitch diameter 12 ÷ 8 = 1.500 in. Angle of edge 26° 34′ and angle of face 59° 11′ (Brown & Sharpe's figures for every 12 and 24 tooth pair). Diameter increment = cos 26° 34′ × 0.250 = 0.224 in, so turn the steel blank to 1.72 in outside diameter. Face ½ in long. Try both angles with a protractor against the end of the hub.
このステップの材料:
 軟鋼バー1 length for one blank
必要な工具:
 金属旋盤
 旋盤の切削工具
 分度器
 マイクロメータ
2
2
Choose the cutter
Choose the cutter
Twice the back cone radius × 8 comes to about 13, which would call for a No. 8, but take a No. 6, 8-pitch bevel gear cutter (17 to 20 teeth), as Brown & Sharpe's own shop did for this pinion. Measure its thickness Tc at the pitch line, 0.145 in from its tip.
必要な工具:
 かさ歯車フライス
 歯厚ノギス
3
3
Set the head at 22° 18′
Set the head at 22° 18′
Apex distance = sec 26° 34′ × 1.5 = 1.677 in. Angle increment: tan = sin 26° 34′ ÷ 6, giving 4° 16′. Set the dividing head to the cutting angle 26° 34′ − 4° 16′ = 22° 18′ and index 12 spaces. Depth at the large end 0.270 in.
必要な工具:
 フライス盤
 割り出し台かさ歯車フライス
4
4
Set over and cut one side
Set over and cut one side
Apex distance ÷ face = 3.35; we take the nearest column, 3¼, where a No. 6 cutter has the factor .318. Set-over = Tc ÷ 2 − .318 ÷ 8 = Tc ÷ 2 − 0.040 in. Set off centre by that amount, take up backlash, and cut round all 12 spaces.
必要な工具:
フライス盤割り出し台かさ歯車フライス5
5
Set over the other way and trim
Set over the other way and trim
Set over the same amount the other side, line the cutter up with the space at the small end, take a trial cut, and rotate toward the cutter until the tooth is right at the faces of the large end: 0.196 in at the pitch line (0.138 in at the small end). Check with the gear tooth vernier, then cut round.
必要な工具:
フライス盤割り出し台かさ歯車フライス歯厚ノギス6
6
File the small ends
File the small ends
The No. 6 cuts the tooth sides with a longer curve than the No. 8, so expect considerable filing: round the teeth over at the small ends, without filing them thinner at the pitch line.
必要な工具:
 目の細かいやすり
この設計図で作るもの

関連ブループリント
これらのブループリントは知識を共有しています — 技術、材料、原理
CC0 パブリックドメイン
このブループリントはCC0で公開されています。許可を求めずに、自由にコピー、修正、配布、あらゆる目的で使用できます。
メイカーを応援するには、ブループリント経由で製品を購入してください。メイカーには メイカーコミッション がベンダーにより設定されています。または、このブループリントの新しいイテレーションを作成し、自分のブループリントにコネクションとして含めて収益を共有できます。