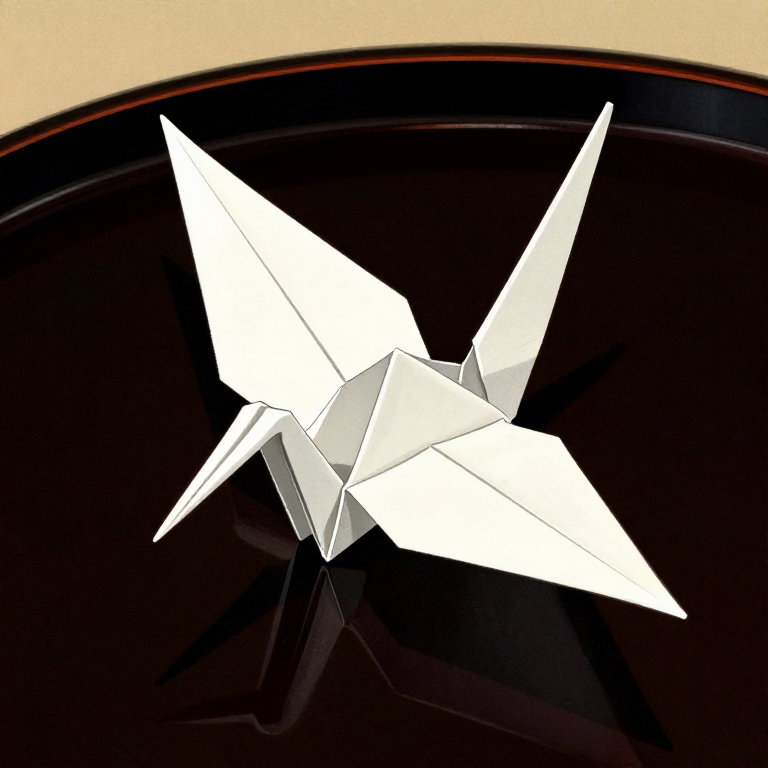
Folding a Traditional Orizuru Paper Crane — Classic Japanese Origami
手順
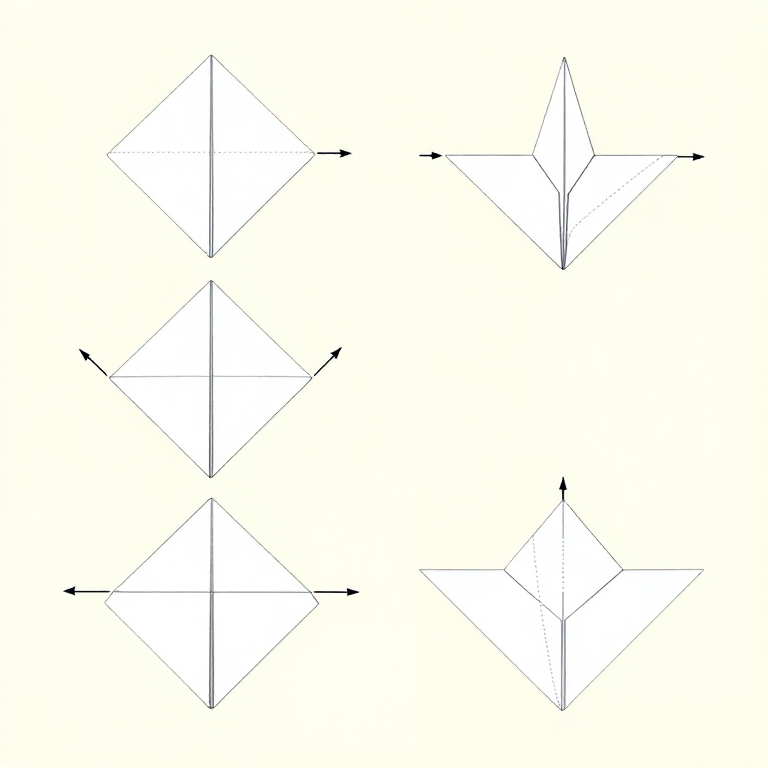
Fold the Preliminary Base
Fold the Preliminary Base
Start with the coloured side face down. Fold the square in half diagonally to make a triangle, crease firmly, and unfold. Fold diagonally the other way, crease, and unfold. Turn the paper over. Fold in half horizontally, crease, and unfold. Fold in half vertically, crease, and unfold. You now have eight crease lines radiating from the centre. Pick up the paper and collapse it inward along the existing creases so that the four corners of the square meet at the bottom and the paper forms a smaller square (called the preliminary base or square base) with the open point at the bottom. All four flaps should lie flat and symmetrical.
このステップの材料:
必要な工具:
 Bone Folder
Fold the Bird Base
Fold the Bird Base
Place the preliminary base with the open end pointing down. Take the right edge of the top layer and fold it inward so it aligns with the centre crease. Repeat on the left side. Fold the small triangle at the top down over these flaps and crease firmly — this crease is a guide mark. Unfold all three folds. Now lift just the bottom point of the top layer upward, using the guide crease to reverse-fold the side edges inward so they meet along the centre line, forming a long narrow diamond shape on top. Turn the model over and repeat the entire sequence on the back. The result is the bird base — a narrow diamond shape with two long points at the bottom (which become the head and tail) and two flaps at the top (which become the wings).
Narrow the Neck and Tail
Narrow the Neck and Tail
On the bird base, fold the lower edges of the front flap inward to the centre line, narrowing the bottom point. Repeat on the back flap. These narrowed points will become the head/neck and the tail. The two upper flaps remain broad — these become the wings. If the paper is becoming thick at the centre and resisting clean folds, use a bone folder or ruler edge to press the creases firmly. Precision at this stage determines the final shape of the crane — sloppy folds here produce a lopsided bird.
Form the Head and Tail
Form the Head and Tail
Fold one of the narrow bottom points upward between the wings using an inside reverse fold — push the point up between the layers of the body so it projects above the wing line at a steep angle. This becomes the neck. Repeat with the other narrow point, folding it upward at a shallower angle for the tail. To form the head, make another inside reverse fold at the tip of the neck, folding a small section downward to create the beak. The beak should point forward and slightly downward. Adjust the angles of the neck and tail until the proportions look balanced and natural.
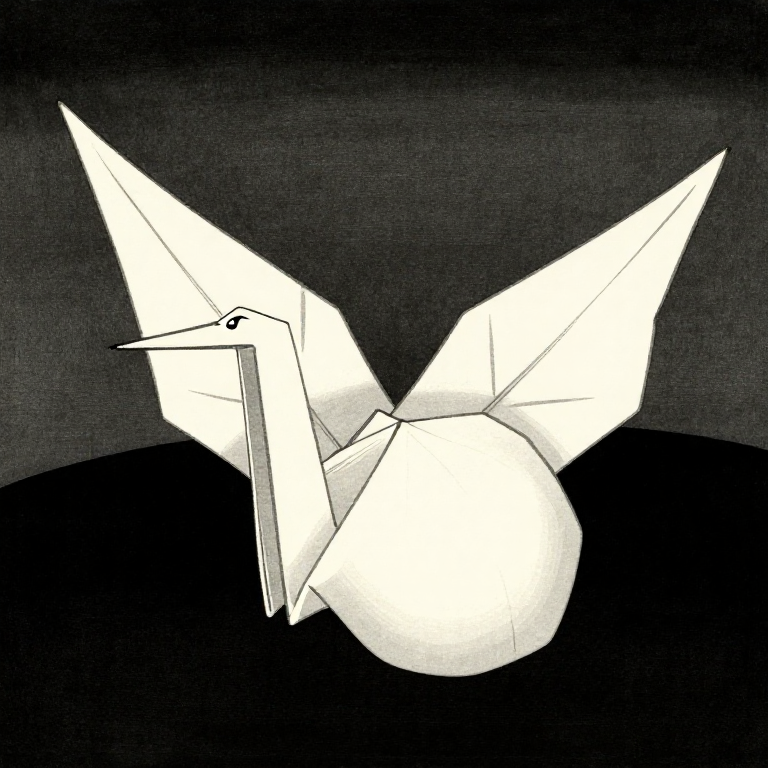
Open the Wings and Shape the Body
Open the Wings and Shape the Body
Gently pull the two wing flaps outward and slightly downward to spread the wings. As you pull the wings apart, the body inflates slightly — there is a small hole at the base of the body through which you can gently blow to puff it out into a rounded shape. Crease the wing folds so the wings hold their position. The finished crane should stand or hang balanced, with the head and tail extending at graceful angles from a plump body and the wings spread horizontally. In Japanese tradition, folding one thousand cranes (senbazuru) and stringing them together is believed to grant the folder a wish — a practice formalized in Edo-period culture and continuing to this day.
材料
1- 1 sheet 個プレースホルダー
必要な工具
1- プレースホルダー
CC0 パブリックドメイン
このブループリントはCC0で公開されています。許可を求めずに、自由にコピー、修正、配布、あらゆる目的で使用できます。
メイカーを応援するには、ブループリント経由で製品を購入してください。メイカーには メイカーコミッション がベンダーにより設定されています。または、このブループリントの新しいイテレーションを作成し、自分のブループリントにコネクションとして含めて収益を共有できます。