コラボレーション
アート
美容とウェルネス
工芸
文化と歴史
エンターテインメント
環境
食品と飲料
リバースエンジニアリング
科学
スポーツ
テクノロジー
ウェアラブル
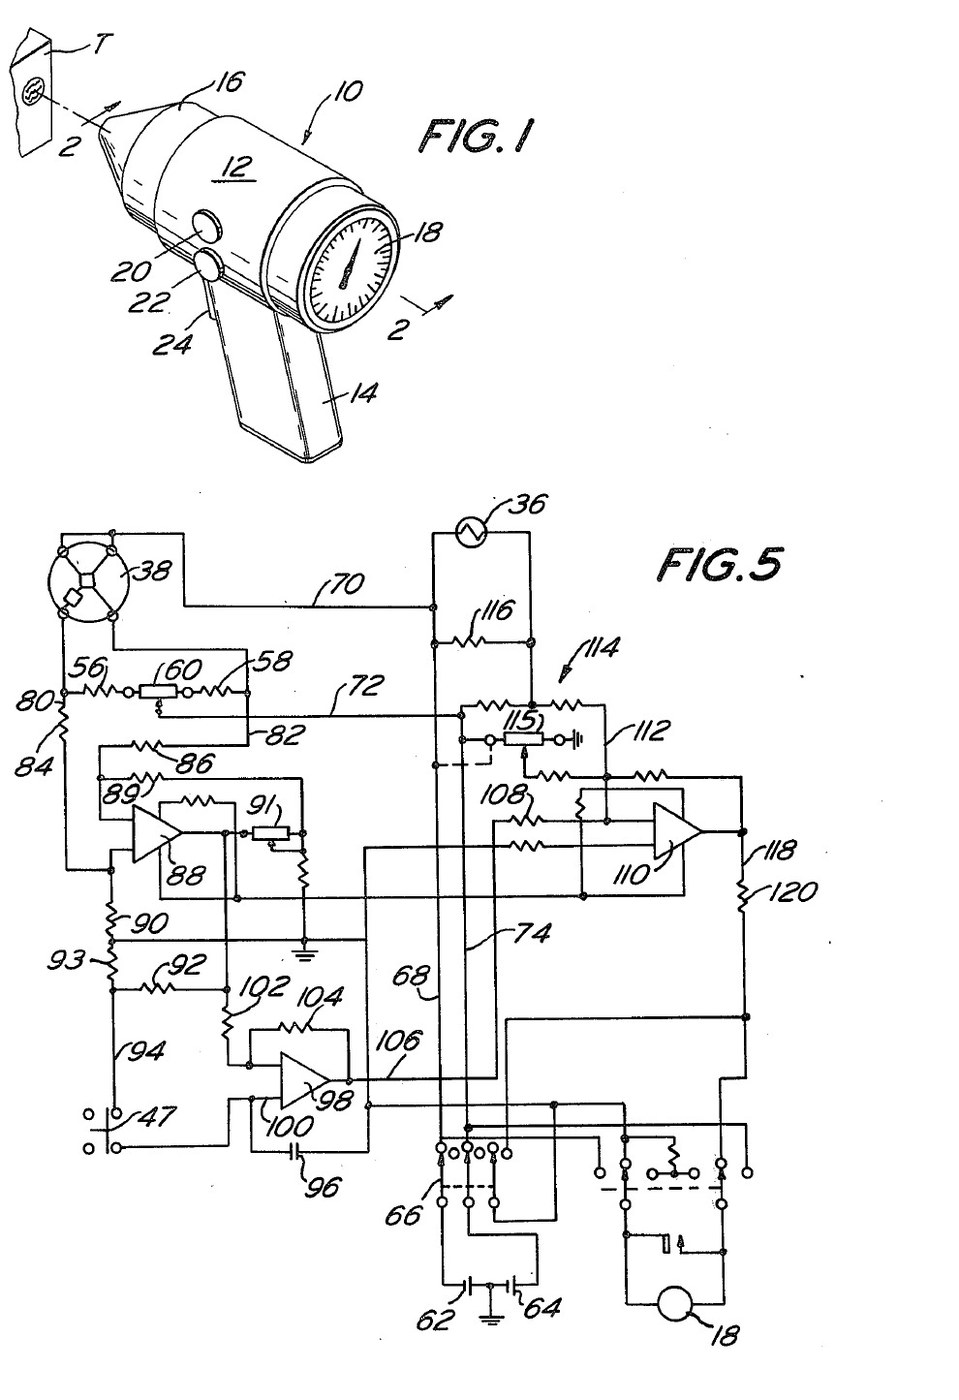


Infrared Thermometer: Pistol Grip with a Trigger-Swung Mirror That Zeroes on the Cavity (Michael, US 4,005,605, 1977)
A pistol-grip thermometer that reads a surface's temperature from its infrared radiation, without touching it. Inside, a concave mirror on a pivot first looks at the instrument's own cavity and a thermistor there, so the circuit stores a zero; pulling the trigger swings the mirror to the nose opening and focuses the target's radiation on a thermistor bolometer. The meter shows the difference, corrected for the cavity's temperature.
Result: a non-contact thermometer reading -20 to 60 °C, built for veterinary use.
Source: D. S. Michael (Mikron Instrument), US 4,005,605 (1977). Unknown: sizes, component values and most materials. Picture: the patent drawing.
上級者
Unknown
手順
1
1
Build the housing and nose
Build the housing and nose
Make a housing with a pistol handle, in three pieces for easy assembly. Fix a cone-shaped nose to its front, cut off at the tip to leave a round opening about one tenth of the cavity's inside diameter, so little stray radiation gets in or out. Paint the inside of the nose and cavity flat black. An infrared-transparent sheet may close the nose to keep out dirt and draughts. Not given: sizes, the materials.
このステップの材料:
 不明な材料1 housing, nose, window
 つや消し黒塗料1 as needed
必要な工具:
 幅広の刷毛
 不明な寸法
2
2
Fit the detector, mirror and ambient thermistor
Fit the detector, mirror and ambient thermistor
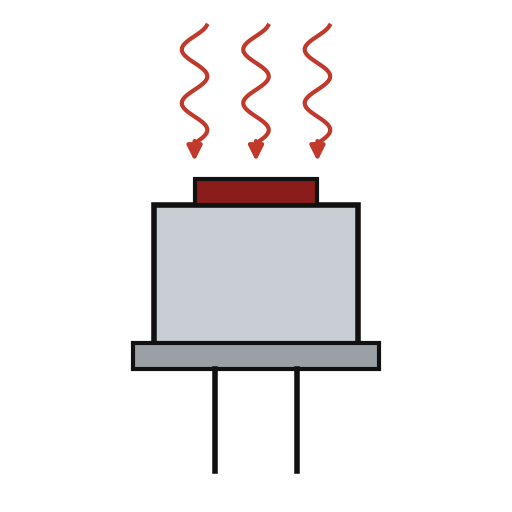
Hold the thermistor bolometer on the housing's axis with a spider. Mount a concave mirror in a gimbal ring on two trunnions in bearings in the housing wall, with the detector at its focus when it faces the nose. Put a bead thermistor inside the cone. A leaf spring holds the ring tilted so the mirror faces the thermistor. Not given: the mirror's focal length, the metals.
このステップの材料:
 サーミスタボロメータ1 個
 凹面鏡1 個
 不明な金属1 gimbal ring, trunnions, spider
 NTC サーミスタキット1 bead thermistor
 板ばね1 個
必要な工具:
 ドライバーセット不明な寸法
3
3
Fit the trigger
Fit the trigger
Pivot a trigger in the handle. A finger on it pushes the gimbal ring against the spring, so the mirror turns to face the nose opening, and at the same moment opens a small switch beside the trigger. Fit the off-on switch and two control knobs on the housing, and the meter in its back. Ours: a microswitch and a moving-coil meter.
このステップの材料:
不明な金属1 trigger, finger, pivot マイクロスイッチ1 個
 トグルスイッチ1 multipole off-on
 可動コイル形パネルメーター1 個
必要な工具:
ドライバーセット4
4
Wire the circuit and measure
Wire the circuit and measure
Wire the bolometer's active and passive elements as two arms of a Wheatstone bridge, with two resistors and a balancing potentiometer as the others; batteries in the handle feed it through the off-on switch. The bridge feeds a differential preamplifier with a gain potentiometer. Through the trigger switch its output charges a capacitor on the + input of a FET-input op-amp whose input bias current is under 1 pA; match the divider resistors to the op-amp's resistors within 0.1 %. Feed that op-amp's output into a summing amplifier together with an ambient correction from the bead thermistor (a fixed resistor across it, and a potentiometer to set the starting reading), and drive the meter from the sum. To use, switch on and balance the bridge; with the trigger released the mirror faces the cavity and the capacitor stores that reading. Aim at the target and pull the trigger: the meter shows the target minus the stored cavity reading, plus the ambient correction, so detector and preamplifier drift cancel. Not given: the component values.
このステップの材料:
 プリント基板1 個
 オペアンプ IC3 preamplifier, FET-input store, summing
 電気抵抗1 set, incl. 0.1 % matched pairs
 可変抵抗器4 個
 コンデンサキット1 storage capacitor
 電池2 個
 はんだ線1 as needed
必要な工具:
 はんだごて
材料
17- 1 housing, nose, windowプレースホルダー
- 1 as neededプレースホルダー
- 1 個プレースホルダー
- 1 個プレースホルダー
- 1 trigger, finger, pivotプレースホルダー
- 1 bead thermistorプレースホルダー
- 1 個プレースホルダー
- プレースホルダー
- プレースホルダー
- プレースホルダー
- 1 個プレースホルダー
- 3 preamplifier, FET-input store, summingプレースホルダー
- 1 set, incl. 0.1 % matched pairsプレースホルダー
- プレースホルダー
- 1 storage capacitorプレースホルダー
- 2 個プレースホルダー
- 1 as neededプレースホルダー
接続ブループリントの材料

この設計図で作るもの

CC0 パブリックドメイン
このブループリントはCC0で公開されています。許可を求めずに、自由にコピー、修正、配布、あらゆる目的で使用できます。
メイカーを応援するには、ブループリント経由で製品を購入してください。メイカーには メイカーコミッション がベンダーにより設定されています。または、このブループリントの新しいイテレーションを作成し、自分のブループリントにコネクションとして含めて収益を共有できます。