アート
美容とウェルネス
工芸
文化と歴史
エンターテインメント
環境
食品と飲料
リバースエンジニアリング
科学
スポーツ
テクノロジー
ウェアラブル
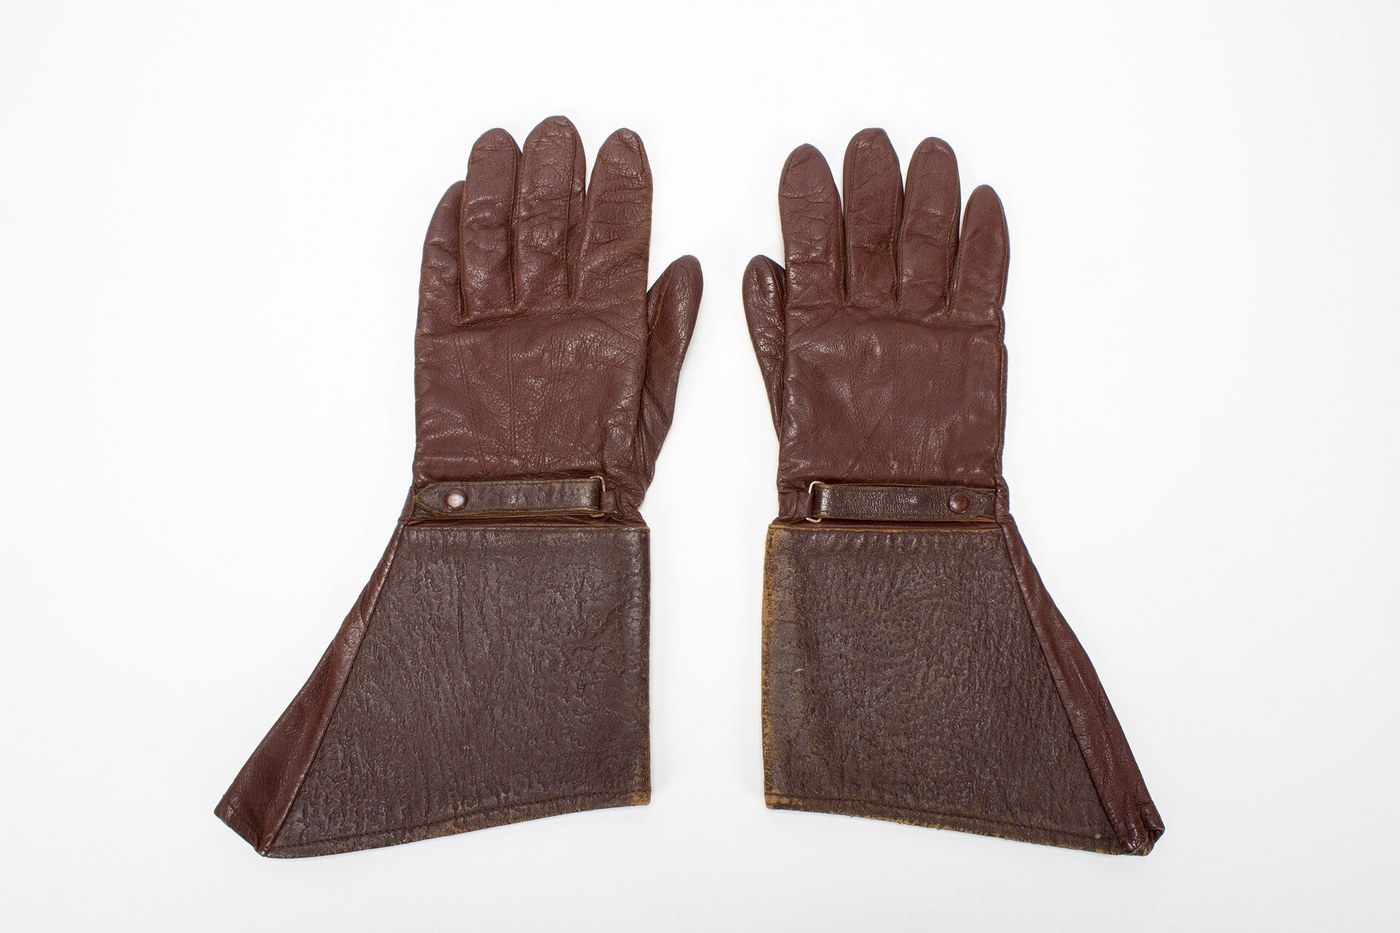


Leather Welding Gloves with Gauntlet Cuffs
Welders and smiths wear heavy leather gloves, because hot spatter melts through synthetic cloth. Cut the hand, thumb and a wide gauntlet cuff from thick leather, and sew them with waxed linen thread in small even stitches, the seams held in a vice as glove makers did.
The picture: leather gauntlet gloves with wide cuffs.
中級者
A day
手順
1
1
Make the pattern
Make the pattern
Trace your hand, fingers slightly apart, on paper. Add a seam allowance of about 6 mm and room to move (our sizes). Draw the thumb as a separate piece and a cuff that flares toward the elbow.
このステップの材料:
 紙2 枚
必要な工具:
 定規
 はさみ
2
2
Cut the leather
Cut the leather
Chalk the pattern onto thick leather, with the stretch running across the hand, and cut a front, a back, a thumb and a cuff for each glove, the second glove mirrored.
このステップの材料:
 植物タンニンなめし革3 sq ft
必要な工具:
 チャコ
 カッターナイフ
3
3
Set in the thumb
Set in the thumb
Cut the thumb hole in the front piece and sew the thumb in, inside out.
このステップの材料:
 ろう引き麻糸5 m
必要な工具:
 目打ち(キリ)
 縫い針
4
4
Sew the hand
Sew the hand
Clamp the edges of front and back together in the vice between two strips of wood and sew round the fingers with small even stitches, pricking each hole with the awl. Turn the glove right side out.
このステップの材料:
ろう引き麻糸10 m必要な工具:
 万力(ベンチバイス)目打ち(キリ)縫い針
5
5
Add the cuff
Add the cuff
Sew the cuff into a tube and stitch it round the wrist of the glove, overlapping by a finger's width.
このステップの材料:
ろう引き麻糸5 m必要な工具:
目打ち(キリ)縫い針6
6
Leather for a pair
Leather for a pair
Jupyter ノートブックを読み込み中…
この設計図で作るもの

関連ブループリント
これらのブループリントは知識を共有しています — 技術、材料、原理

CC0 パブリックドメイン
このブループリントはCC0で公開されています。許可を求めずに、自由にコピー、修正、配布、あらゆる目的で使用できます。
メイカーを応援するには、ブループリント経由で製品を購入してください。メイカーには メイカーコミッション がベンダーにより設定されています。または、このブループリントの新しいイテレーションを作成し、自分のブループリントにコネクションとして含めて収益を共有できます。