Weaving a Small Tapestry on a High-Warp Loom — Medieval Textile Art
手順
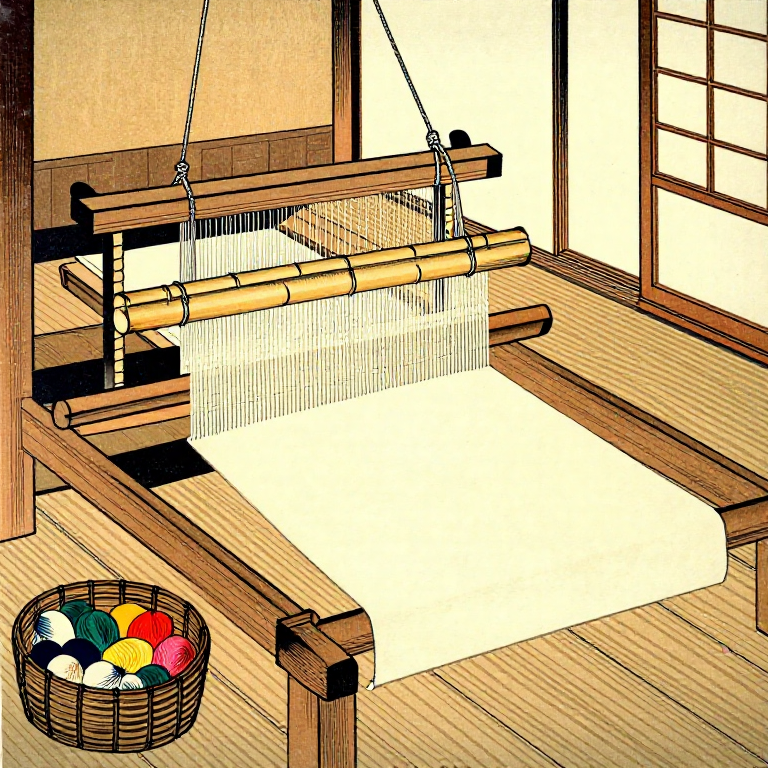
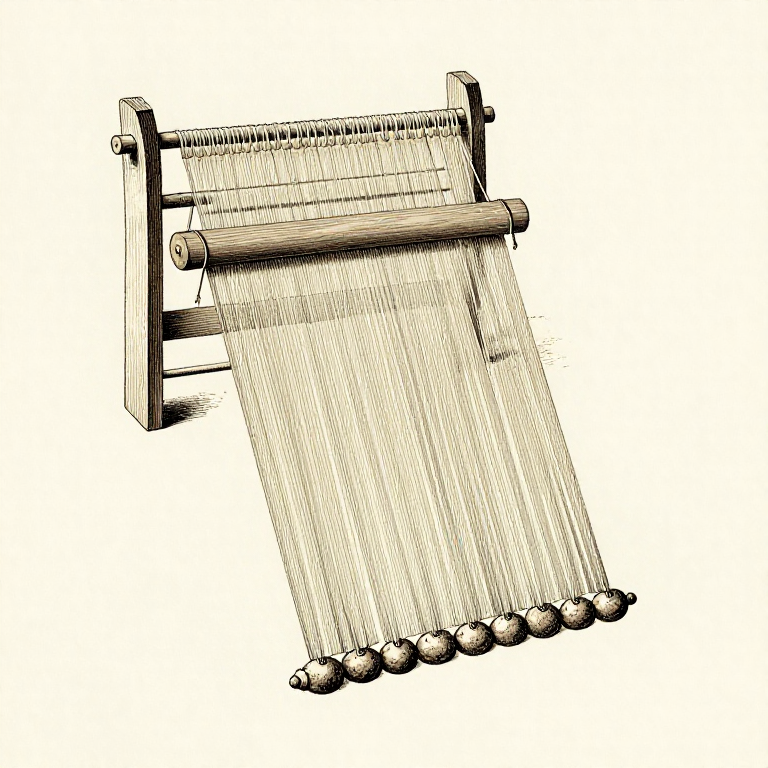
Warp the Loom
Warp the Loom
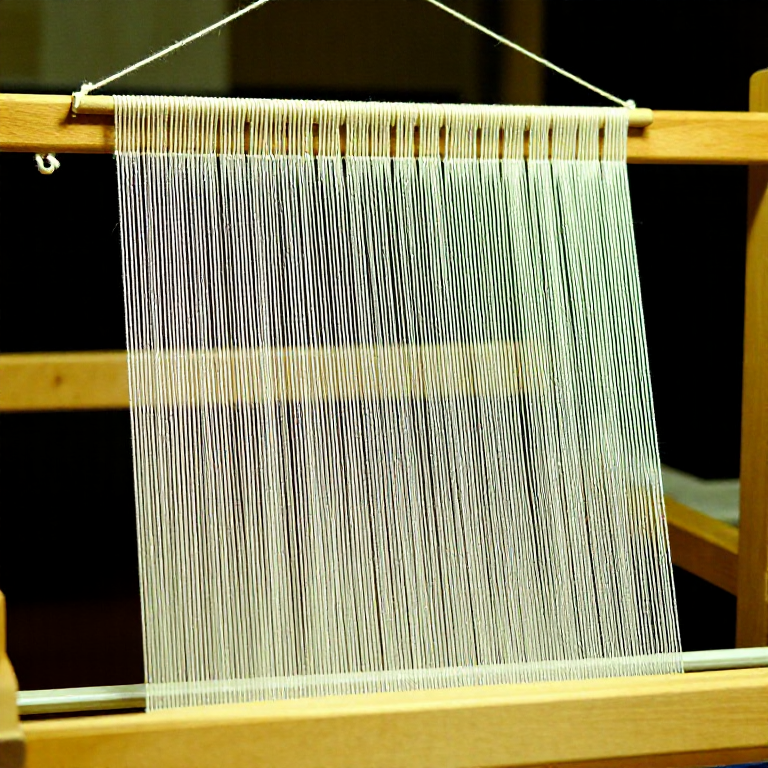
Wind the linen warp thread around the top and bottom bars of the frame loom, creating a series of parallel vertical threads spaced approximately 4 to 6 threads per centimetre. Maintain even tension throughout — uneven tension causes puckering in the finished tapestry. Attach a heddle bar by looping a cotton string around every other warp thread and tying it to a horizontal stick, creating two sheds (the openings between alternate warp threads through which the weft passes). In a high-warp loom, the weaver pulls the heddle bar forward to open one shed and releases it to open the other, alternating with each pass of the weft. Tie off the warp ends securely. The total number of warp threads determines the width of the tapestry and the fineness of detail possible.
Prepare the Cartoon and Bobbins
Prepare the Cartoon and Bobbins
Draw or trace the tapestry design (called a cartoon) onto paper at full scale. In a high-warp loom, the cartoon is placed behind the warp threads as a guide — the weaver works from the back, checking the front periodically by looking through or around the loom. For a geometric design (chevrons, diamonds, or interlocking bands), mark the colour boundaries clearly on the cartoon. Wind each colour of wool yarn onto a separate small bobbin (a flat stick or butterfly-shaped hank). Each colour area in the design will be woven with its own bobbin, hanging from the work in progress. A complex tapestry section might have 10 to 20 bobbins active simultaneously. The wool weft should be thicker than the warp — the weft completely covers the warp threads in a finished tapestry, making the warp invisible.
Begin Weaving
Begin Weaving
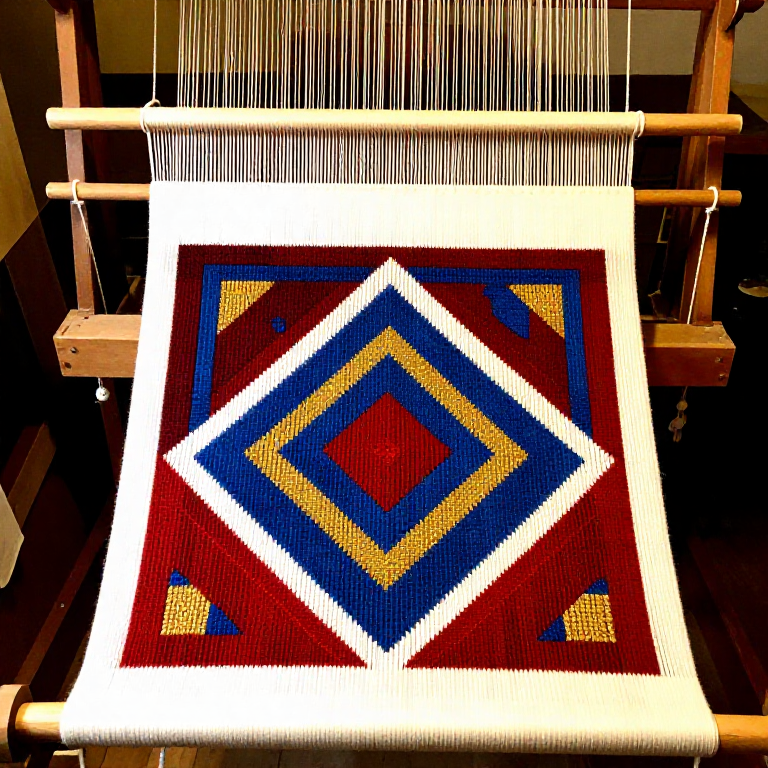
Open the first shed by pulling the heddle bar and pass a bobbin of background-colour wool weft through the opening from one selvedge to the other. Release the heddle to close the shed and open the alternate shed, then pass the weft back in the opposite direction. Beat each row of weft down firmly with the tapestry comb to pack the threads tightly against each other — in a well-woven tapestry, the weft threads should completely conceal the warp. For colour changes within a row (where the design requires a different colour), stop the first colour, loop it around the warp thread at the boundary point, and start the new colour from the same boundary. The join between adjacent colour areas can be interlocked (the two weft threads wrap around the same warp thread) or slit (each colour turns back at its own warp thread, creating a small gap that is sewn closed later).

Build the Design Row by Row
Build the Design Row by Row
Continue weaving row by row, following the cartoon design. Work each colour area with its own bobbin, building the design from the bottom up. For diagonal lines and curves, step the colour boundary one or two warp threads to the left or right every few rows to create the angled shape — this is the tapestry equivalent of a staircase approximation. Finer warp spacing (more threads per centimetre) allows smoother diagonals and more detail. Check the front of the work regularly by looking through the warp or using a mirror. Maintain consistent tension in the weft — too tight and the tapestry will draw in at the sides (hourglass shape), too loose and the surface will be bumpy. A skilled medieval tapestry weaver could produce approximately 1 to 3 square metres per month, depending on the complexity of the design.
このステップの材料:
 Wooden Eyeglass Frame Kit1 loom 個
Finish and Remove from the Loom
Finish and Remove from the Loom
When the design is complete, weave several rows of plain weave at the top to secure the last design rows, matching the plain rows at the bottom. Cut the warp threads from the loom bars, leaving approximately 5 to 8 cm tails at top and bottom. Tie adjacent warp ends together in groups of two or four to prevent unravelling, then fold the warp tails to the back and stitch them down. Sew closed any slit joins between colour areas from the back using matching thread. Trim all loose weft tails on the reverse. The finished tapestry can be hung from a rod passed through loops sewn along the top edge. Medieval tapestries served as both decoration and insulation — they covered cold stone walls, reduced drafts, and created private spaces within large halls by acting as moveable room dividers.
材料
3- 200 g 個プレースホルダー
- プレースホルダー
- プレースホルダー
必要な工具
5- プレースホルダー
- プレースホルダー
Related blueprints
Other builds that share materials, tools, or techniques with this one.
CC0 パブリックドメイン
このブループリントはCC0で公開されています。許可を求めずに、自由にコピー、修正、配布、あらゆる目的で使用できます。
メイカーを応援するには、ブループリント経由で製品を購入してください。メイカーには メイカーコミッション がベンダーにより設定されています。または、このブループリントの新しいイテレーションを作成し、自分のブループリントにコネクションとして含めて収益を共有できます。