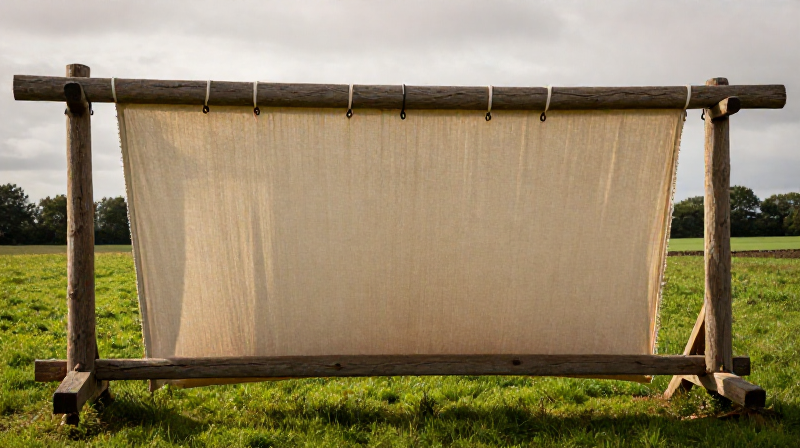
Tentering Cloth on a Frame — Stretching Fulled Wool to Set Width and Grain
Tentering is the critical finishing step between fulling and napping that transforms shapeless, shrunken fulled wool into cloth of uniform width and straight grain. The wet fulled fabric is hooked onto rows of L-shaped iron hooks — tenterhooks — driven into the rails of a large outdoor wooden frame, then stretched to its proper dimensions and left to dry in the open air. Without tentering, fulled cloth dries unevenly, shrinks to unpredictable widths, and develops a skewed grain that makes cutting and tailoring impossible. The process was so central to the medieval wool trade that every cloth town maintained communal tentergrounds, and the phrase "on tenterhooks" — meaning in a state of anxious suspense — entered the English language from this very practice. This blueprint covers the complete tentering process using a traditional two-rail tenter frame.
手順
Inspect the fulled cloth
Inspect the fulled cloth
このステップの材料:
 Fulled Wool Cloth1 個
Rinse the cloth clean
Rinse the cloth clean
このステップの材料:
 Clean Water20 リットル
必要な工具:
 Washing Basin
Measure the target width
Measure the target width
必要な工具:
 Measuring Tape 3m
Position the tenter frame
Position the tenter frame
必要な工具:
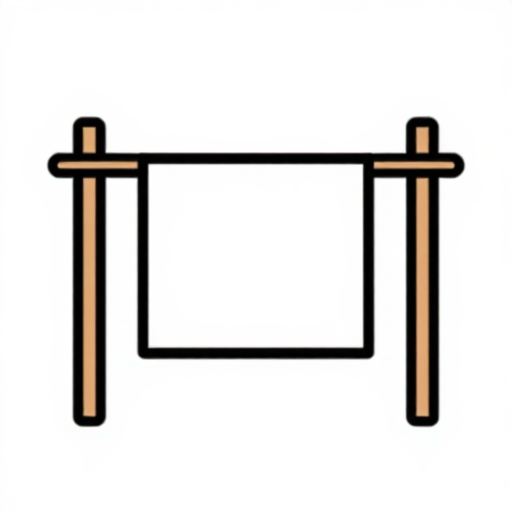 Tenter Frame
Check the tenterhooks
Check the tenterhooks
必要な工具:
 Tenterhooks
Hook the upper selvedge
Hook the upper selvedge
Stretch and hook the lower selvedge
Stretch and hook the lower selvedge
Even the tension across the cloth
Even the tension across the cloth
Smooth the surface by hand
Smooth the surface by hand
Stretch the length if needed
Stretch the length if needed
Leave to dry in the air
Leave to dry in the air
Check tension during drying
Check tension during drying
Test for dryness
Test for dryness
Unhook the lower rail
Unhook the lower rail
Unhook the upper rail
Unhook the upper rail
Measure the finished width
Measure the finished width
必要な工具:
Measuring Tape 3mCheck the grain
Check the grain
Fold and store the tentered cloth
Fold and store the tentered cloth
材料
2- プレースホルダー
- 20 リットルプレースホルダー
必要な工具
4- プレースホルダー
- プレースホルダー
- プレースホルダー
- プレースホルダー
接続ブループリントの材料
関連ブループリント
これらのブループリントは知識を共有しています — 技術、材料、原理
Related blueprints
Other builds that share materials, tools, or techniques with this one.


CC0 パブリックドメイン
このブループリントはCC0で公開されています。許可を求めずに、自由にコピー、修正、配布、あらゆる目的で使用できます。
メイカーを応援するには、ブループリント経由で製品を購入してください。メイカーには メイカーコミッション がベンダーにより設定されています。または、このブループリントの新しいイテレーションを作成し、自分のブループリントにコネクションとして含めて収益を共有できます。