アート
美容とウェルネス
工芸
文化と歴史
エンターテインメント
環境
食品と飲料
リバースエンジニアリング
科学
スポーツ
テクノロジー
ウェアラブル
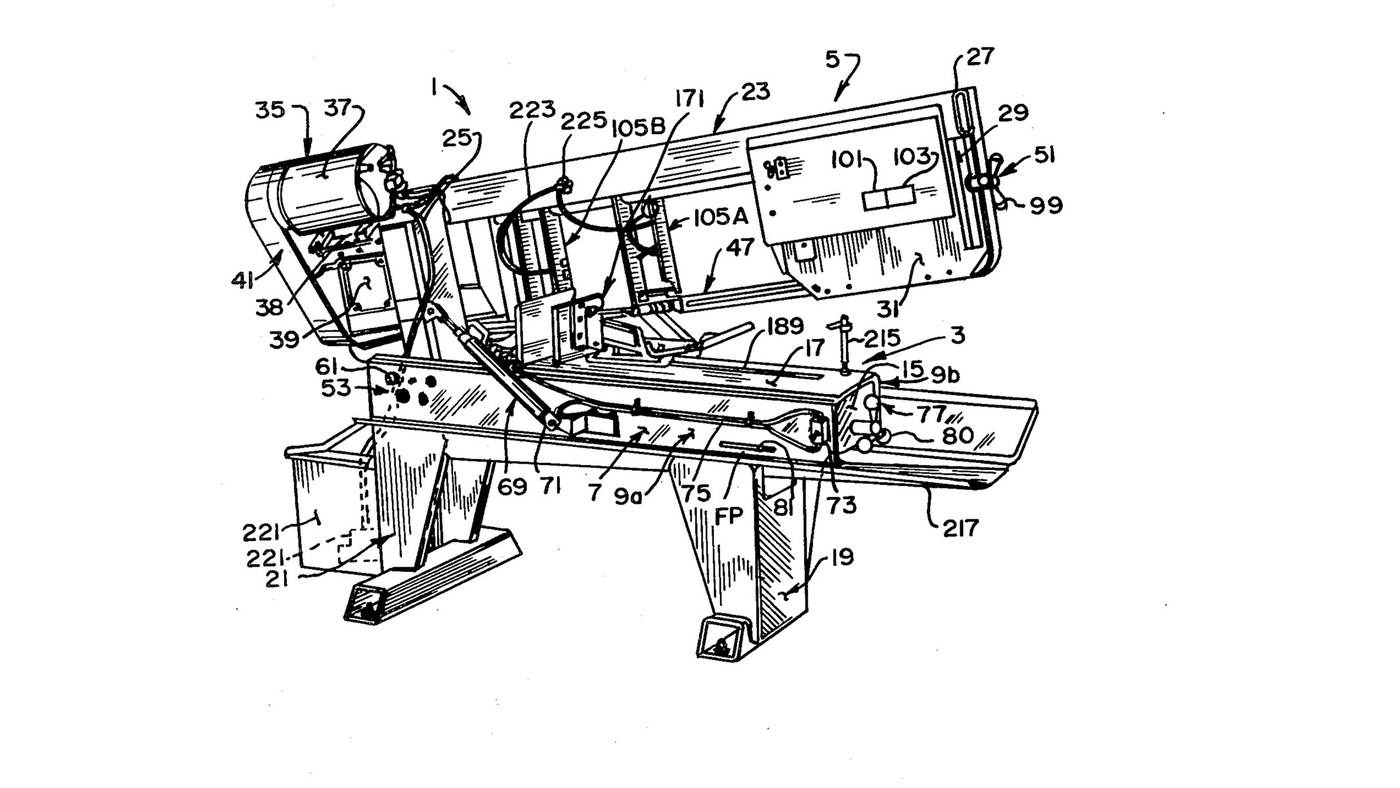


Metal Band Saw: Horizontal Saw on a Welded Steel Frame
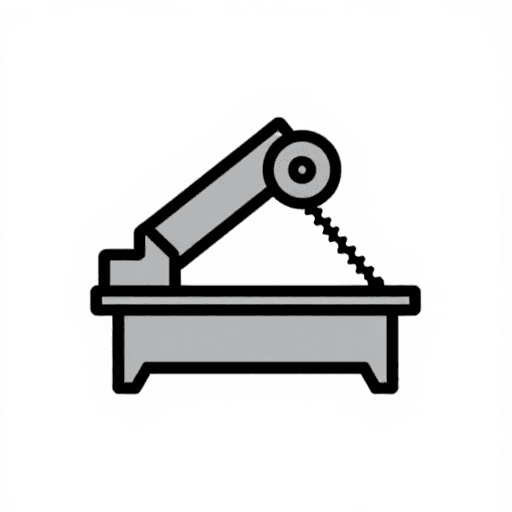
Curtis Eccardt's horizontal power band saw (Emerson Electric, US 4,364,294, 1982), built from welded steel channel and tube instead of iron castings to cut its cost. The saw head swings down on trunnions over the bed; a hydraulic cylinder with a valve sets how fast it feeds, a spring counterbalances it, and a spring tensioner shows the blade tension on a scale. Two guides with rollers twist the blade's lower run 90° so its teeth face down into the work, and carbide inserts hold it there.
The patent gives no sizes, speeds or ratings; the welder and wrenches are ours. The picture: the patent's Fig. 1.
上級者
4 days
手順
1
1
Weld the bed
Weld the bed
Stand two steel channels (9a, 9b) parallel, webs upright and flanges facing in, and weld gussets (15) between their webs. Bolt a bed plate (17) across the top flanges as the work surface. Ours: MIG welder, drill press for the bolt holes.
このステップの材料:
 溝形鋼2 個
 軟鋼板1 個
 六角ボルト - 強度区分 8.81 個
必要な工具:
 MIG溶接機
 ボール盤
 モンキーレンチ
2
2
Weld and bolt on the legs
Weld and bolt on the legs
Weld formed sheet-steel legs onto horizontal floor members to make front and rear leg weldments (19, 21), and bolt them under the bed.
このステップの材料:
 鋼板1 個
 構造用鋼管1 個六角ボルト - 強度区分 8.81 個
必要な工具:
MIG溶接機モンキーレンチ3
3
Weld the head
Weld the head
Weld a head post (25) of square or rectangular steel tube square to a head beam (27) of rectangular tube. Weld a bracket leg (29) down from the beam's outer end, and fix support plates at both ends (31, 33).
このステップの材料:
構造用鋼管1 個軟鋼板1 個必要な工具:
MIG溶接機4
4
Fit the trunnions and align the pivot
Fit the trunnions and align the pivot
Fix a shaft through the head post with its ends out as trunnions (55a, 55b), in bushings in two bearing blocks (59a, 59b) bolted inside the channel webs. Each block has one close-fit bolt hole and three oversize ones: shift the blocks until the pivot is parallel to the bed plate, then torque the bolts. A set screw (67) takes out end play.
このステップの材料:
 鋼製シャフト1 個
 金属ブッシュ2 個
 軸受ブロック2 個六角ボルト - 強度区分 8.88 個
 くぼみ先端の止めねじ1 個
必要な工具:
ボール盤 トルクレンチ
5
5
Mount motor, belt drive and gearbox
Mount motor, belt drive and gearbox
Mount the electric motor (37) on a plate (38) pivoted on the head beam, and couple it by a multi-speed belt and pulleys (41) to a gearbox (39). Fit the drive wheel (43) on the gearbox output shaft.
このステップの材料:
 電動機1 個軟鋼板1 個
 駆動ベルト1 個
 滑車1 個
 ギアボックス1 個
 バンドソーホイール1 個
必要な工具:
モンキーレンチ6
6
Build the idler tensioner
Build the idler tensioner
Weld an idler yoke (87) of rolled steel plate, pivot it on the head beam with a pin (89), and cantilever the idler axle from it with the idler wheel (45) on bearings (85). A threaded rod (91) pulls the yoke through a coil spring (93) held between compression plates and a U-bolt (97); a knob (99) turns the rod. An indicator (101) on the spring reads the tension on a scale (103).
このステップの材料:
軟鋼板1 個 鋼製ピン1 個鋼製シャフト1 個バンドソーホイール1 個
 ボールベアリング1 個
 全ねじ棒1 個
 Coil Spring1 個
 Uボルト1 個
 コントロールノブ1 個
必要な工具:
MIG溶接機モンキーレンチ7
7
Build the two blade guides
Build the two blade guides
In each guide channel (111) mount two guide rollers (115a, 115b) on ball bearings on eccentric bushings, one fixed and one adjusted to the blade thickness. Add a carbide thrust insert (133) on the blade's back edge and two carbide side inserts (137a fixed, 137b on a sprung swing bracket set by a bolt and knob). Clamp the guides on two bar tracks (107).
このステップの材料:
 ガイドローラー4 個ボールベアリング4 個
 偏心ブッシュ4 個
 超硬チップ6 個Coil Spring2 個コントロールノブ2 個構造用鋼管1 個
必要な工具:
モンキーレンチ8
8
Fit the blade and set the tension
Fit the blade and set the tension
By hand, run the endless blade (47) round the drive and idler wheels and through both guides; the rollers twist its lower run about 90° so the teeth face down. Turn the tension knob until the scale shows the tension you want.
このステップの材料:
 帯のこ刃1 個
9
9
Fit the feed cylinder and counterbalance
Fit the feed cylinder and counterbalance
Connect a hydraulic cylinder (71) between bed channel and head post above the trunnions, filled with oil and piped through tubing (75) to a control valve (73): the valve sets the feed rate and, closed, holds the head. Fit a coil spring (78) on a threaded linkage (79) between an end gusset and the head post below the trunnions, adjusted by a knob (80), to counterbalance the head.
このステップの材料:
 油圧シリンダー1 個
 作動油1 batch
 油圧チューブ1 個
 流量制御弁1 個Coil Spring1 個全ねじ棒1 個コントロールノブ1 個
必要な工具:
モンキーレンチ10
10
Bolt on the vice
Bolt on the vice
Bolt the quick-acting vice to the bed plate to clamp the work square under the blade.
このステップの材料:
 マシンバイス1 個六角ボルト - 強度区分 8.81 個
必要な工具:
モンキーレンチ材料
29- 2 個プレースホルダー
- 1 個プレースホルダー
- 11 個プレースホルダー
- 1 個プレースホルダー
- 1 個プレースホルダー
- 1 個プレースホルダー
- 2 個プレースホルダー
- 2 個プレースホルダー
- 1 個プレースホルダー
- 1 個プレースホルダー
- 1 個プレースホルダー
- 1 個プレースホルダー
- 1 個プレースホルダー
- 1 個プレースホルダー
- 1 個プレースホルダー
- プレースホルダー
- 1 個プレースホルダー
- 4 個プレースホルダー
- 1 個プレースホルダー
- プレースホルダー
- 4 個プレースホルダー
- 4 個プレースホルダー
- 6 個プレースホルダー
- 1 個プレースホルダー
- 1 個プレースホルダー
- 1 batchプレースホルダー
- 1 個プレースホルダー
- 1 個プレースホルダー
- 1 個プレースホルダー
この設計図で作るもの
CC0 パブリックドメイン
このブループリントはCC0で公開されています。許可を求めずに、自由にコピー、修正、配布、あらゆる目的で使用できます。
メイカーを応援するには、ブループリント経由で製品を購入してください。メイカーには メイカーコミッション がベンダーにより設定されています。または、このブループリントの新しいイテレーションを作成し、自分のブループリントにコネクションとして含めて収益を共有できます。