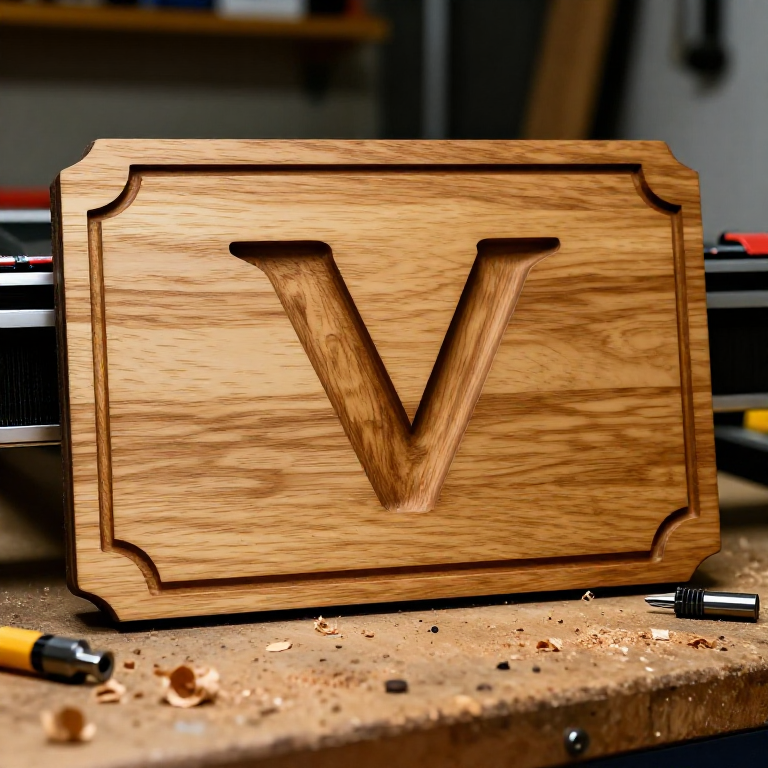
CNC-Routing a Wooden Sign — Computer-Controlled Carving
手順
Design the Sign in CAD/CAM Software
Design the Sign in CAD/CAM Software
Open your CAM software and set the material dimensions (board size and thickness). Type the text using a suitable font — serif fonts and bold sans-serifs produce the clearest V-carved results, while very thin fonts can be too narrow for the router bit to enter. Add any decorative elements: borders, graphics, or ornamental dividers. For V-carved text, select a V-carving toolpath — the software automatically calculates the depth of cut based on letter width and the V-bit angle, producing letters that are shallow at thin strokes and deep at thick strokes, mimicking hand-carved sign lettering. For raised text (text standing proud of a recessed background), use a pocket toolpath that removes the background around the letters.
このステップの材料:
 Hardwood Ash1 board, sized for your sign 個
 Double-Sided Tapeas needed for workholding 個
必要な工具:
 CNC Router
Generate Toolpaths and Preview
Generate Toolpaths and Preview
Select the appropriate router bit for each operation: a 60 or 90-degree V-bit for V-carving text (60-degree produces finer, deeper cuts; 90-degree produces wider, shallower cuts), and a flat endmill (3-6mm) for pocket clearing around raised elements or cutting the sign outline. Set feed rate and spindle speed according to your CNC machine and material — for hardwood, a V-bit typically runs at 15,000-20,000 RPM with 1000-2000mm/min feed rate. Preview the toolpath simulation in the software to verify the result before cutting: check that all text is correct, no elements overlap the board edges, and the estimated cutting depth does not exceed the material thickness. Export the toolpaths as G-code (the numerical control language that CNC machines read).
Secure the Workpiece and Set the Origin
Secure the Workpiece and Set the Origin
Secure the board to the CNC router bed using clamps, double-sided tape, or a combination of both. The board must not shift during cutting — even 0.5mm of movement ruins the alignment of multi-pass cuts and can break bits. Mount the appropriate router bit in the collet and tighten securely. Set the machine's XY origin (the zero point) to match the origin set in your CAM software (typically the lower-left corner or centre of the design). Set the Z origin (the zero height) by carefully lowering the bit until it just touches the wood surface. This zero position ensures the machine cuts to the correct depth. Run an air cut (raising the bit 10mm above the surface and running the program) to verify the toolpath stays within the board boundaries.
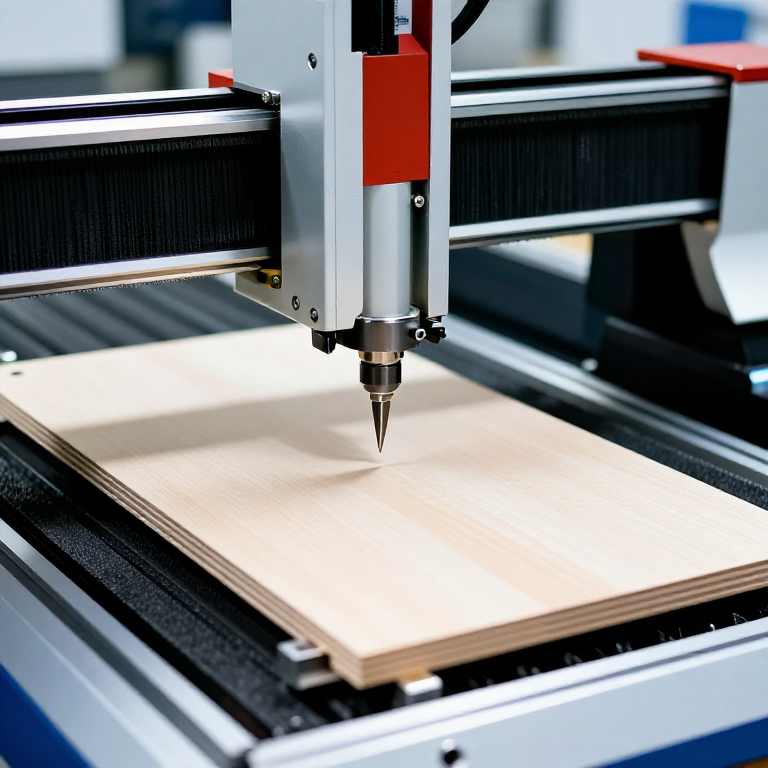
Run the CNC Program
Run the CNC Program
Start the spindle and begin the cutting program. The CNC machine follows the generated toolpaths precisely, moving the spinning bit through the wood at the programmed feed rate and depth. V-carving text produces a satisfying progression as each letter emerges from the wood with sharp, clean edges. Stay nearby to monitor for problems: listen for unusual sounds (chattering indicates the feed rate is too fast or the bit is dull), watch for bit breakage, and verify the cut depth looks correct. If running multiple toolpath operations (V-carving followed by pocket clearing), the machine may pause between operations for a bit change — swap to the correct bit, re-zero the Z axis to the new bit tip, and continue.
Finish the Sign
Finish the Sign
After machining is complete, remove the sign from the CNC bed and brush out wood chips from the carved areas using a stiff brush or compressed air. Lightly sand the flat surface with 220-grit sandpaper to remove any fuzz or raised grain caused by the router bit. Do not sand inside V-carved letters — the crisp edges are a key visual feature and sanding rounds them off. For a two-tone effect, paint the carved areas with a contrasting colour (black paint in walnut, for example), then sand the flat surface to remove paint from the high areas, leaving colour only in the carved recesses. Apply a clear finish (polyurethane for outdoor signs, Danish oil or wax for indoor) to protect the wood and enhance the grain. CNC-routed signs combine the warmth and natural beauty of hand-carved woodwork with the precision and repeatability of digital fabrication.
材料
2- 1 board, sized for your sign 個プレースホルダー
- as needed for workholding 個プレースホルダー
必要な工具
3- プレースホルダー
- プレースホルダー
- プレースホルダー
Related blueprints
Other builds that share materials, tools, or techniques with this one.

CC0 パブリックドメイン
このブループリントはCC0で公開されています。許可を求めずに、自由にコピー、修正、配布、あらゆる目的で使用できます。
メイカーを応援するには、ブループリント経由で製品を購入してください。メイカーには メイカーコミッション がベンダーにより設定されています。または、このブループリントの新しいイテレーションを作成し、自分のブループリントにコネクションとして含めて収益を共有できます。