アート
美容とウェルネス
工芸
文化と歴史
エンターテインメント
環境
食品と飲料
リバースエンジニアリング
科学
スポーツ
テクノロジー
ウェアラブル
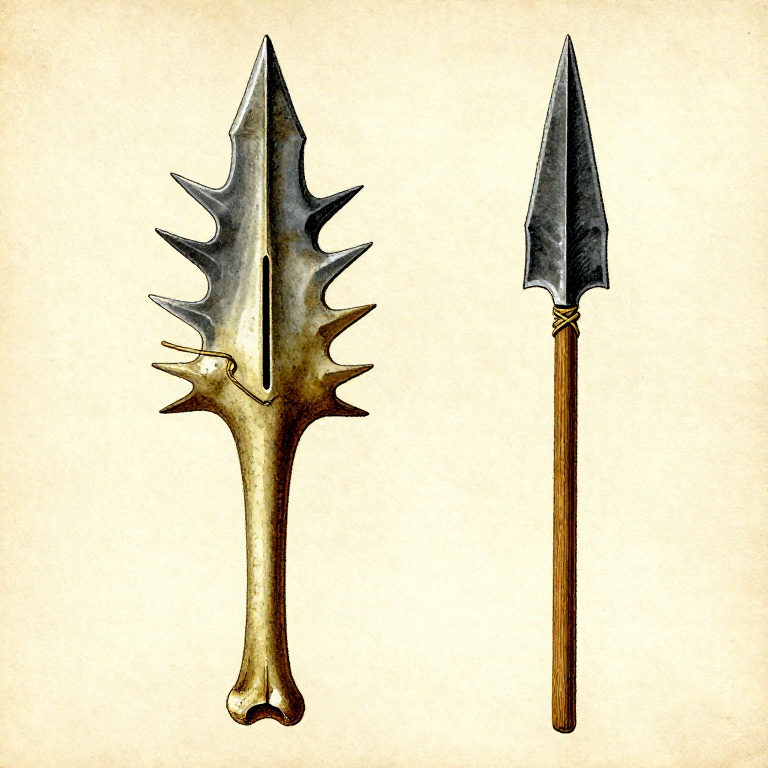
Carving a Toggling Bone Harpoon — Detachable-Head Hunting Point
The toggling harpoon is a brilliant engineering solution to the problem of hunting large aquatic animals. Unlike a fixed spear point that can pull free from a struggling animal, a toggling harpoon head detaches from the shaft on impact and rotates 90 degrees beneath the skin, acting as a toggle that cannot be pulled back through the entry wound. A line connects the detached head to the hunter, allowing the animal to be retrieved. This technology appears in the archaeological record by at least 15,000 years ago in the Magdalenian period of Europe, and was perfected by Arctic peoples for seal and whale hunting. The design requires precise carving: a socket for the shaft, a line hole at the centre of mass, and barbs that grip on entry.
上級者
3-4 hours
手順
1
1
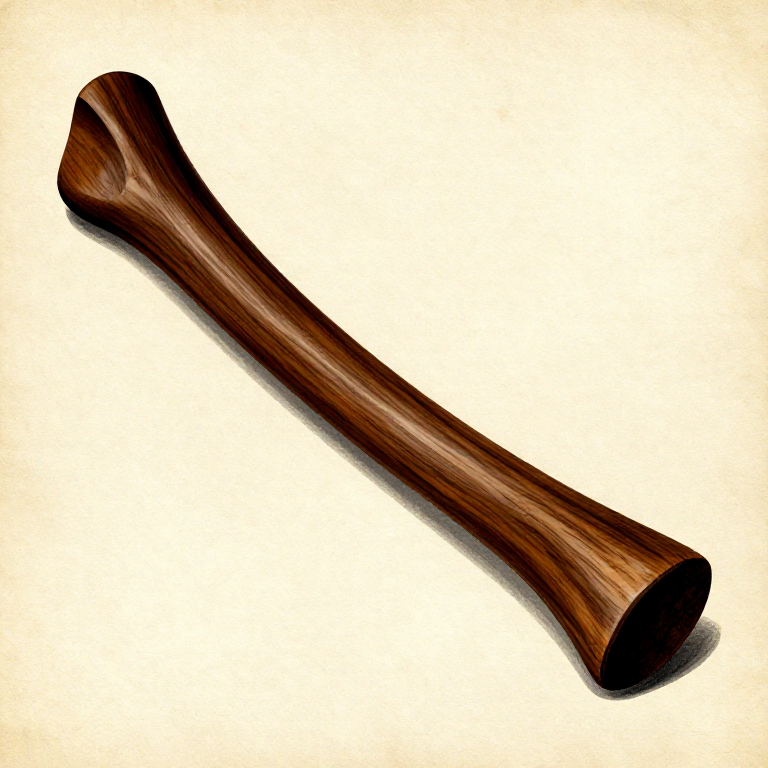
Select a Large Leg Bone or Antler Tine
Select a Large Leg Bone or Antler Tine
Choose a large leg bone (femur or tibia) from deer, elk, or cattle, or a thick antler tine at least 15 cm long. The bone must be fresh or recently cleaned — old, sun-bleached bone is brittle and will crack during carving. Leg bones from large ungulates provide the densest, most uniform material for harpoon heads. Antler is slightly more forgiving of carving errors but dulls tools faster.
このステップの材料:
 Animal Bones1 個
2
2
Split the Bone Lengthwise
Split the Bone Lengthwise
Place the bone on a flat stone anvil. Position a bone wedge or thick flint flake along the length of the bone and strike it firmly with a hammerstone to split the bone lengthwise. Work slowly — bone splits unpredictably if struck too hard. You need a long splinter from the dense outer wall (cortical bone), not the spongy interior marrow cavity. Discard any pieces with spongy bone still attached.
必要な工具:
 Hammerstone
3
3
Select a Splinter of the Right Size
Select a Splinter of the Right Size
Choose a bone splinter 12 to 15 cm long and 1.5 to 2 cm wide. It should be straight, dense, and free of cracks. The splinter needs enough thickness to accommodate both barbs and a line hole without becoming fragile. If the splinter is curved, it can be straightened slightly by soaking in warm water and clamping between two flat stones while it dries.
4
4
Rough-Shape the Harpoon Head
Rough-Shape the Harpoon Head
Scrape the bone splinter into a tapered point using a coarse stone scraper or sandstone slab. Remove material from both sides to create a symmetrical, lozenge-shaped cross-section — flat faces on both sides tapering to a sharp point at one end. The base end (where the shaft socket will be) should remain wider and thicker. Work slowly and check symmetry frequently.
必要な工具:
 Sandstone (Abrasive)
5
5
Carve Barbs on Each Side of the Point
Carve Barbs on Each Side of the Point
Using a sharp flint blade, carve a backward-angling barb on each side of the point, positioned 2 to 3 cm from the tip. Each barb should project outward about 3 to 4 mm and angle backward toward the base at roughly 45 degrees. The barbs grip the flesh on entry and prevent the head from pulling straight back out. Carve carefully — a slip can snap the barb off, requiring you to start over.
6
6
Carve the Shaft Socket at the Base
Carve the Shaft Socket at the Base
At the base of the harpoon head, carve a shallow rectangular notch (socket) about 1 cm deep and 1 cm wide. This socket receives the tapered tip of the shaft. The socket must be centred on the base and aligned with the long axis of the harpoon head. The fit should be snug but not so tight that the head cannot detach when struck sideways — the toggling action depends on the head separating cleanly from the shaft.
7
7
Drill the Line Hole Through the Centre
Drill the Line Hole Through the Centre
Locate the centre of mass of the harpoon head by balancing it on a thin stick — the balance point is where the line hole must go. Using a sharp flint drill point rotated between the palms (or a bow drill with a flint bit), bore a hole straight through the harpoon head at this point. The hole should be 3 to 4 mm in diameter — large enough for sinew cord to pass through freely. Drill from both sides to prevent blowout.
8
8
Thread Sinew Cord Through the Line Hole
Thread Sinew Cord Through the Line Hole
Cut a length of strong sinew cord 2 to 3 metres long. Thread one end through the line hole and secure it with multiple half-hitches pulled tight against the bone. The attachment must be absolutely secure — this line is all that connects the detached harpoon head to the hunter. Wet the sinew before tying; it will shrink as it dries and lock the knots tight.
このステップの材料:
 Sinew Thread2 個
9
9
Shape the Shaft
Shape the Shaft
Select a straight hardwood shaft 1.5 to 2 metres long and approximately 2 cm in diameter. Ash, birch, or hazel are ideal. Taper one end to a blunt point that fits snugly into the socket you carved in the harpoon head. The taper should be 3 to 4 cm long. The shaft does not need to be fire-hardened — it is a delivery system, not a cutting tool.
このステップの材料:
 Hardwood Sapling1 個
10
10
Seat the Harpoon Head on the Shaft
Seat the Harpoon Head on the Shaft
Push the tapered shaft tip into the socket of the harpoon head. The head should sit firmly and point straight along the shaft axis. Critically, the head must detach under sideways pressure — if you push the head sideways with your thumb, it should pop off the shaft. If it is too tight, shave the shaft taper slightly thinner. If too loose, wrap a thin layer of sinew around the shaft tip to build up the diameter.
11
11
Coil the Line and Attach to the Shaft
Coil the Line and Attach to the Shaft
Coil the sinew line neatly and bind it loosely to the shaft with a light sinew wrap so it pays out freely on impact without tangling. Attach the far end of the line either to the shaft itself (for hand retrieval) or to a float made from a sealed bladder or bundle of dry rushes (for hunting in deep water). The float tires the animal and marks its position.
12
12
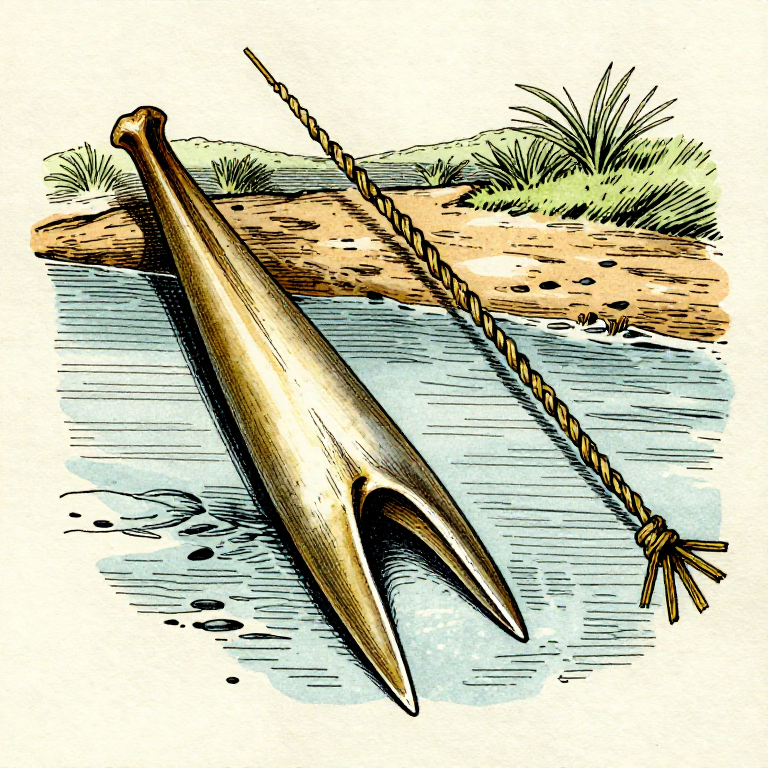
Test the Toggling Action
Test the Toggling Action
Thrust the harpoon firmly into a piece of soft wood or thick hide. On impact, the head should penetrate and then detach from the shaft as you pull back. Pull the sinew line — the head should rotate 90 degrees and toggle sideways beneath the surface, making it impossible to pull back through the entry wound. If the head does not toggle, adjust the line hole position or enlarge the socket slightly so the head separates more easily.
材料
3- プレースホルダー
- 2 個プレースホルダー
- プレースホルダー
必要な工具
2- プレースホルダー
- プレースホルダー
接続ブループリントの材料
関連ブループリント
これらのブループリントは知識を共有しています — 技術、材料、原理
Related blueprints
Other builds that share materials, tools, or techniques with this one.
Making a Bone Fish Gorge — The Oldest Fishing Devicesurvival
Making a Prehistoric Throwing Stick — The Simplest Hunting Weaponsurvival
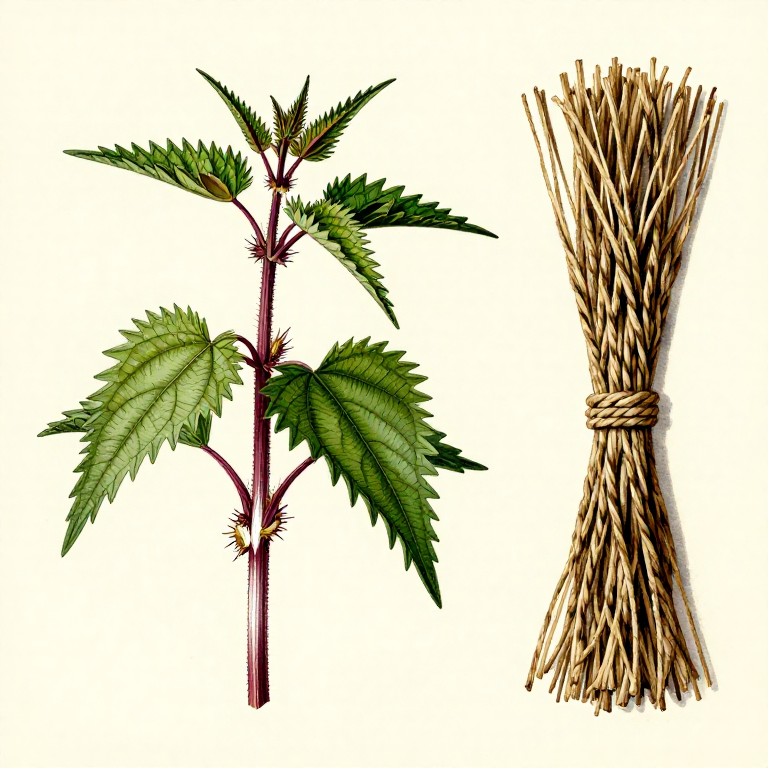
Making Rope from Stinging Nettle Fibre — Plant Bast Extraction and Reverse Twistsurvival
Collecting and Preparing Feathers for Arrow Fletching — Stabilising Projectiles in Flightsurvival

Digging a Pitfall Trap for Large Game — Concealed Pit Huntingsurvival
Making Bolas — Weighted Throwing Weapon for Huntingsurvival
CC0 パブリックドメイン
このブループリントはCC0で公開されています。許可を求めずに、自由にコピー、修正、配布、あらゆる目的で使用できます。
メイカーを応援するには、ブループリント経由で製品を購入してください。メイカーには メイカーコミッション がベンダーにより設定されています。または、このブループリントの新しいイテレーションを作成し、自分のブループリントにコネクションとして含めて収益を共有できます。