アート
美容とウェルネス
工芸
文化と歴史
エンターテインメント
環境
食品と飲料
リバースエンジニアリング
科学
スポーツ
テクノロジー
ウェアラブル
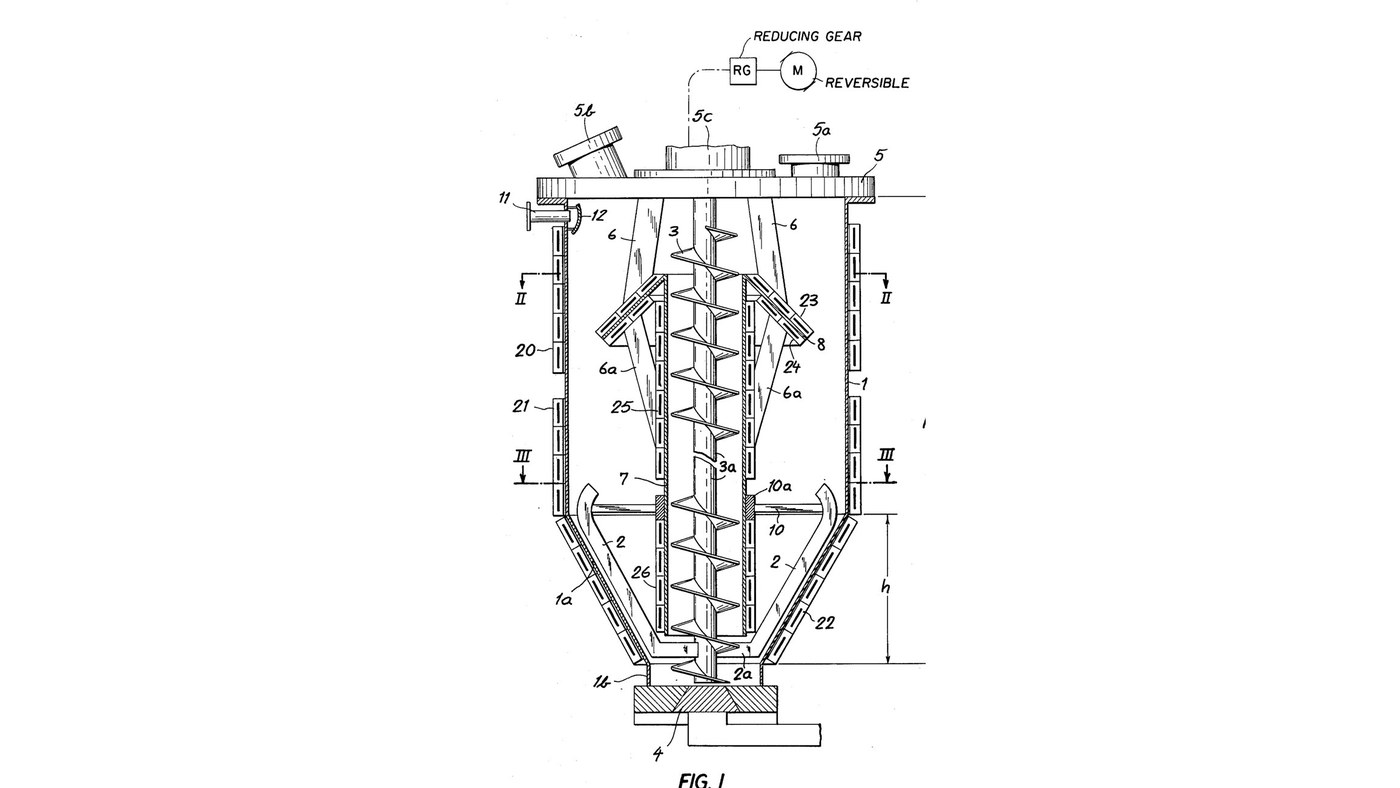


Resin Mixing and Degassing Station: Vacuum Vessel with Worm and Apron
W. Hedrich's mixer (US 4,049,244, 1977) for reactive resins that must be mixed and freed of gas before they set. In a vessel under vacuum a worm lifts the resin up a central tube and spills it over a cone-shaped apron in a thin layer, where the gas escapes; vanes on the worm sweep the funnel bottom and keep it circulating. Peltier elements on the vessel, tube and apron heat or cool each zone. Reversed, the worm drives the batch out through the bottom valve.
The patent gives no sizes, vacuum, speeds or temperatures; it describes an industrial vessel. The picture: the patent's Fig. 1.
上級者
5 days
手順
1
1
Fit the vessel's neck valve and vacuum pipe
Fit the vessel's neck valve and vacuum pipe
Use a metal vessel, cylindrical above with a funnel bottom about one third of its height, ending in a short neck. Fit the discharge valve (4) on the neck, and a side vacuum pipe (11) near the top with a baffle plate (12) inside to keep solids out of the vacuum line. Ours: TIG welder.
このステップの材料:
 混合槽1 個
 ボールバルブ1 個
 ステンレス鋼の管1 個
 ステンレス鋼の板1 個
必要な工具:
 TIG 溶接機
 モンキーレンチ
2
2
Make the mixing tube and apron
Make the mixing tube and apron
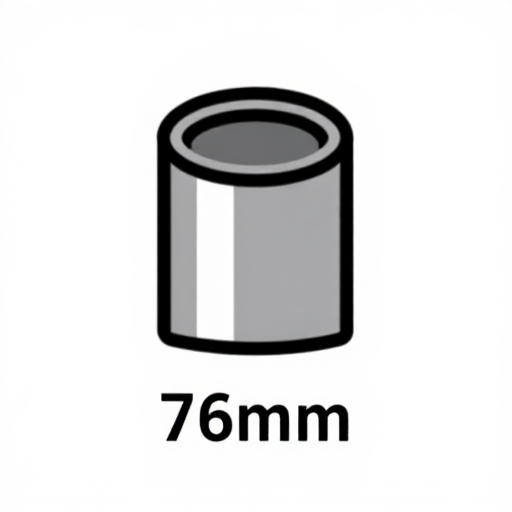
Join a downward-flaring cone apron (8) to the upper end of a tube (7), braced by struts (6a). Hang the tube on struts (6) from the cover.
このステップの材料:
ステンレス鋼の管1 個ステンレス鋼の板1 個必要な工具:
TIG 溶接機3
3
Fit the cover's inlet, window and bearing
Fit the cover's inlet, window and bearing
Fit the removable cover (5) with an inlet fitting (5a) that seals vacuum-tight, a viewing window (5b) with a watch glass to watch the degassing, and a bearing (5c) for the worm shaft; seal it to the vessel.
このステップの材料:
 槽の蓋1 個
 ホース用ねじニップル1 個
 時計皿1 個
 ボールベアリング1 個
 ガスケット1 個
必要な工具:
モンキーレンチ4
4
Fit the worm and its vanes
Fit the worm and its vanes
Pass the worm (3) down through the tube so it just sticks out at the top and reaches into the neck close to the valve. Below the tube, fix agitating vanes (2) on arms (2a) so they sweep close to the funnel wall, steadied by struts (10) on a bearing (10a) riding on the tube.
このステップの材料:
 スクリューコンベヤ1 個
 攪拌翼2 個
 金属ブッシュ1 個
必要な工具:
モンキーレンチ5
5
Mount the reversible drive on the cover
Mount the reversible drive on the cover
Mount a reversible variable-speed motor (M) with reduction gearing (RG) on the cover, driving the worm shaft: one way lifts resin up the tube, the other drives it out of the valve.
このステップの材料:
 電動機1 個
 ギアボックス1 個
必要な工具:
モンキーレンチ6
6
Fit the Peltier elements
Fit the Peltier elements
Fit Peltier elements in electrical contact with the metal in separately switched sets: round the top of the vessel (20), its lower cylinder (21) and its funnel (22), and along the tube and on the apron (23-26), best on the apron's upper face. Reversing a set's polarity swaps heating for cooling.
このステップの材料:
 ペルチェ素子1 個
必要な工具:
モンキーレンチ7
7
Connect the vacuum and run a batch
Connect the vacuum and run a batch
Connect the vacuum pipe to a vacuum pump. With the vessel under vacuum, add the resin components one after another through the inlet; the worm lifts the mix over the apron in a thin layer, and the funnel stays full while it circulates. Reverse the worm with the valve open to empty it.
必要な工具:
 真空ポンプ
材料
15- 1 個プレースホルダー
- 1 個プレースホルダー
- 1 個プレースホルダー
- 1 個プレースホルダー
- 1 個プレースホルダー
- 1 個プレースホルダー
- 1 個プレースホルダー
- プレースホルダー
- 1 個プレースホルダー
- 1 個プレースホルダー
- 2 個プレースホルダー
- 1 個プレースホルダー
- 1 個プレースホルダー
- 1 個プレースホルダー
- 1 個プレースホルダー
この設計図で作るもの

CC0 パブリックドメイン
このブループリントはCC0で公開されています。許可を求めずに、自由にコピー、修正、配布、あらゆる目的で使用できます。
メイカーを応援するには、ブループリント経由で製品を購入してください。メイカーには メイカーコミッション がベンダーにより設定されています。または、このブループリントの新しいイテレーションを作成し、自分のブループリントにコネクションとして含めて収益を共有できます。