コラボレーション
アート
美容とウェルネス
工芸
文化と歴史
エンターテインメント
環境
食品と飲料
リバースエンジニアリング
科学
スポーツ
テクノロジー
ウェアラブル


Small Series-Wound Electric Motor with Laminated Field and 12-Slot Ring Armature (Robertson, Boy Mechanic 1913)
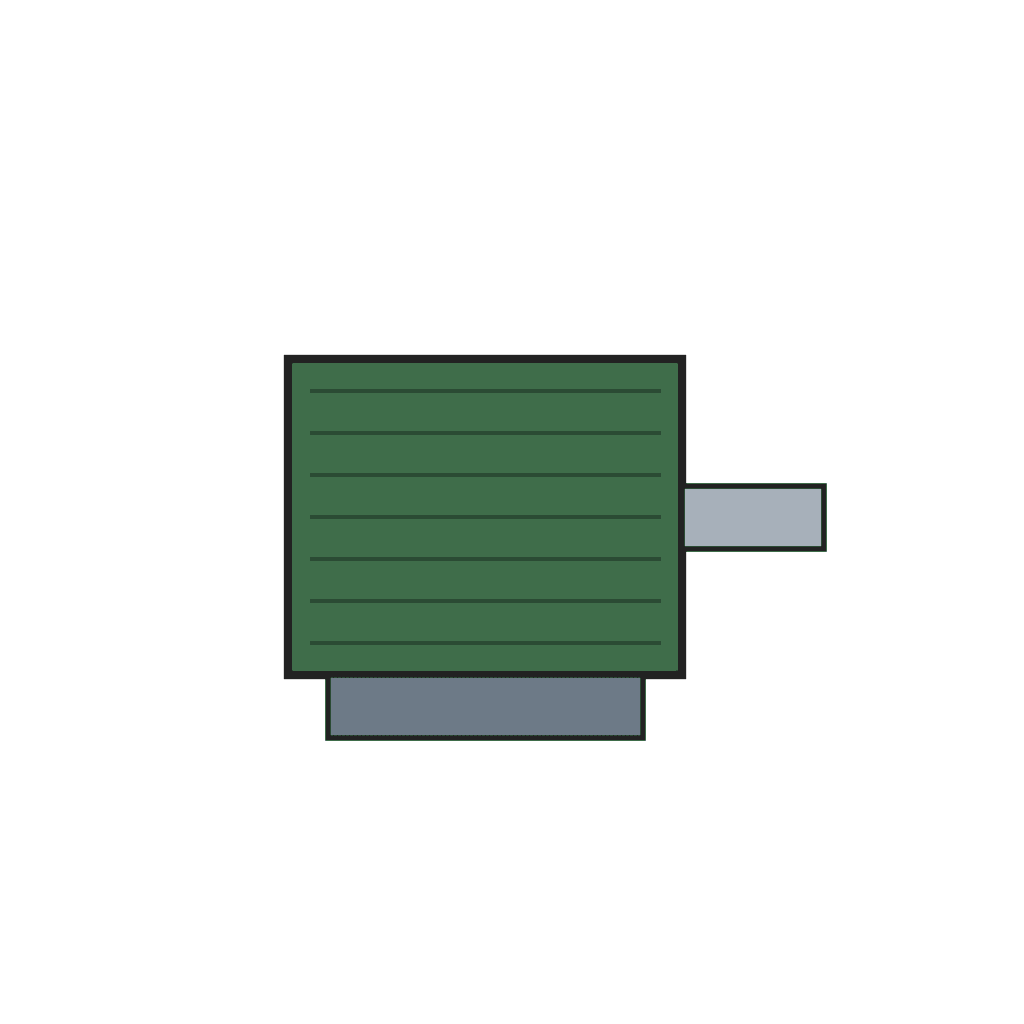
A real workshop-built DC motor: a field of riveted sheet-iron plates bored to 2-3/4 in, a 12-slot laminated ring armature on a brass spider, a 12-segment brass commutator insulated with mica, gauze brushes, and series windings of cotton-covered magnet wire.
上級者
Several weekends
手順
1
1
Read the Boy Mechanic
Read the Boy Mechanic
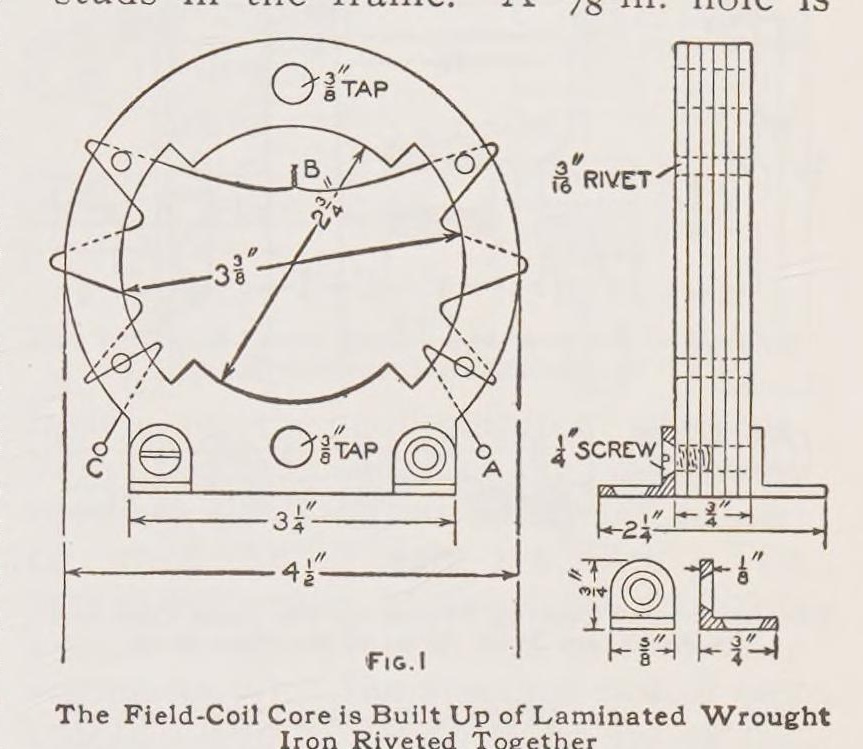
"The field frame of the motor, Fig. 1, is composed of wrought sheet iron."
2
2
Field frame
Field frame
Mark a template 1/16 in larger than Fig. 1, cut enough sheet-iron plates to make 3/4 in, drill four rivet holes and rivet them. Mark the bore with dividers set at 1/8 in, drill 1/4 in holes round it and file to shape. Bore to 2-3/4 in on a lathe; mark the field core at 3-3/8 in and the outside at 4-1/2 in and finish to the marks.
このステップの材料:
 軟鋼板1 個
 鋼製リベット1 個
必要な工具:
 けがき針
 ディバイダー(両脚規)
 ハンドドリル
 やすり(手やすり)
 金属旋盤
 ハンマー
3
3
Studs, lugs and bearings
Studs, lugs and bearings
Drill and tap two 3/8 in holes 3-5/8 in apart for the bearing studs (Fig. 2) and 1/4 in holes for feet bent from 1/8 in brass or iron. Make the bearing supports from 1/8 in brass with a 5/8 in hole and a 5/8 in brass rod soldered in and drilled for the shaft. Fit them after the armature is made: wrap paper round the armature, set it in the field, slip the bearings on and solder them, then check it turns freely.
このステップの材料:
 真鍮板1 個
 真鍮棒1 個
 軟鋼丸棒1 個
 錫鉛はんだ1 個
必要な工具:
 ねじ切りタップダイスセット金属旋盤
 はんだごてハンドドリル
4
4
Armature core
Armature core
Cut two 1/8 in wrought-iron outer plates and enough No. 24 sheet iron to make over 3/4 in (Fig. 5), drill six 1/8 in holes and rivet. Anneal at cherry red and cool in ashes. Bore to 1-11/16 in, fit a brass spider turned from 3/4 in brass on the machine-steel shaft with a setscrew, solder, turn the outside and face it to 3/4 in. File 12 slots 1/4 in deep and 7/16 in wide.
このステップの材料:
軟鋼板1 個鋼製リベット1 個真鍮棒1 個軟鋼丸棒1 個必要な工具:
 鍛冶炉金属旋盤やすり(手やすり)ハンドドリル
5
5
Commutator
Commutator
Turn a piece of 3/4 in i.d. brass pipe to 3/4 in long, chamfer both ends at 60 deg, divide into 12, drill and tap a 1/8 in hole in each segment for a brass pin, turn the pins to 1-1/4 in outside and slit them for the wires. Saw it into 12 bars, fit them on turned fibre ends with 12 mica strips between, clamp with the nut and true up.
このステップの材料:
 真鍮管1 個真鍮棒1 個
 バルカナイズドファイバー板1 個
 雲母板1 個
必要な工具:
金属旋盤ねじ切りタップダイスセット 金切りのこ(ハクソー)
6
6
Brushes
Brushes
Make the brush holder of fibre (Fig. 8) and studs of 5/16 in brass rod (Fig. 9). Roll brass or copper wire gauze and flatten it to 1/8 x 1/4 in, solder one end, and fit the holder on the bearing with a setscrew.
このステップの材料:
バルカナイズドファイバー板1 個真鍮棒1 個 金網1 個錫鉛はんだ1 個
必要な工具:
はんだごてやすり(手やすり)7
7
Wind the field
Wind the field
Insulate the field cores with 1/64 in fibre and end washers 1-1/8 x 1-1/2 in (softened in warm water, then glued). Wind each side with four layers (about 50 ft) of No. 18 double-cotton-covered wire, A to B and C to B, and join the ends at B.
このステップの材料:
バルカナイズドファイバー板1 個 エナメル被覆銅線1 個
 木工用接着剤1 個
8
8
Wind the armature
Wind the armature
Line the ring and spider with 1/16 in fibre and the slots with 1/64 in fibre channels. Wind each slot with about 12 ft of No. 21 wire, 40 turns in four layers of 10, shellacking each layer, leaving 2 in ends. Join each coil's start to the next coil's finish and solder the joints to the commutator pins.
このステップの材料:
バルカナイズドファイバー板1 個エナメル被覆銅線1 個 シェラックニス1 個錫鉛はんだ1 個
必要な工具:
はんだごて9
9
Mount and wire
Mount and wire
Screw the motor to a wood base 8 x 6 x 1 in with two terminals and a switch. Wire it in series: field end A to a terminal, field end C to one brush stud, the other brush through the switch to the other terminal.
このステップの材料:
 堅木の板1 個
 バインディングポスト1 個
 トグルスイッチ1 個
 木ねじ1 個
必要な工具:
 曲柄錐と錐先
10
10
Troubleshooting
Troubleshooting
Motor troubleshooting.
Flow
Loading...
11
11
History and honest limits
History and honest limits
From W. A. Robertson in **The Boy Mechanic, Book 1** (Popular Mechanics, 1913), pp. 345-347 (checked on the archive.org scan boymechanic0000unse_n5a8). Sizes not in the text are in his Figs. 1-9; enamelled wire for cotton-covered and the low-voltage advice are ours.
材料
17- 1 個プレースホルダー
- 1 個プレースホルダー
- 1 個プレースホルダー
- 1 個プレースホルダー
- 1 個プレースホルダー
- 3 個プレースホルダー
- 1 個プレースホルダー
- プレースホルダー
- 1 個プレースホルダー
- 1 個プレースホルダー
- 1 個プレースホルダー
- 1 個プレースホルダー
- 1 個プレースホルダー
- 1 個プレースホルダー
- プレースホルダー
- プレースホルダー
- 1 個プレースホルダー
この設計図で作るもの
関連ブループリント
これらのブループリントは知識を共有しています — 技術、材料、原理

CC0 パブリックドメイン
このブループリントはCC0で公開されています。許可を求めずに、自由にコピー、修正、配布、あらゆる目的で使用できます。
メイカーを応援するには、ブループリント経由で製品を購入してください。メイカーには メイカーコミッション がベンダーにより設定されています。または、このブループリントの新しいイテレーションを作成し、自分のブループリントにコネクションとして含めて収益を共有できます。